Soren's Purple Plate

Babies, kids, and parents eat together. Simple, healthy food ideas.

  • Home
  • Recipes
    • Breakfast
    • Main Meals
    • Fish & Meat
    • Vegetarian & Vegan
    • Soups & Stews
    • Treats & Snacks
    • Smoothies & Drinks
    • On-the-go & Travel
  • First Foods / BLW
  • Outside the Kitchen
    • Interesting Moms
  • About
    • My Eating Beliefs

QUINOA VEGGIE CUPS

March 14, 2017 by Natasha 2 Comments

This week I’m very honored to be a guest at #HealthyKidsCommuity. If you don’t know, it’s an amazing INSTAGRAM community of parents who put healthy meals for the family and especially children at the top of their priority list. You can find lots of healthy recipe and food ideas. These people are very creative. It’s my constant source of inspiration.

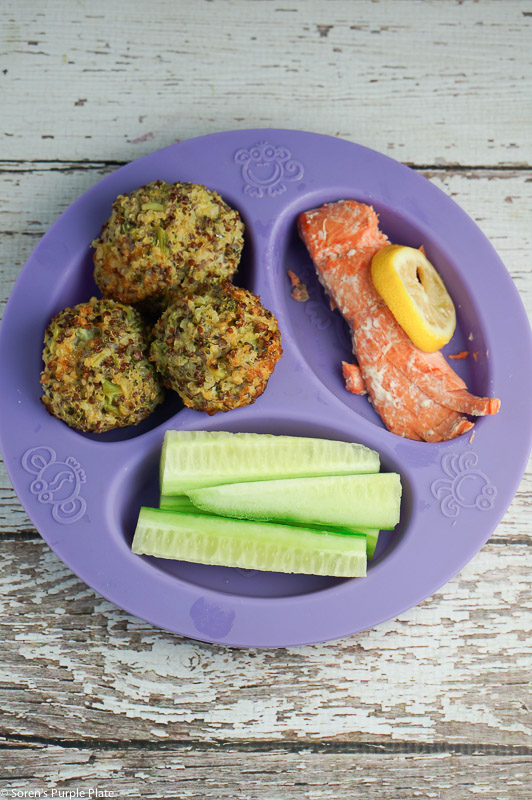
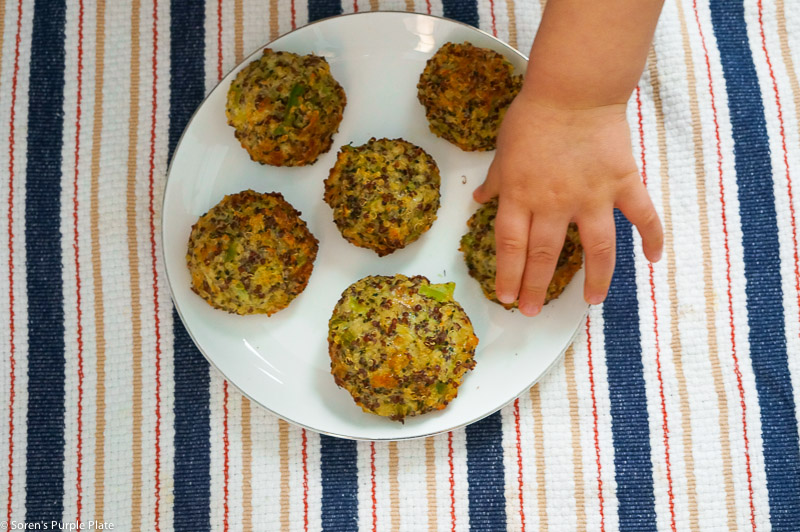
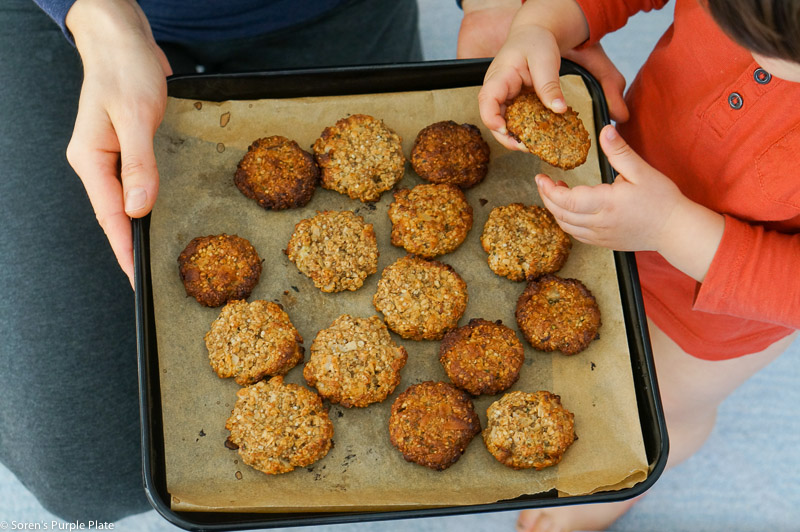
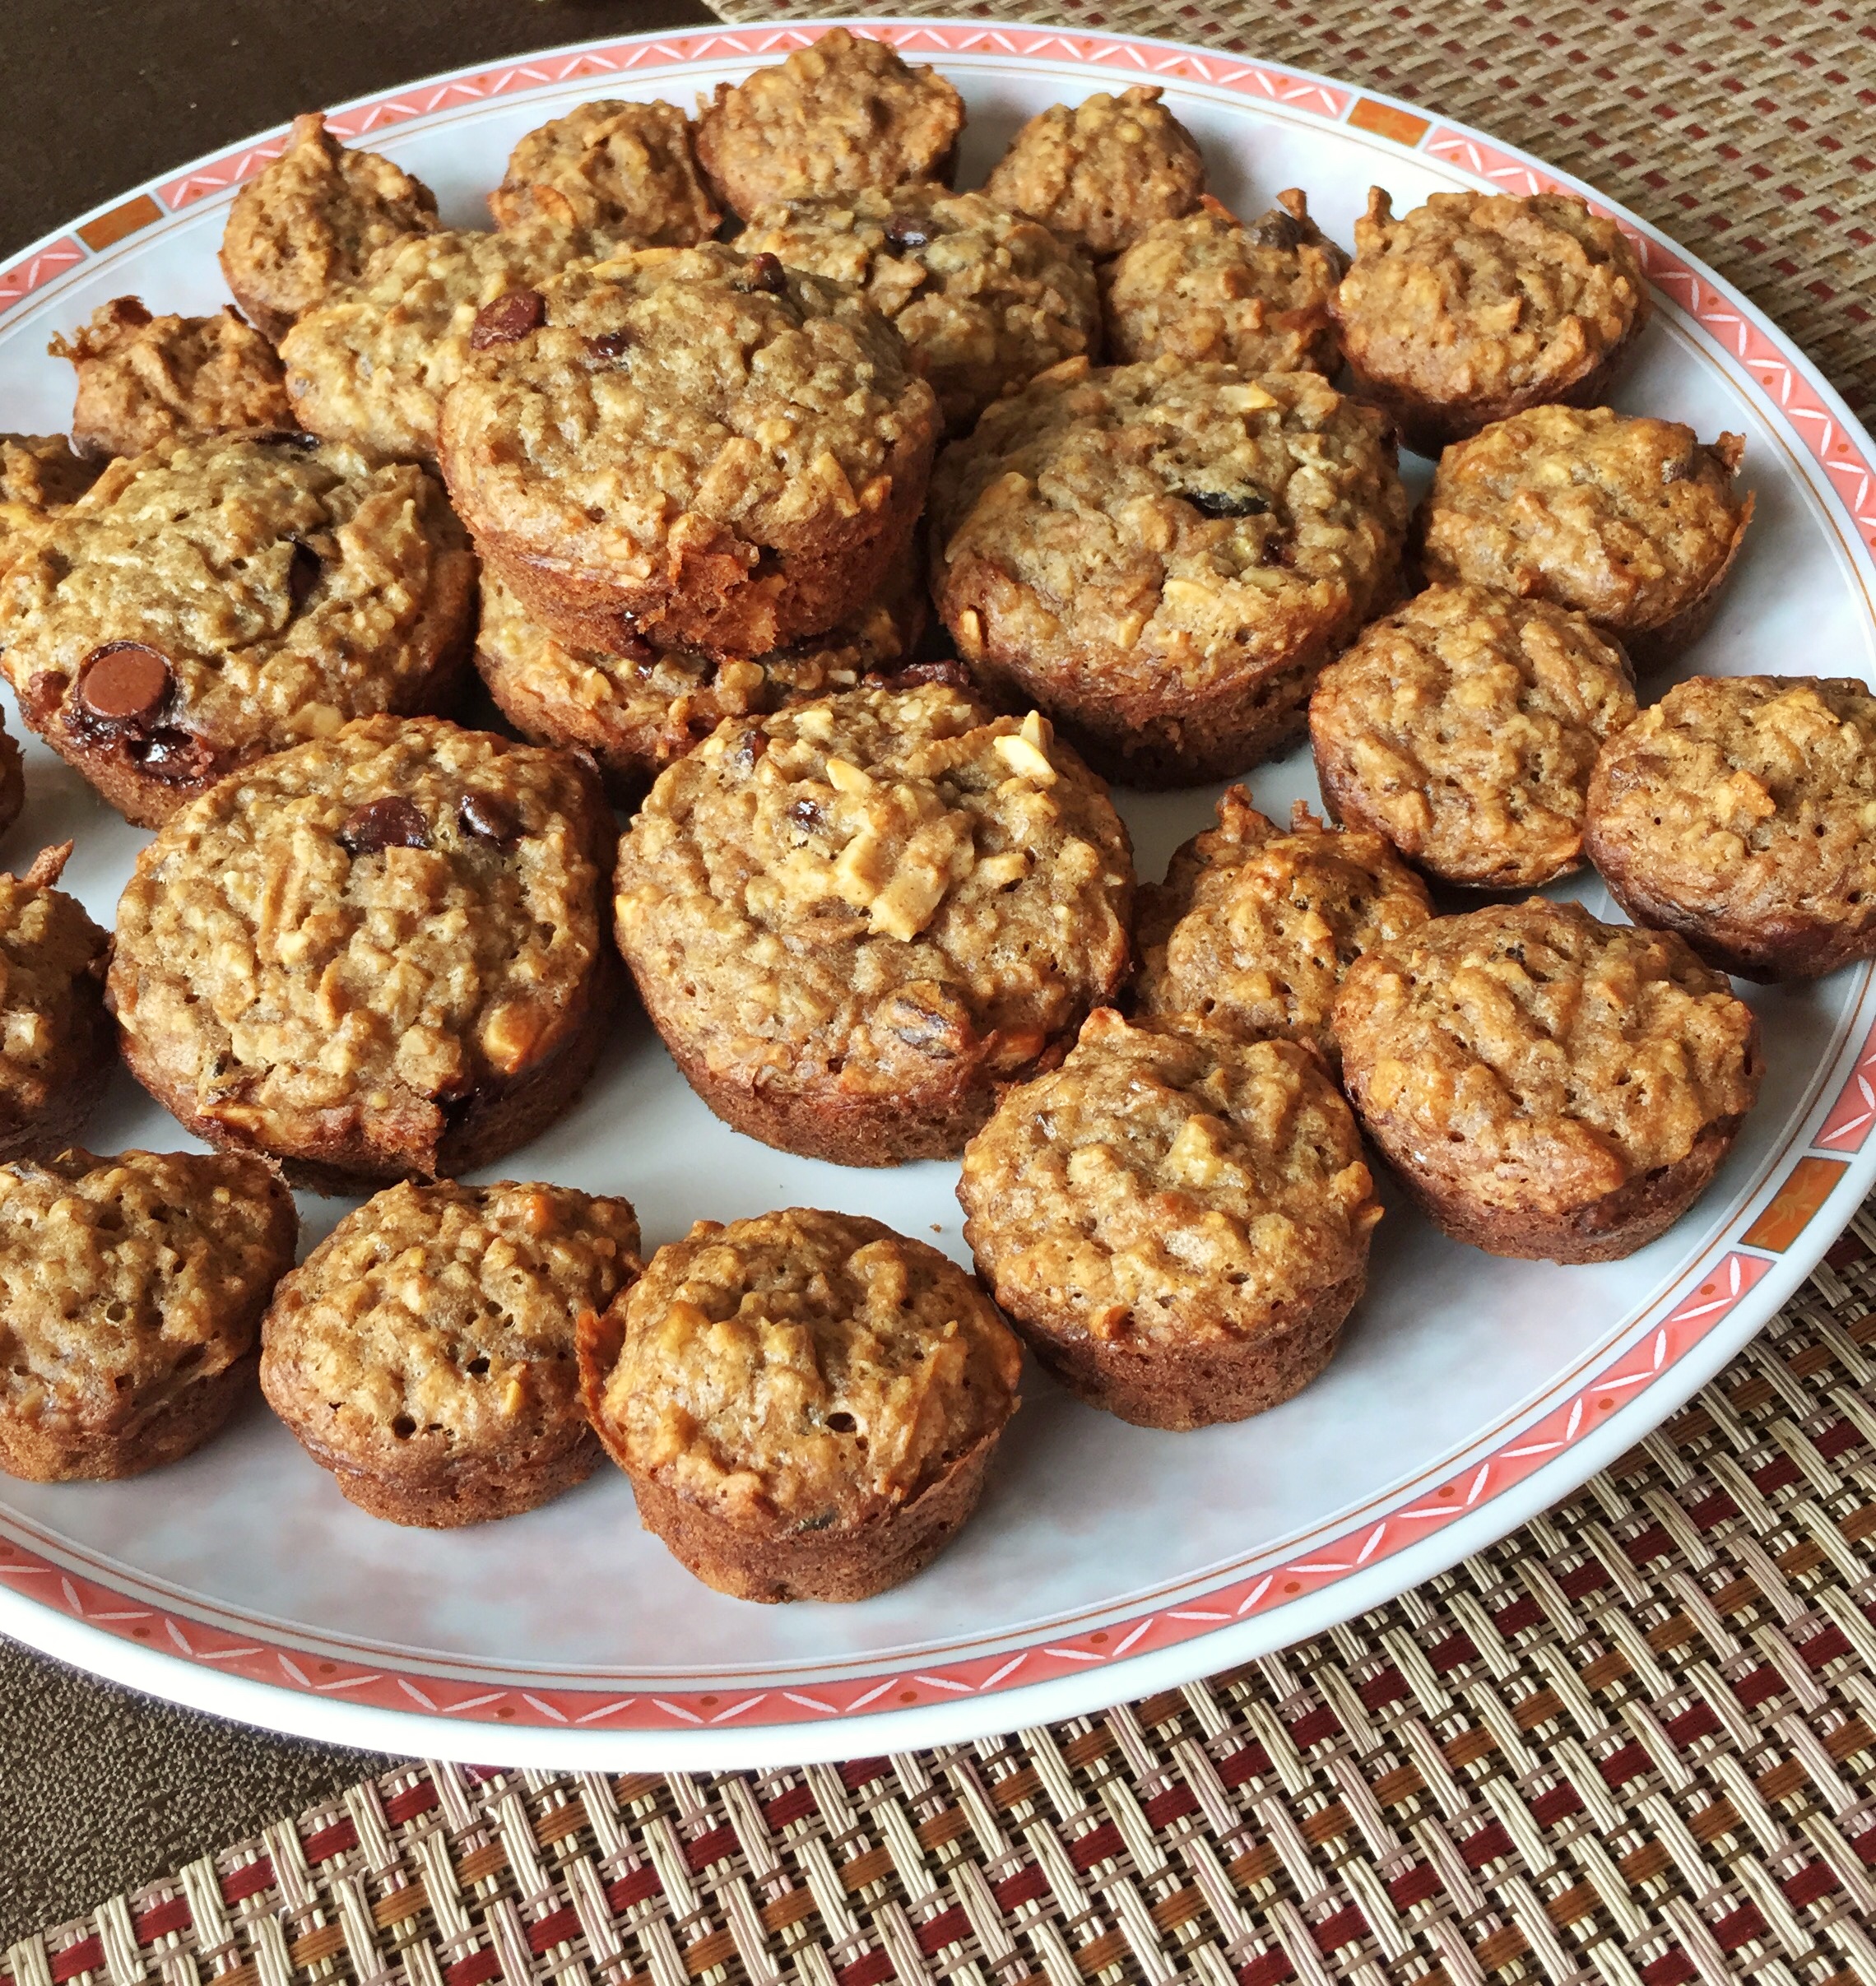
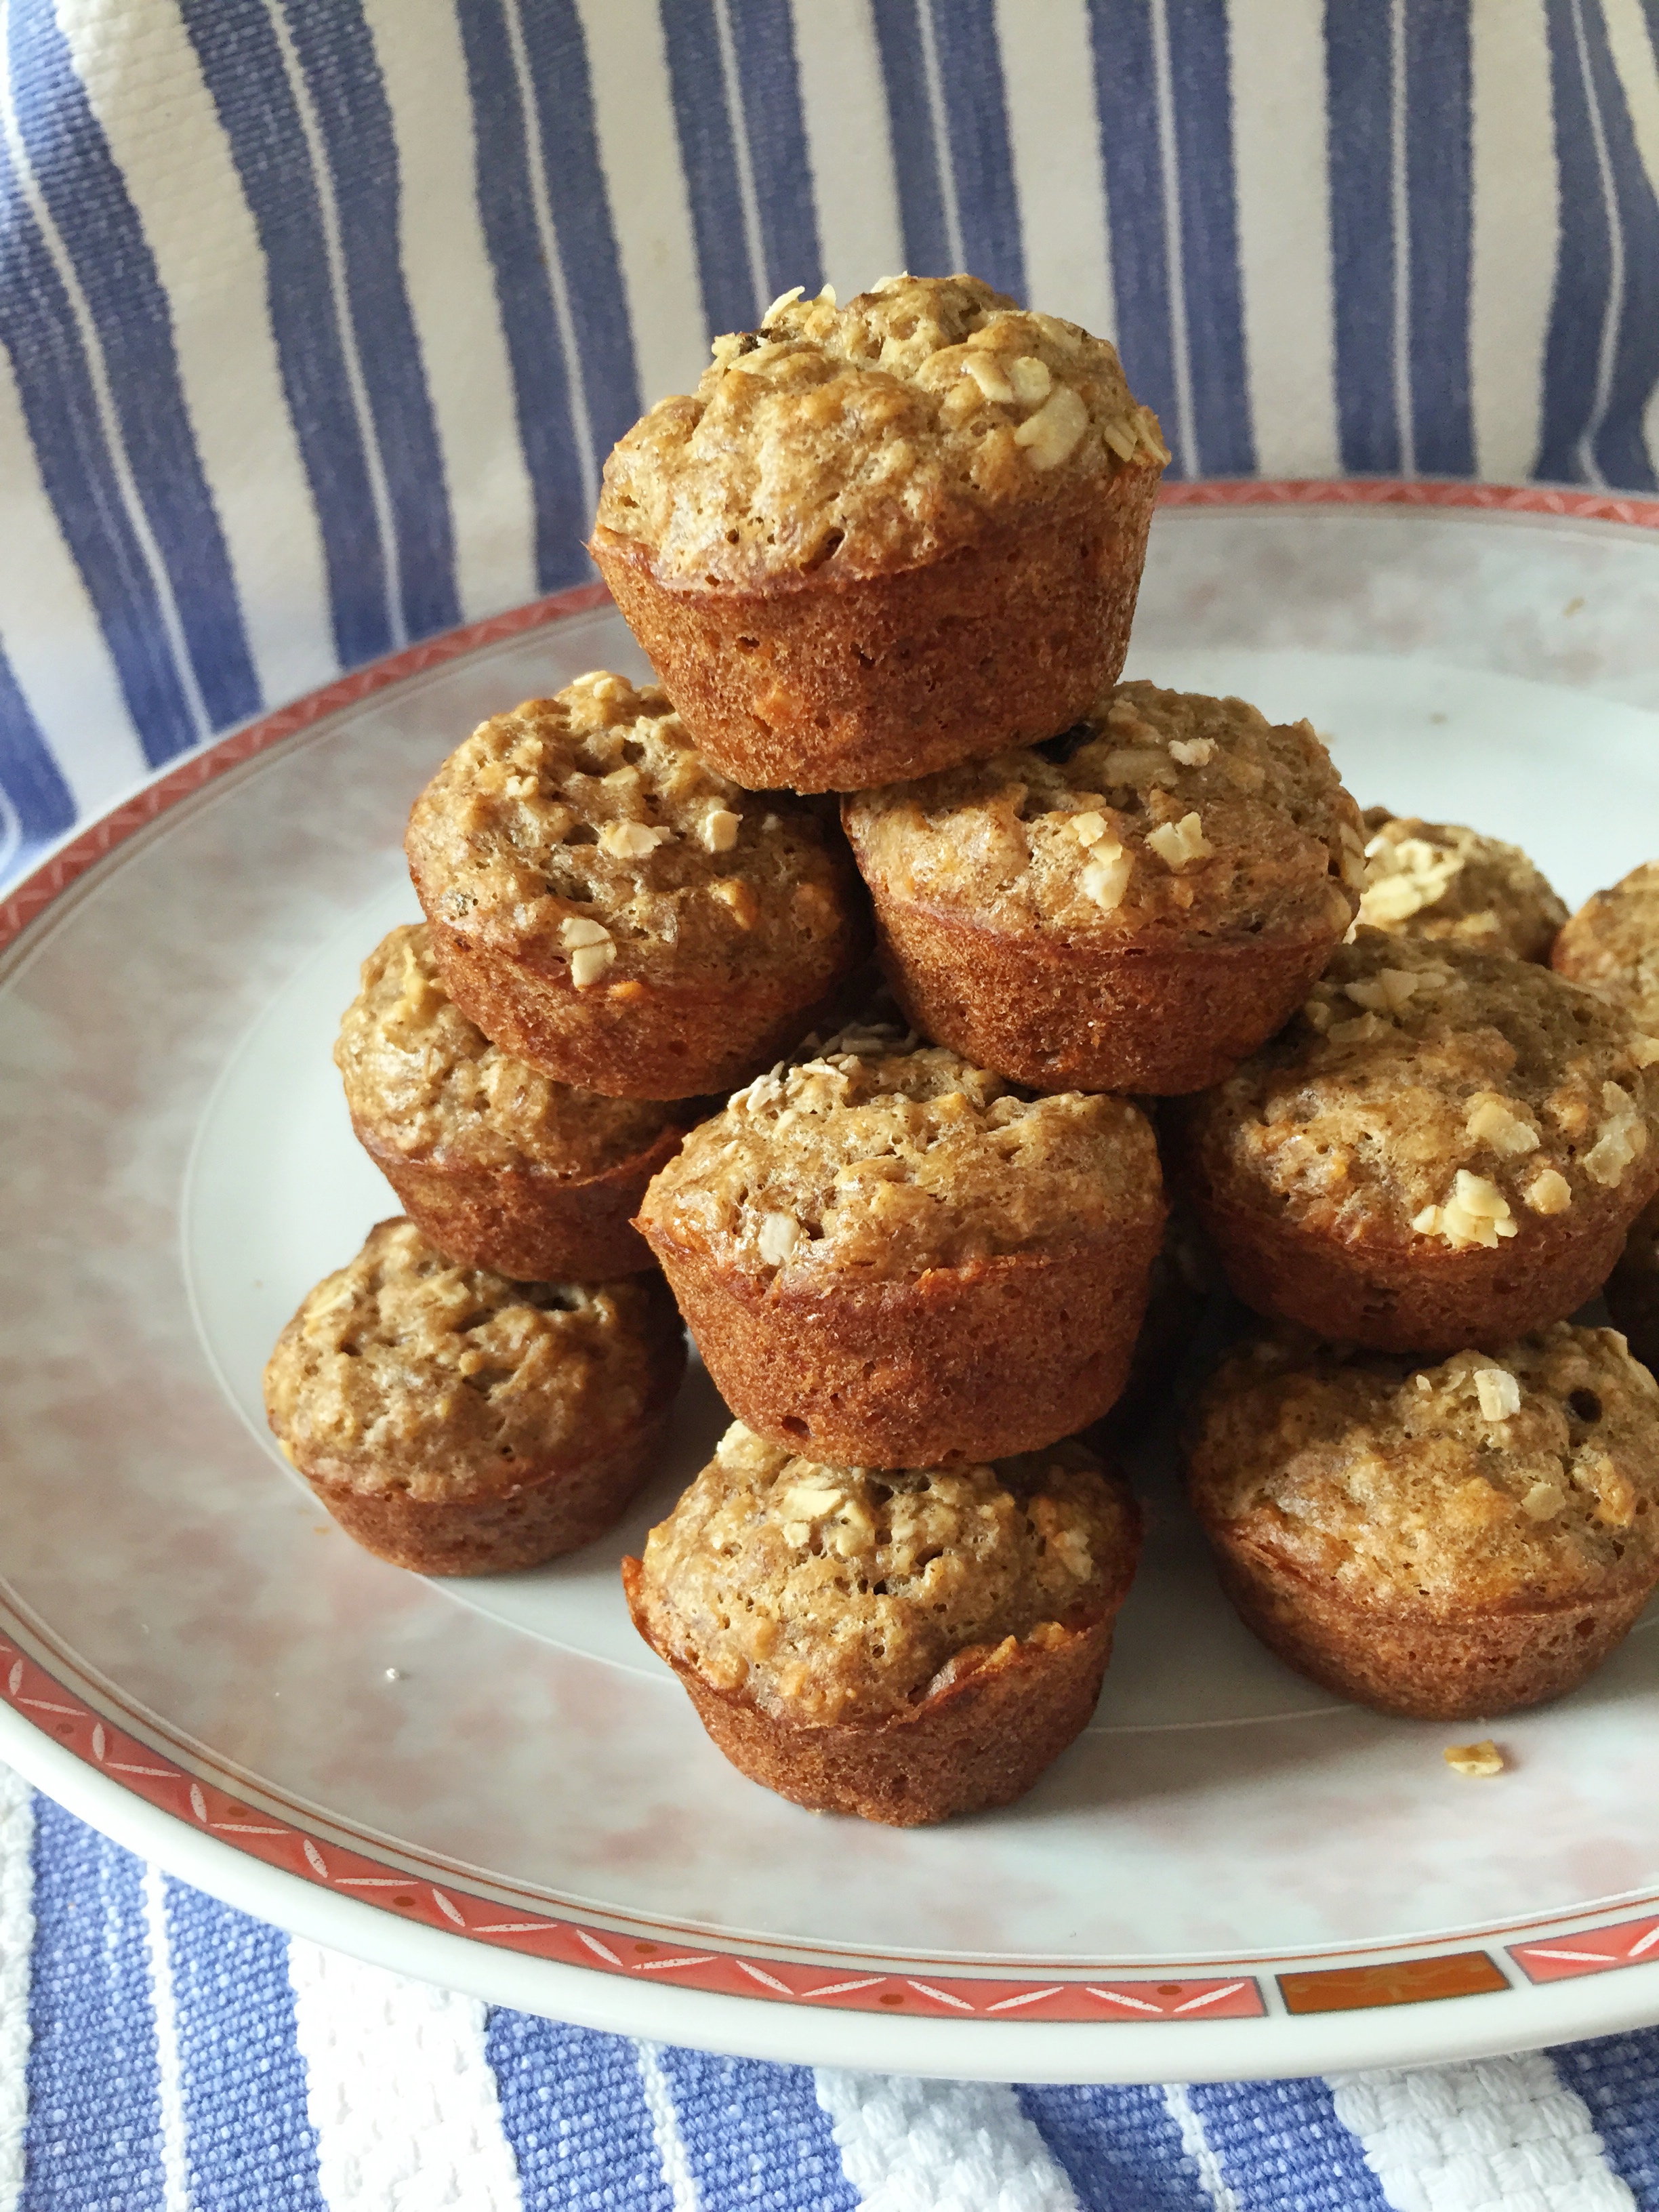
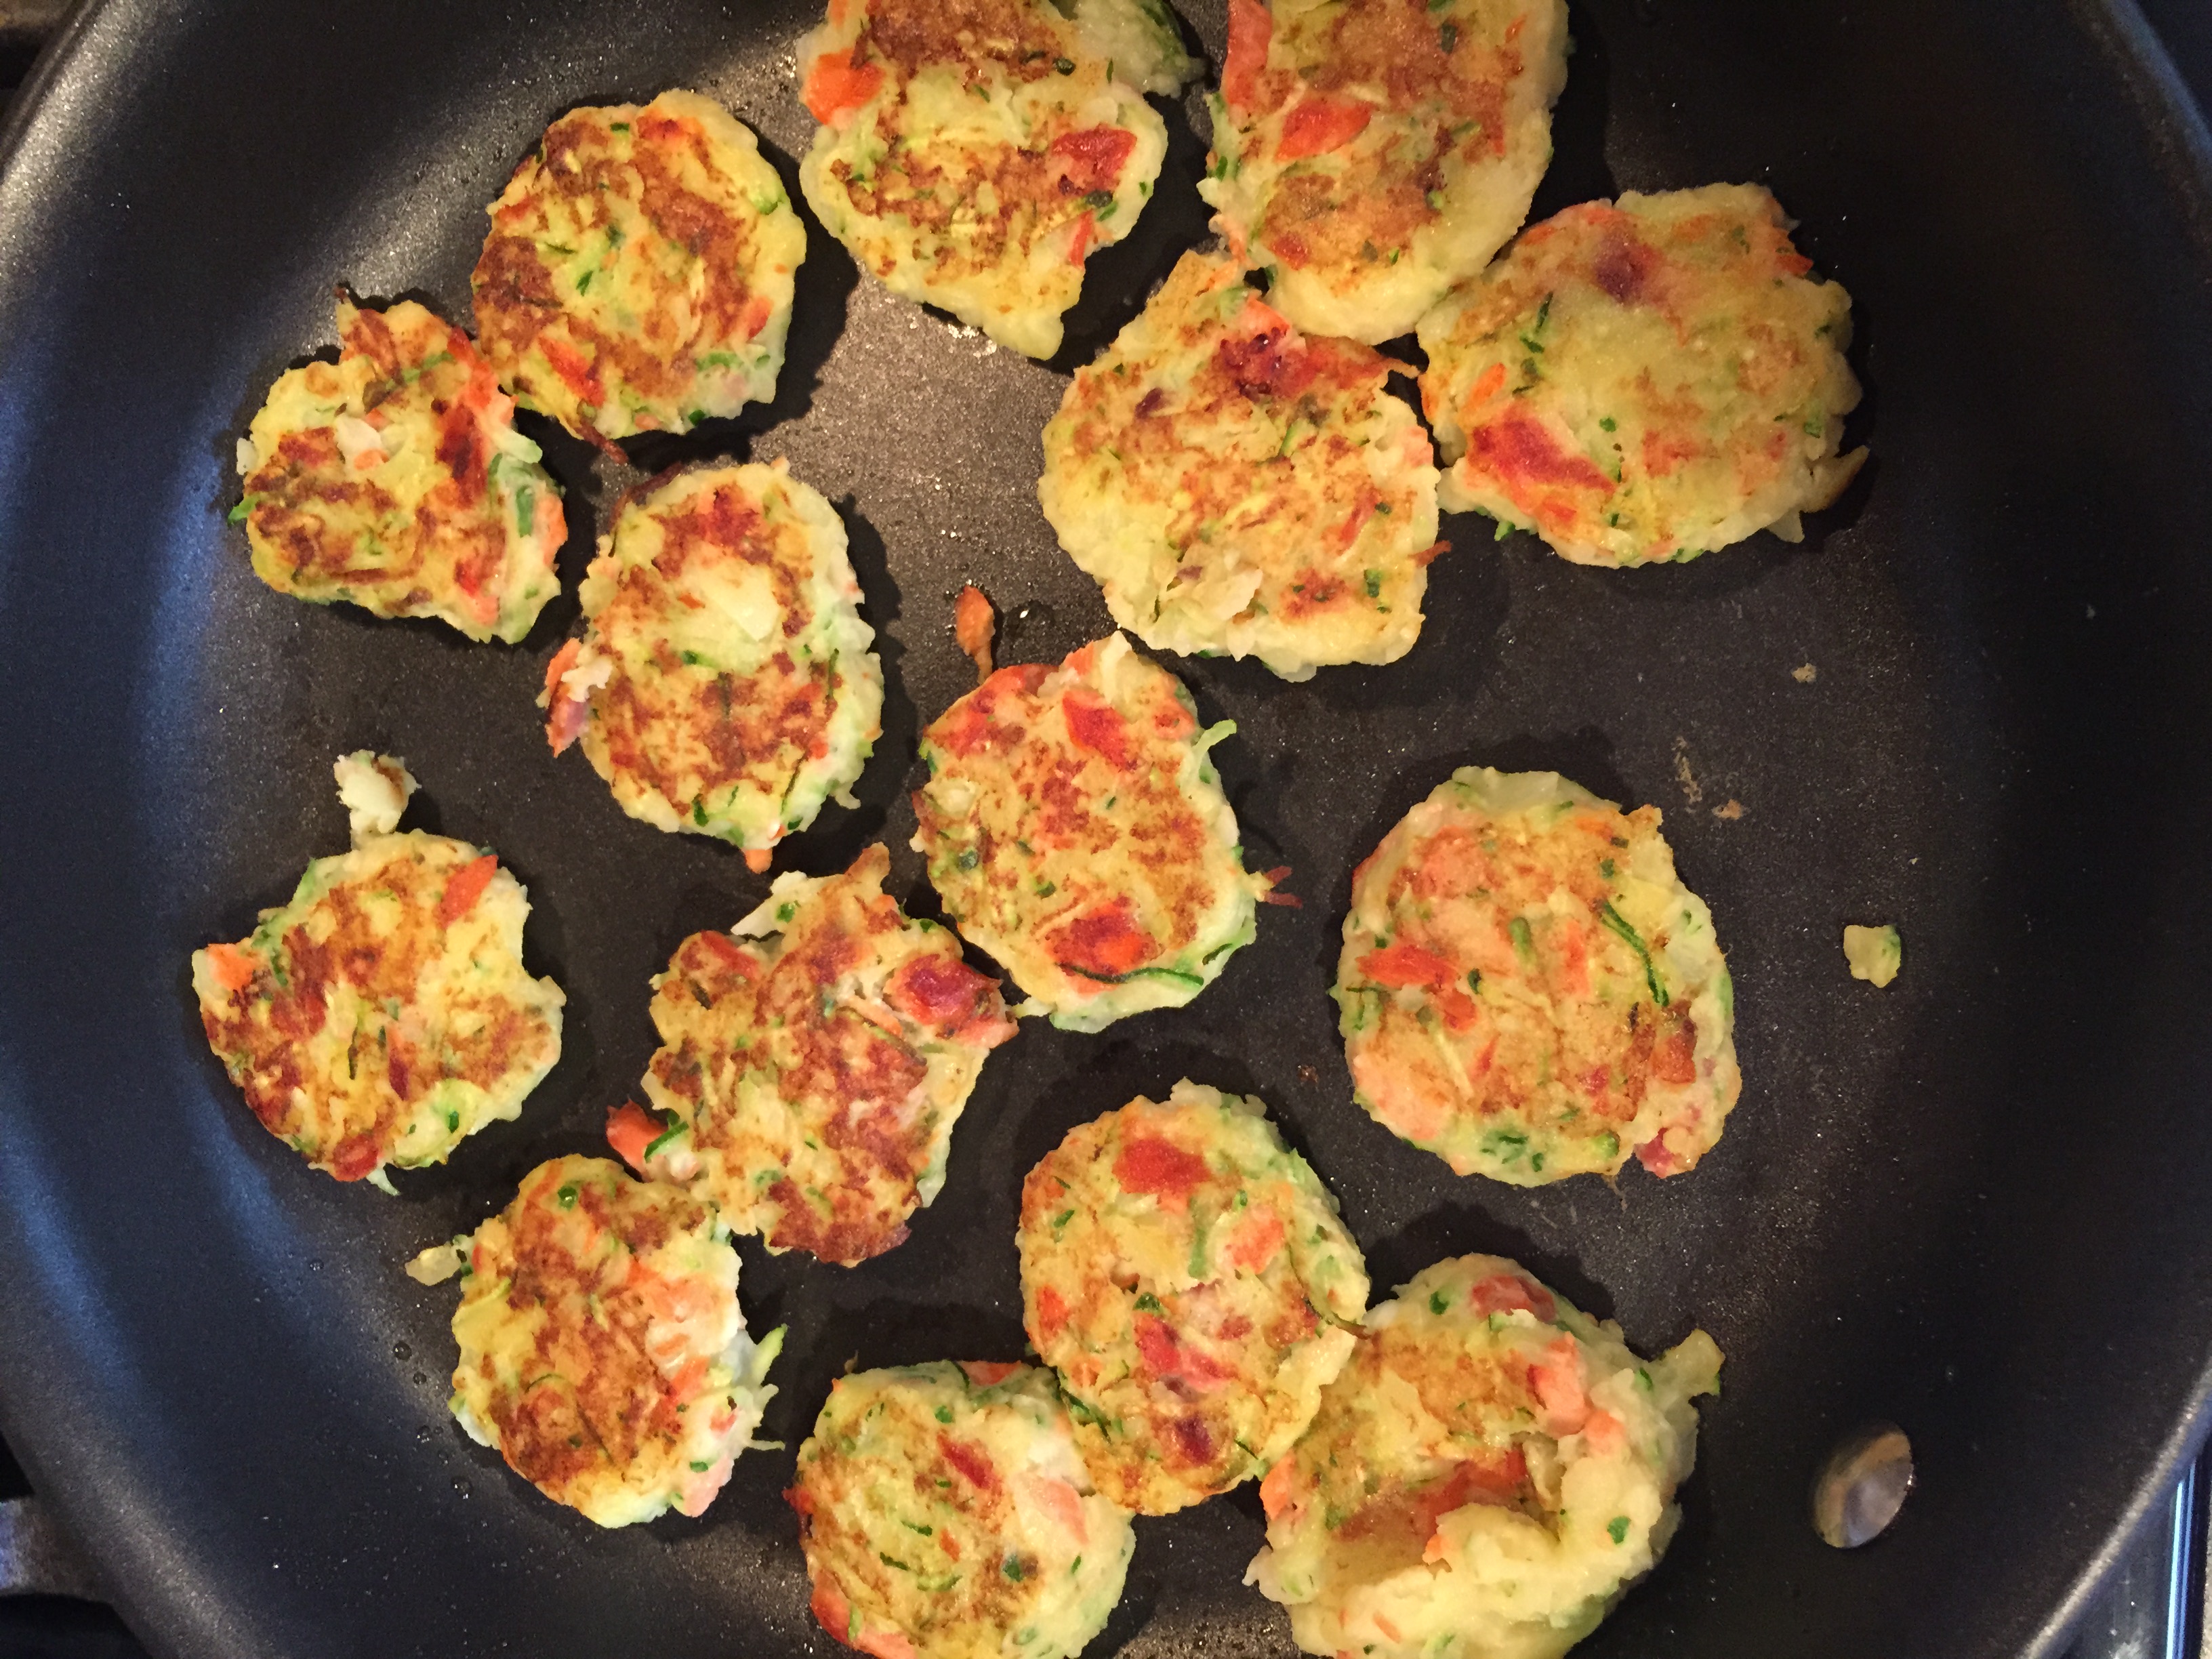
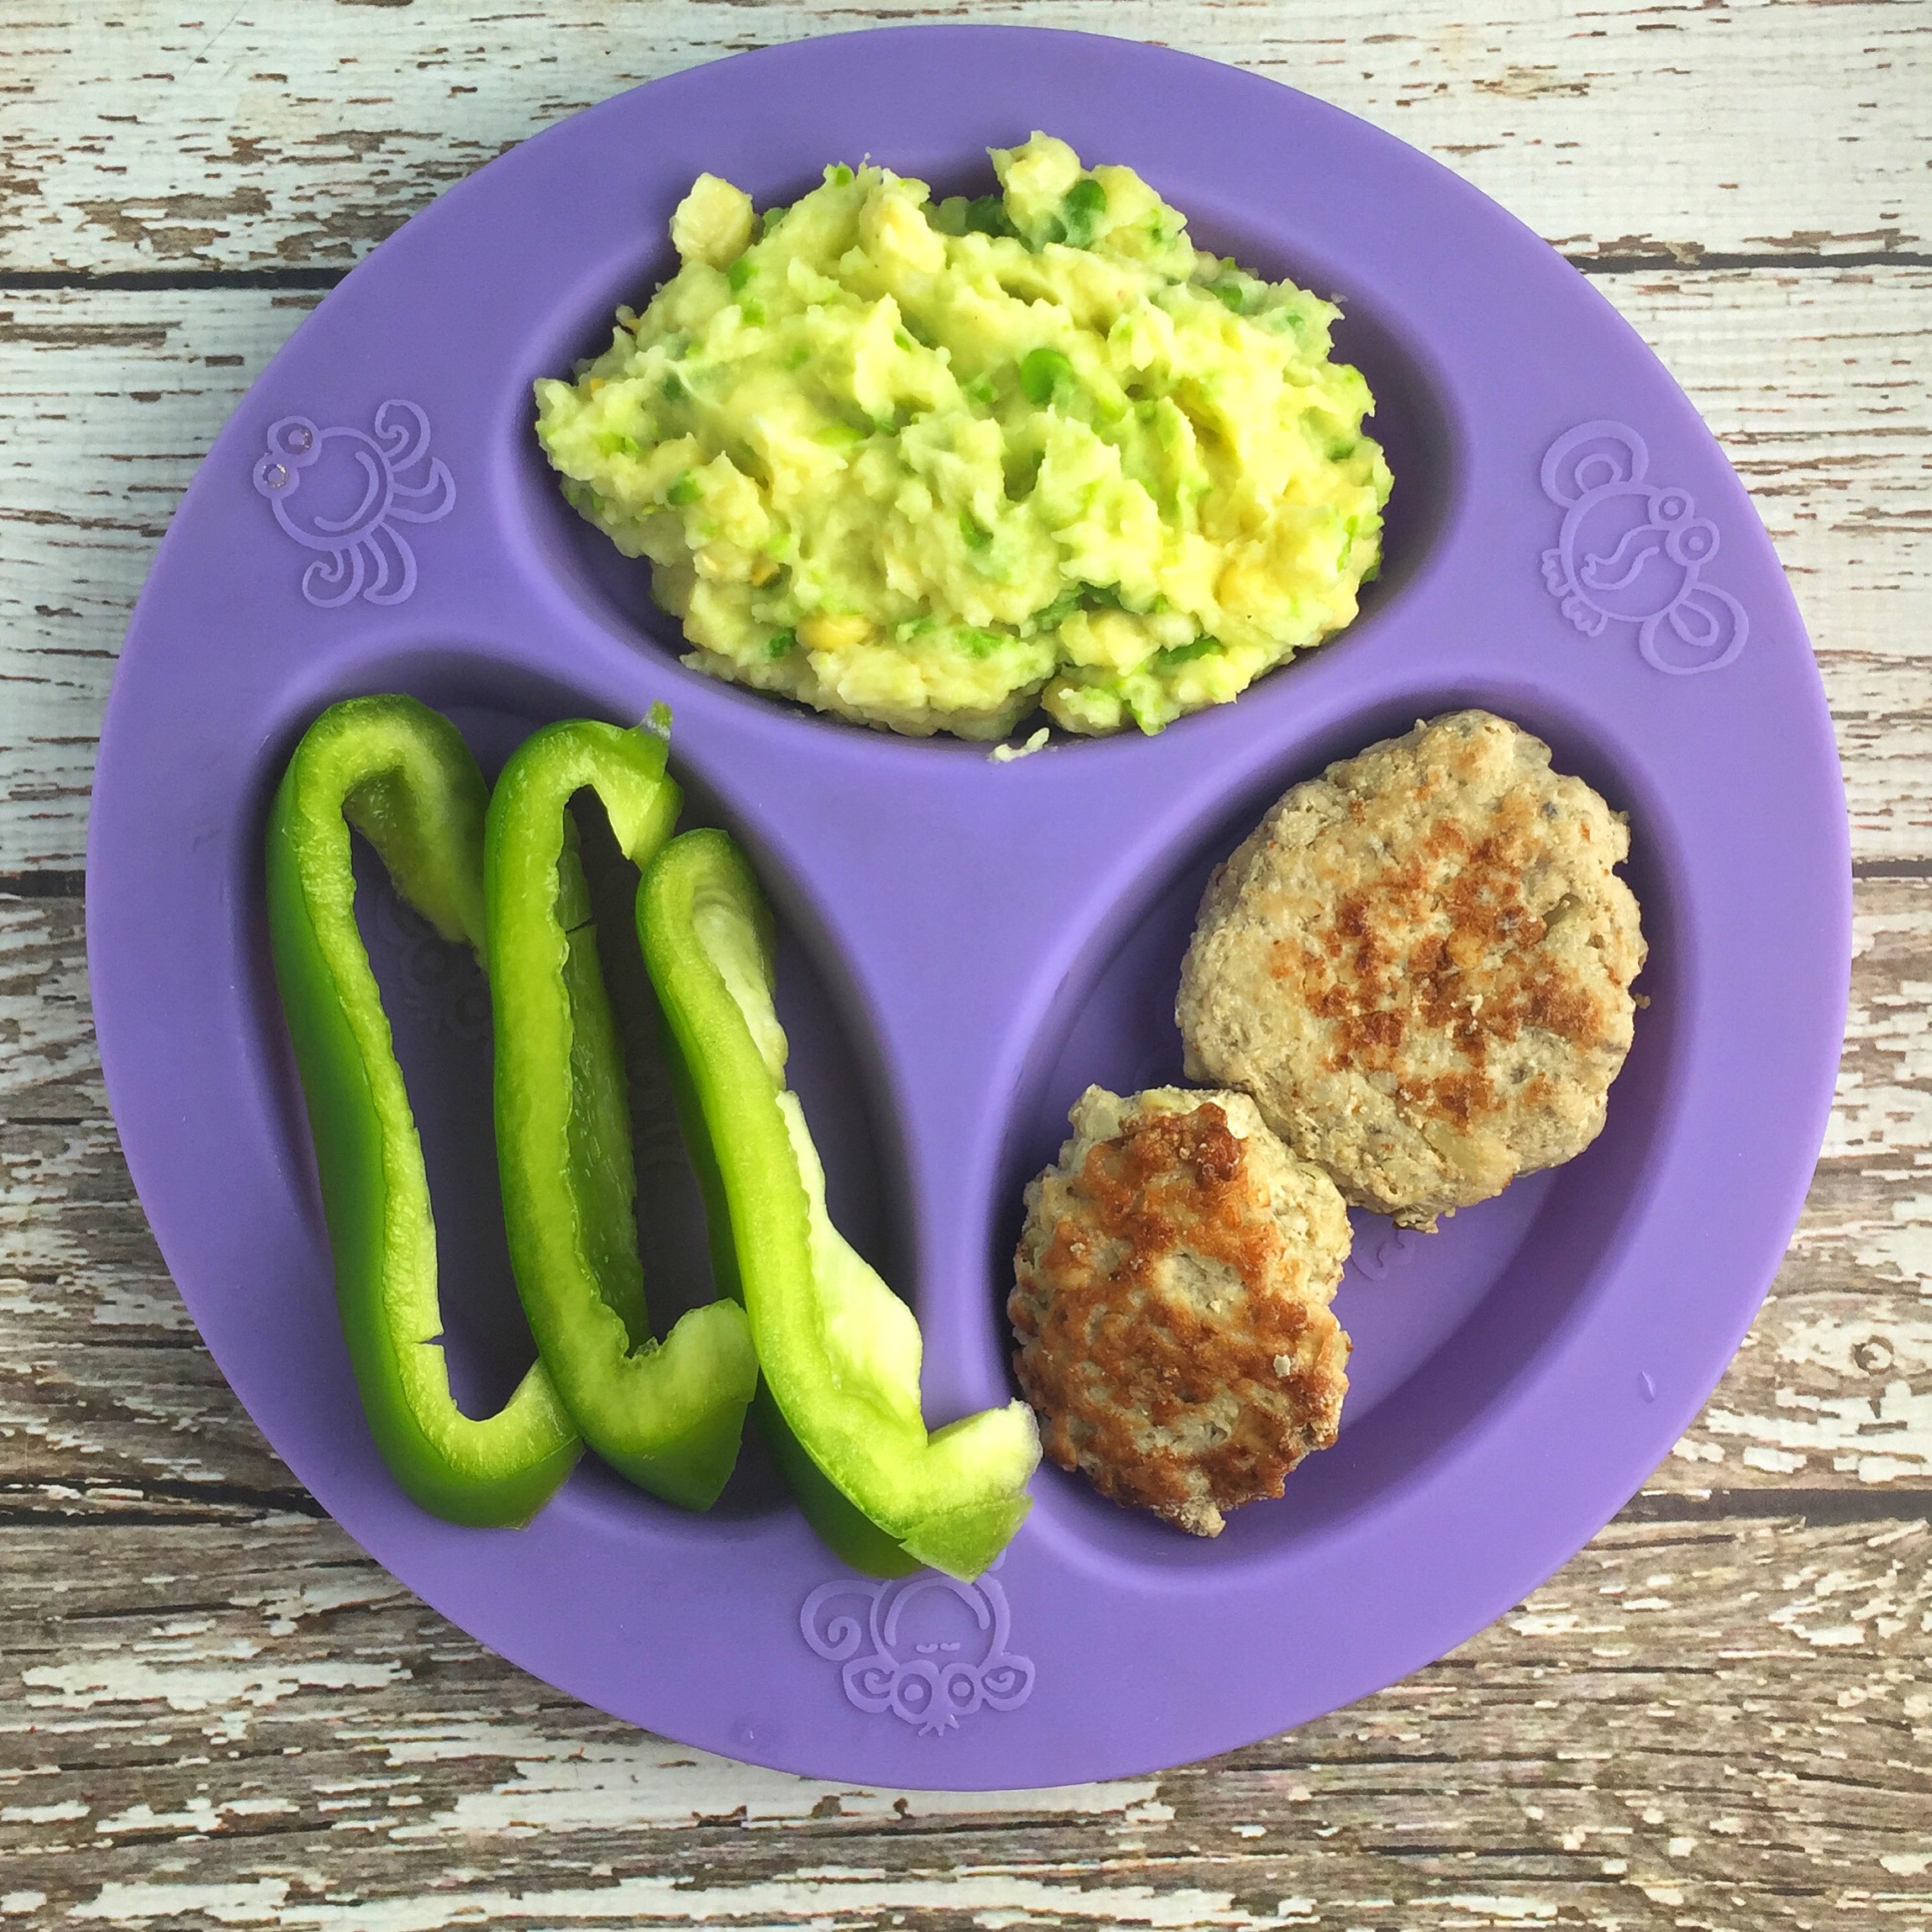
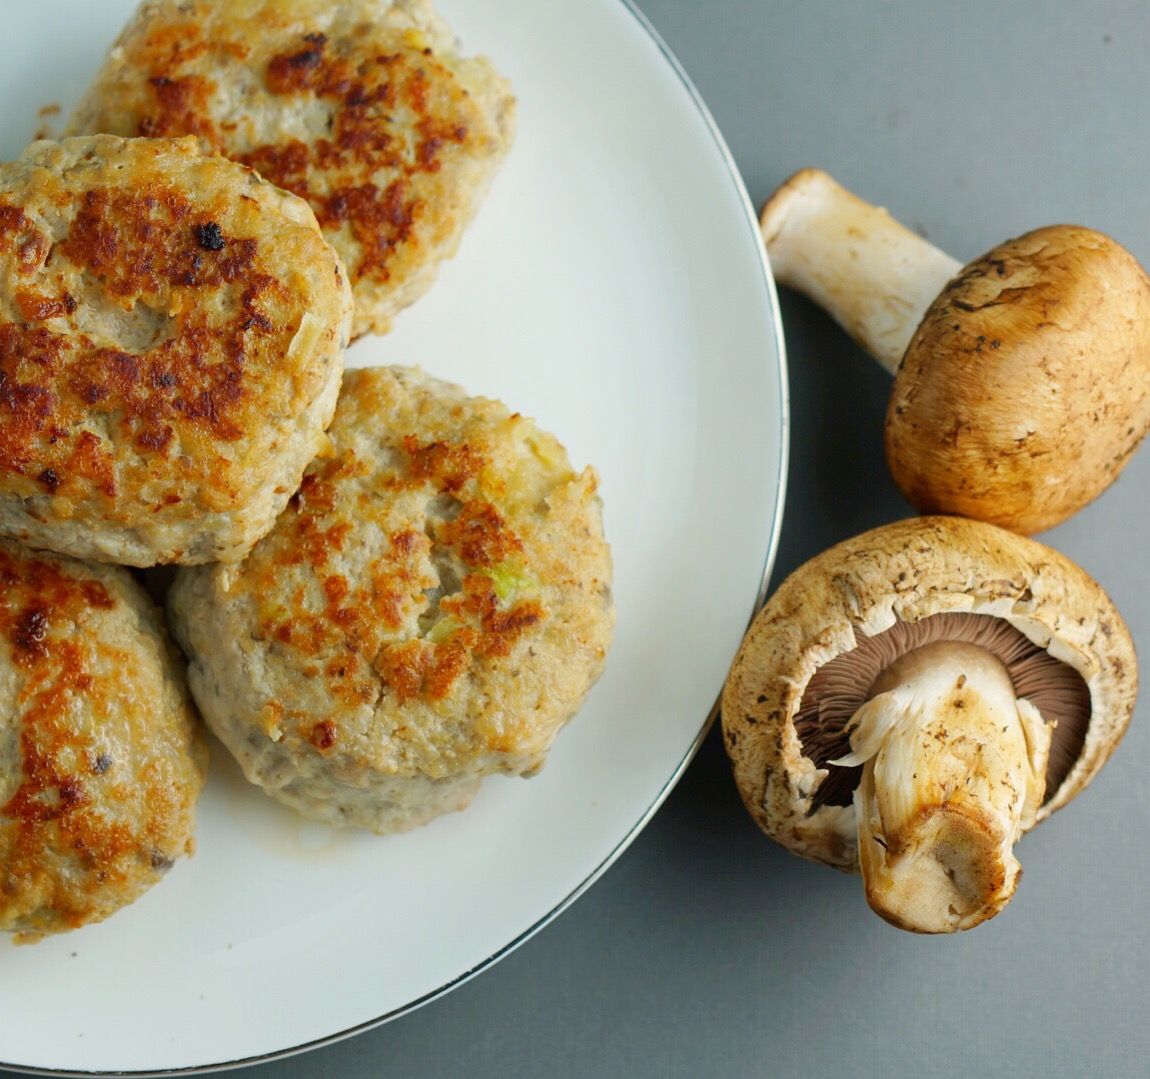
Unfortunately, instead of loosing myself in creativity over a superb family meal (the theme of the week), I have been dealing with winter and the entire family being sick. Happens to all of us, right? Not having much time on hand, I prepared these tasty quinoa cups that everyone can enjoy: kids for dinner and parents as an appetizer or even dinner if you throw in a little salad.


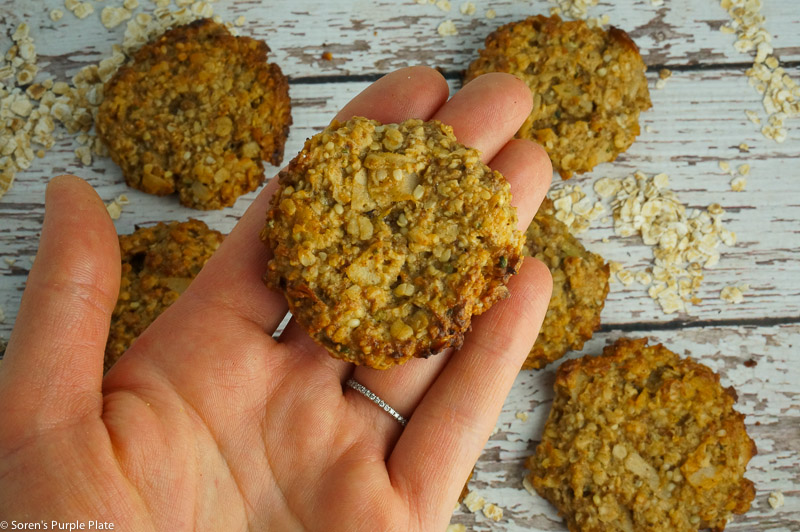
When cooking quinoa, I added a tablespoon of turmeric for extra immunity boost and, of course, color. Leftover quinoa is an ideal way to prepare these little cups as it really won’t take you much time at all.

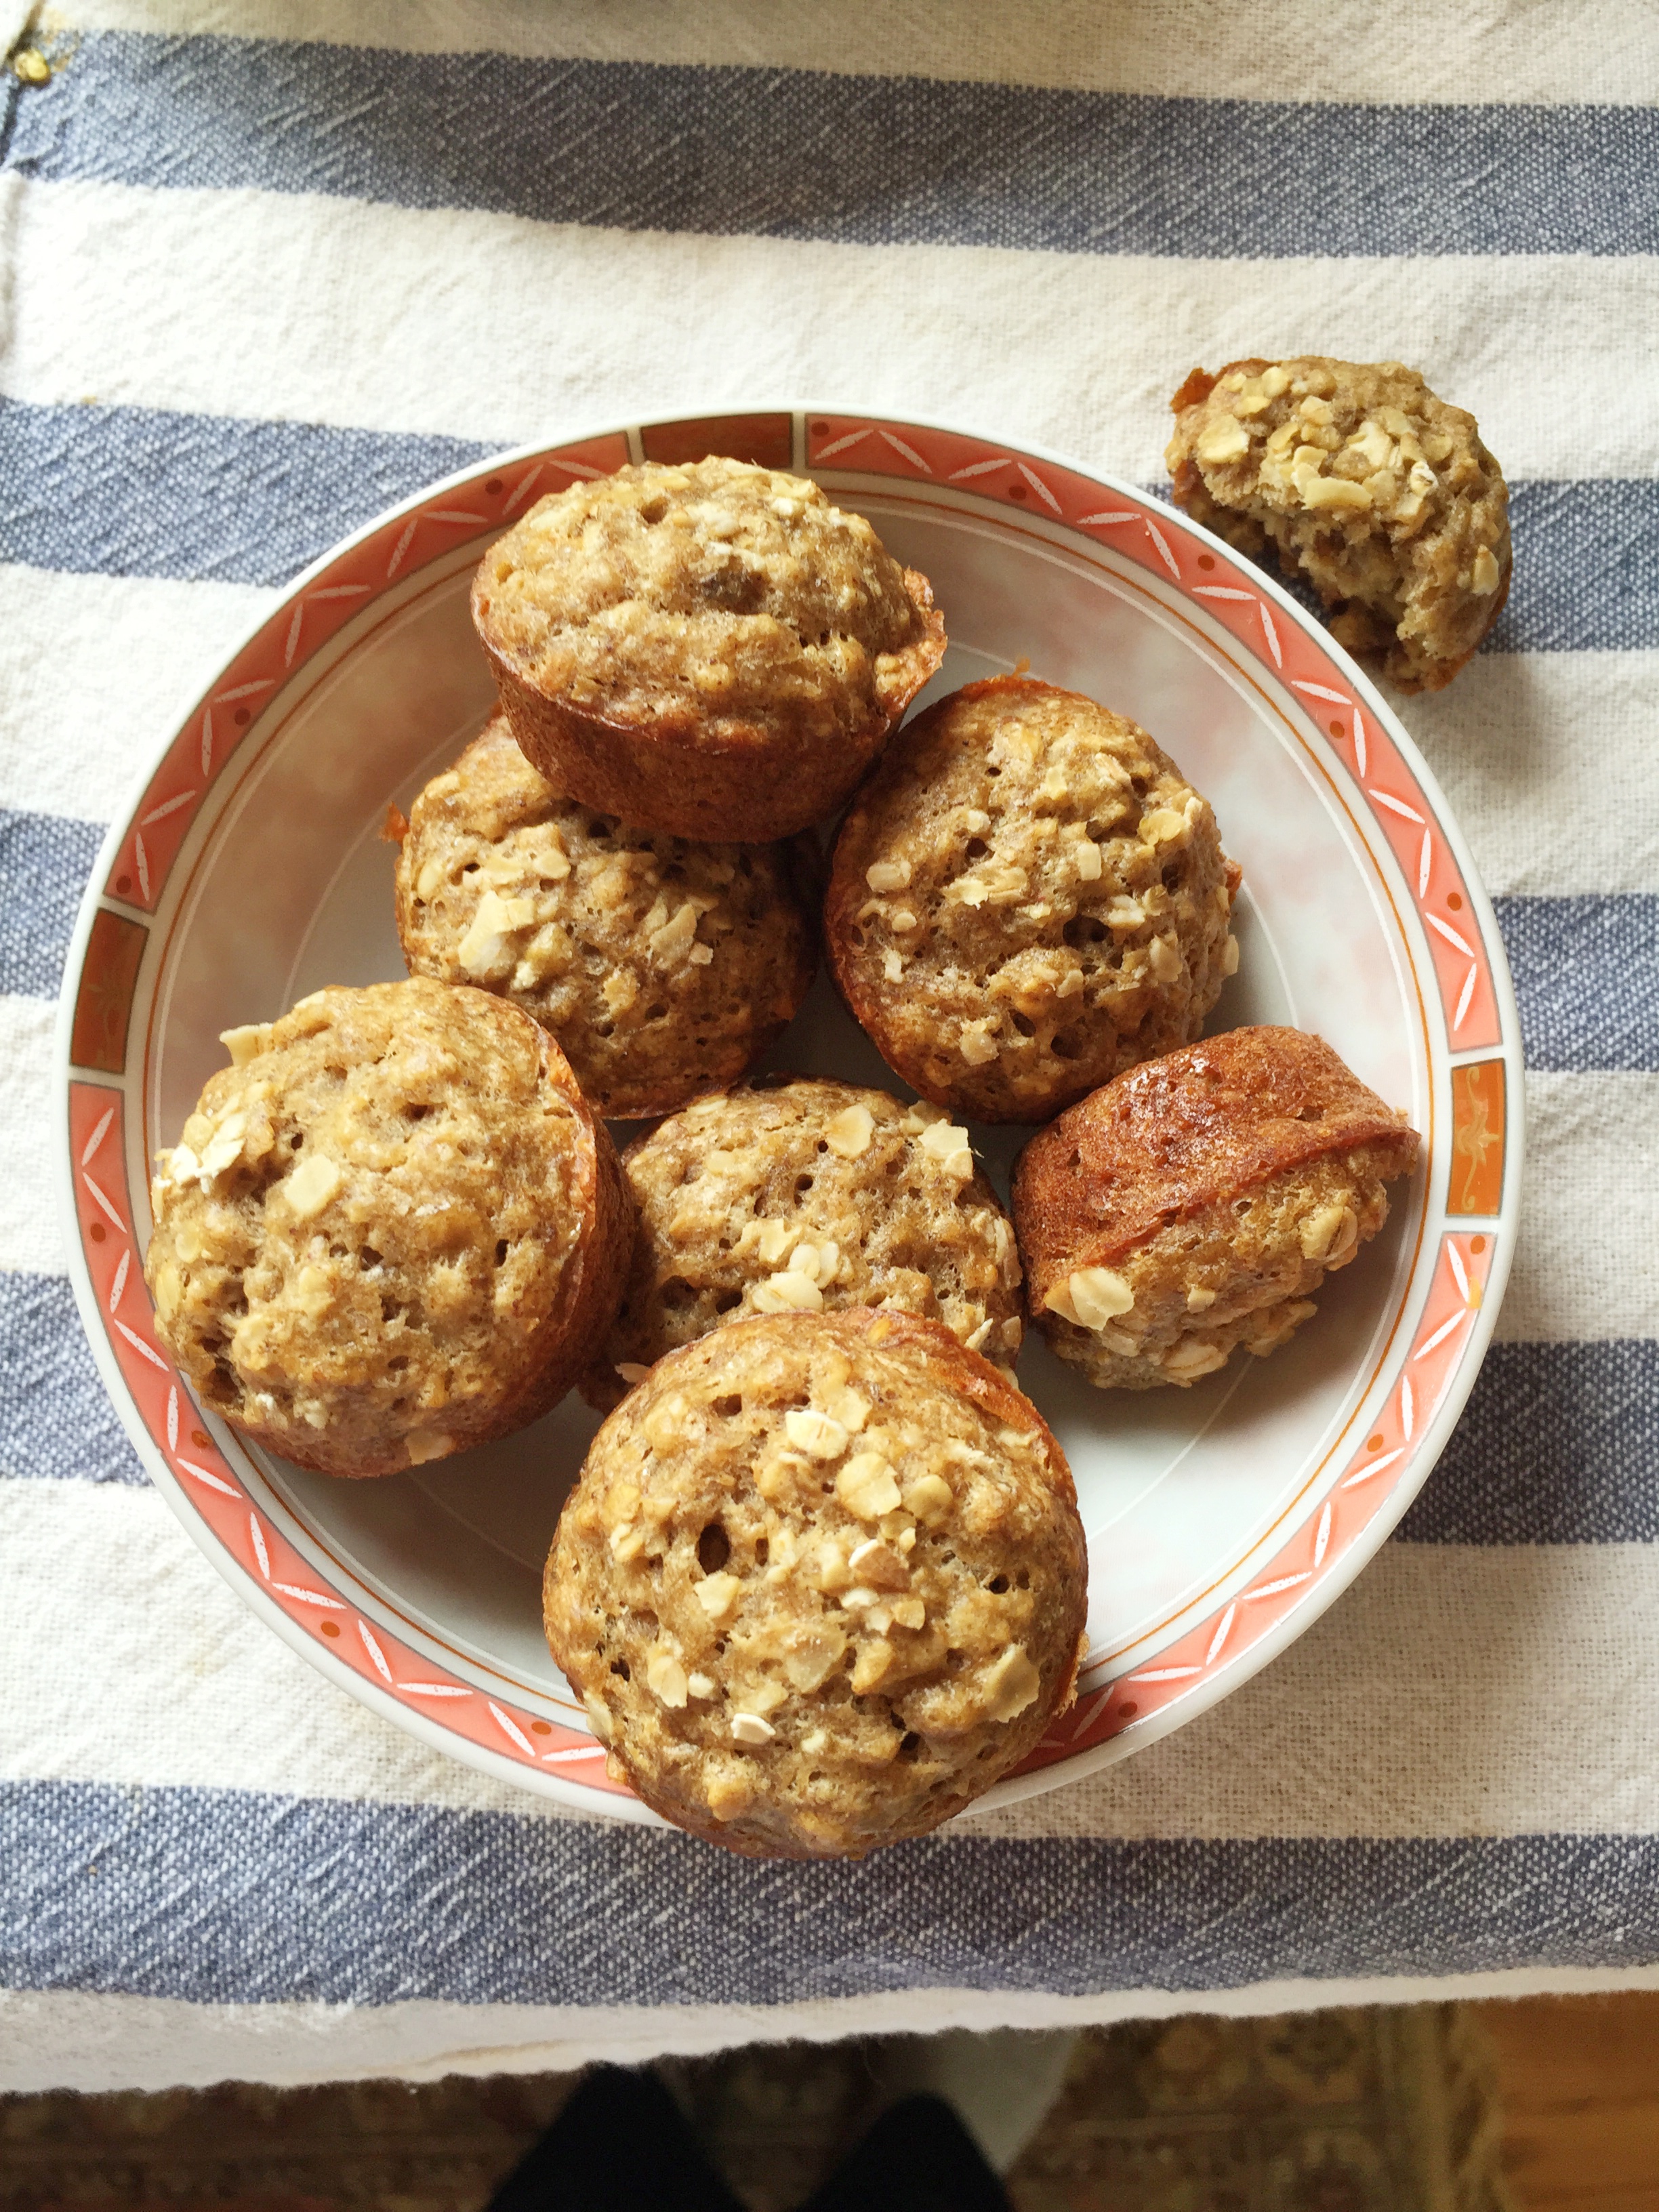
They are absolutely delicious when warm but held up the flavor pretty well when reheated the next day.


QUINOA VEGGIE CUPS
 
Save Print
These super healthy quinoa cups are a fast and easy dinner for children. Add a teaspoon of turmeric to quinoa for extra immunity boost and color.
Author: Natasha @ Soren's Purple Plate
Ingredients
  • ​
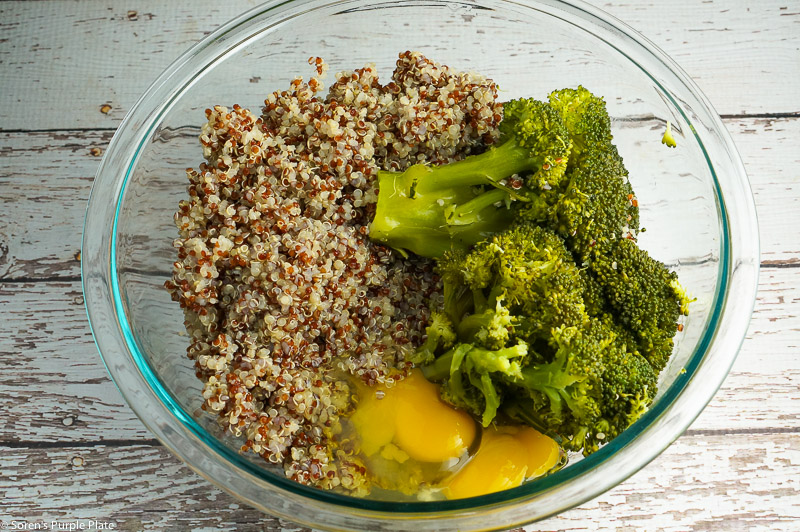
  • 2.5 cups cooked quinoa
  • a few broccoli florets
  • 2-3 spring onions
  • 1 small zucchini
  • 2 eggs
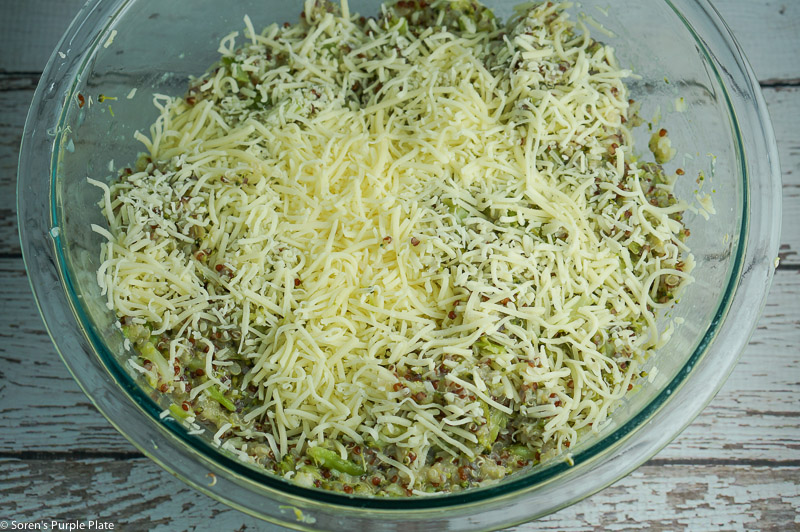
  • ½ cup shredded mozarella cheese
  • ⅓ tsp dried basil
  • Salt/pepper
Instructions
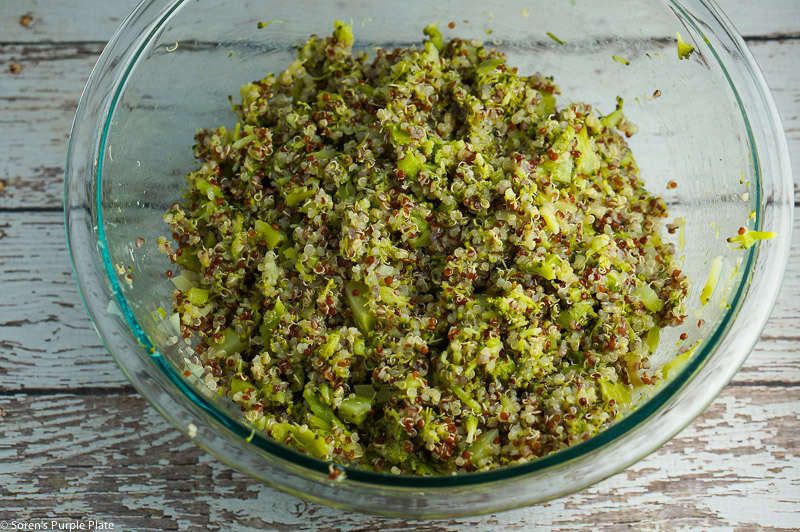
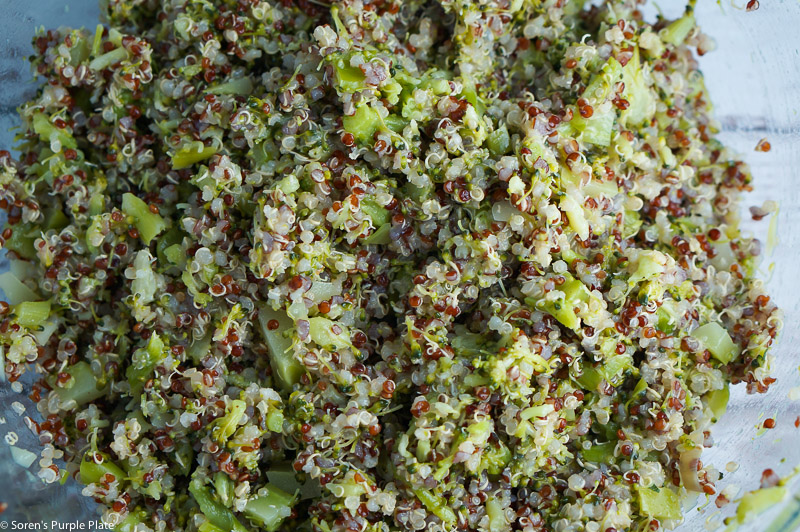
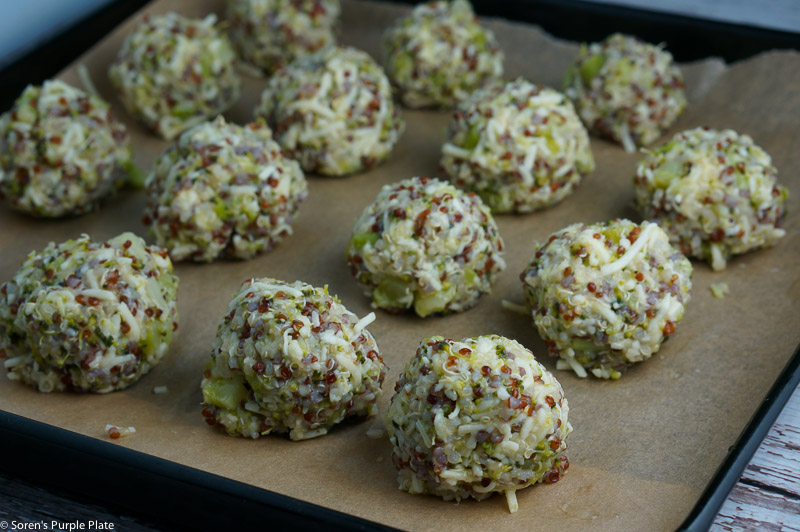
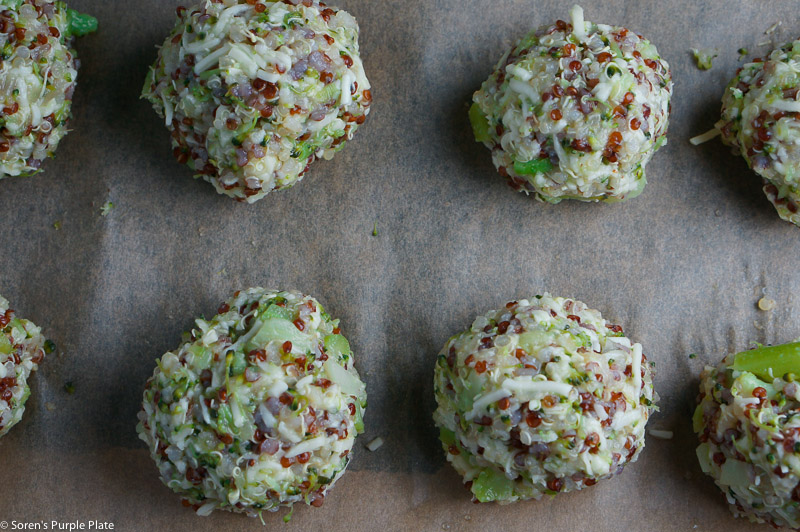
  1. ​Wash and chop all the vegetables. Combine them with quinoa.
  2. In a separate bowl beat the eggs by hand and add salt, pepper, dried basil, and cheese.
  3. Pour the egg mixture over quinoa and mix well.
  4. Bake in muffin tins (using either silicone or paper liners) for 20-25 minutes at 350F.
Notes
I have a convection oven so everything cooks faster there. You might want to cook yours a little longer in the regular oven.
Also you can use any cheese you like instead of mozzarella.
3.5.3208


Filed Under: Main meals, On-the-go / travel food, Recipes, Vegetarian / Vegan / Raw

Crispy Coconut Chicken

September 21, 2016 by Natasha

Coconut Chicken

Hello yummy crispy coconut chicken! It’s made of healthy ingredients but it’s fried.

I would like to state  that I would not offer this chicken to a baby under 1. Yes, I am a fan of Baby Led Weaning (what is it?) but Baby Led Weaning can be as healthy or unhealthy as you make it to be. Babies can be given the most greasy foods right at 6 months and, technically, it would be considered BLW. The main premise is that you offer your child whole foods (large chunks instead of purees) and leave them to be independent eaters (rather than spoon-feeding them from 6 months.) So there. My philosophy is – healthy foods at any cost.

That said, my son is now approaching his SECOND Birthday and I have to admit I definitely have relaxed a lot more about what foods he eats. His appetite is still good but the food preferences are there, sometimes very strong, like a plate can fly high into the air and spill all over the carpet and couch if he doesn’t like what’s on it. I used to be a purist when it came to baby food and I am glad I put the effort. I think it’s paying off already. But at this point, Soren eats a lot more traditional kids foods.

On to the recipe

If you use a non-stick pan, you can make this chicken with minimal oil. If you would like to achieve maximum crispiness, then it’s better to use a regular pan with a considerable amount of oil (however much you need for the chicken not to stick).

It won’t be crispy:

  • if you cover the pan with the lid
  • if you refrigerate
  • if you use too low heat

Crispy or not, it’s still delicious.


Coconut ChickenCoconut chicken


INGREDIENTS:

2 large chicken breasts
2 eggs
1/2 cup flour (I used whole wheat)
1 cup unsweetened coconut shreds
1/2 cup panko (Japanese breadcrumbs)
Coconut oil

METHOD:

1. Prepare 2 plates: one with flour and one with coconut mixed with panko. Beat the eggs. Prepare a pan with coconut oil. If you want really crispy chicken, then use a regular pan (not a non-stick) and use quite a bit of coconut oil.
2. Cut the chicken into thin strips. Season with salt and pepper. Dredge in flour first, then dip in egg mixture, then dredge in coconut shreds mixture.
3. Pan fry for 8 minutes on each side. If you used a lot of oil, then place the cooked chicken on paper towel to absorb excess oil.


Crispy Coconut Chicken
 
Save Print
Author: Natasha @ Soren's Purple Plate
Ingredients
  • INGREDIENTS:
  • 2 large chicken breasts
  • 2 eggs
  • ½ cup flour (I used whole wheat)
  • 1 cup unsweetened coconut shreds
  • ½ cup panko (Japanese breadcrumbs)
  • Coconut oil
Instructions
  1. Prepare 2 plates: one with flour and one with coconut mixed with panko. Beat the eggs. Prepare a pan with coconut oil. If you want really crispy chicken, then use a regular pan (not a non-stick) and use quite a bit of coconut oil.
  2. Cut the chicken into thin strips. Season with salt and pepper. Dredge in flour first, then dip in egg mixture, then dredge in coconut shreds mixture.
  3. Pan fry for 8 minutes on each side. If you used a lot of oil, then place the cooked chicken on paper towel to absorb excess oil.
3.5.3208


Filed Under: Fish and Meat, Main meals, On-the-go / travel food, Recipes

Butternut Squash Rice Balls

January 17, 2016 by Natasha Leave a Comment


butternut squash balls

I think a life of a mom is so much easier if you have roasted/steamed vegetables in the fridge at all times. I roasted a butternut squash yesterday to make pasta sauce and to use for snacking. With the leftover half, I came up with these cute-looking snack balls. Spoon-feeding is certainly not as fun as eating with your hands. Add a little crunch with brown rice crisps (sugar-free) and your babies and toddlers will certainly approve.

I bought Whole Foods brand plain, unsweetened brown rice crisps. The package listed only one ingredient, which is a good product in my book.

If you have butternut squash already roasted then these snacks will take you  5 minutes to make. Not even.

butternut squash balls

butternut squash balls

HOW TO BAKE BUTTERNUT SQUASH

Honestly, just a year ago I had no idea how easy it was to bake whole butternut squash. I used to ruin my fingers trying to peel the quash and cut it into chunks before steaming or roasting.

Preheat oven to 350F. Wash the squash. Dry with paper towels. Cut lengthwise. Place cut side down on parchment paper. Roast for 1 hour. In the middle of roasting, add a little water to the baking tray. That’s it.

Butternut Squash Rice Balls
 
Save Print
This is an ideal healthy snack for kids and people of all ages. Making it with leftover butternut squash will take you 5 minutes to prepare.
Author: Natasha
Ingredients
  • Just 2 ingredients:
  • Roasted butternut squash
  • Brown rice crisps
  • Optional: coconut flakes
Instructions
  1. Scoop the chilled squash out of its shell.
  2. Mash it with a fork (it should be very soft).
  3. Add as many rice crisps as necessary to make the mixture stick to together.
  4. Form little balls with your hands and roll in a bowl with coconut flakes.
3.5.3208


Filed Under: On-the-go / travel food, Recipes, Top recipes, Treats, snacks, desserts, Vegetarian / Vegan / Raw

QUINOA BROCCOLI CROQUETTES

January 17, 2016 by Natasha Leave a Comment

Today on Soren’s plate: salmon baked with lemon (BLW from 8 months – skip salt), cucumbers and leftover quinoa-turned-broccoli croquettes.
Quinoa broccoli croquettes
Salmon and quinoa croquettes

TO BAKE SALMON:

In a bowl combine olive oil, salt, pepper and juice of half of lemon. Whisk until well combined. Rinse salmon under cold water, pat dry with paper towels and coat well with the oil mixture. Bake at 350F for 13-20 minutes max, depending on the size and thickness of your fish.

THE CROQUETTES

quinoa croquettes
quinoa croquettes 20160104-DSC09404-2 20160104-DSC09402-2 20160104-DSC09399

These little nutritious balls turned out really yummy and could easily be enjoyed by babies 10 months and older. They are perfectly soft and could be handled well by the little ones. The reason I suggest 10 months and up is because they have cheese in them. Cheese by definition is a processed product, which usually contains a lot of salt. It’s not a hard rule to avoid cheese but I  was hesitant to give it to Soren before he was 10/11 months. If you are ok with cheese, go ahead and share with your little ones even earlier.

These vegetarian croquettes can be made from scratch or using leftover quinoa and broccoli, which I did. They taste best when warm but can also be stored in fridge for 2 days. Note that they will harden in the fridge so if you are planning to give them to small babies, you can warm them up a bit so that the cheese melts and softens the balls.

Enjoy them as a side dish, in a pita just like you would falafel or eat as a main dish with some salad on the side.

The more cheese you put, the flatter they will come out (which is not bad at all; actually yummy).

quinoa broccoli balls
20160104-DSC09415 20160104-DSC09412

INGREDIENTS (makes a large batch):

2 cups of cooked quinoa
2 large steamed broccoli florets (about 2 cups chopped)
1/2 cup of apple sauce
3 eggs
1.5 cup of grated cheese (I used Italian blend, already grated)
1 garlic clove (minced)


METHOD:

1. Line the baking tray with parchment paper (not foil because it will definitely stick; I tried)
2. Chop up the broccoli. In a large bowl combine all the ingredients together. Season with salt and pepper.
3. Form medium balls in your hands and place them on the tray.
4. Bake for 25-30 minutes at 350F. Once the edge start turning golden, the croquettes are ready.


QUINOA BROCCOLI CROQUETTES
 
Save Print
These vegetarian croquettes can be made from scratch or using leftover quinoa and broccoli. They taste best when warm but can also be stored in fridge for 2 days. Enjoy them as a side dish, in a pita just like you would falafel or eat as a main dish with some salad on the side.
Author: Natasha
Ingredients
  • 2 cups of cooked quinoa
  • 2 large steamed broccoli florets (about 2 cups chopped)
  • ½ cup of apple sauce
  • 3 eggs
  • 1.5 cup of grated cheese (I used Italian blend, already grated)
  • 1 garlic clove (minced)
Instructions
  1. Line the baking tray with parchment paper (not foil because it will definitely stick; I tried)
  2. Chop up the broccoli. In a large bowl combine all the ingredients together. Season with salt and pepper.
  3. Form medium balls in your hands and place them on the tray.
  4. Bake for 25-30 minutes at 350F. Once the edge start turning golden, the croquettes are ready.
3.5.3208

Filed Under: Main meals, On-the-go / travel food, Recipes, Top recipes, Vegetarian / Vegan / Raw

Almond Butter Breakfast Cookies

January 16, 2016 by Natasha 2 Comments

oatmeal cookies with almond butter

My friend Liza is a big inventor of healthy cookies and treats. She has an Instagram blog called @CookingForGrey if you are interested to take a peek there. She has the cutest toddler on Earth who is being spoilt with all kinds of yummy things.

I finally made her breakfast cookies, which were really easy and fast. Now, these cookies are a little tricky because they come out looking very different each time a new person tries making them. The only thing I changed in Liza’s recipe was I used instant oats instead of rolled oats. Mine baked very fast in the oven but I hear it takes some moms longer to make them crunchy. Play with the timing.

oat cookies with almond butter

almond butter cookies

I couldn’t keep Soren away from them. I made them this morning and they are gone – I ate most of them. They are absolutely guilt-free and I would say baby led weaning appropriate from about 8 months (they have nut butter). They are a little crunchy, which can be controlled by cooking them less or more. I made two batches: one soft for Soren and a crunchy one for us. Make sure to cook them for no longer than 14 minutes if giving to small babies. Otherwise, toast them nicely for adults for crunchiness (17 minutes). Your oven might be different so keep an eye on them.

almond butter cookies

breakfast cookies


INGREDIENTS:

2 ripe bananas
1 cup quick oats (or instant oats)
1/2 cup almond butter
1/2 large shaved coconut flakes (or 3/4 cup regular coconut flakes)
1.5 tbsp coconut oil (preferably solidified)
Optional:
1 tbsp hemp seeds
1/2 tsp cinnamon

METHOD:

Mix all the ingredients in a bowl. I used potato masher and then hands. Form little balls with your hands and place them on a baking tray lined with parchment paper. Once on the tray, flatten each ball with your fingers. Bake for 14 minutes for soft cookies and 17 minutes for crispy. Enjoy.


Almond Butter Breakfast Cookies
 
Save Print
Prep time
5 mins
Cook time
15 mins
Total time
20 mins
 
Delicious, vegan, guilt-free breakfast cookies. BLW appropriate from about 8 months.
Author: Natasha
Recipe type: breakfast, cookies
Cuisine: vegan, healthy
Ingredients
  • 2 ripe bananas
  • 1 cup quick oats (or instant oats)
  • ½ cup almond butter
  • ½ large shaved coconut flakes (or ¾ cup regular coconut flakes)
  • 1.5 tbsp coconut oil (preferably solidified)
  • Optional:
  • 1 tbsp hemp seeds
  • ½ tsp cinnamon
Instructions
  1. Mix all the ingredients in a bowl. I used the potato masher and then hands.
  2. Form little balls with your hands and place them on a baking tray lined with parchment paper.
  3. Once on the tray, flatten each ball with your fingers.
  4. Bake for 14 minutes for soft cookies and 17 minutes for crispy.
  5. Enjoy!
3.5.3208


Filed Under: Breakfast, On-the-go / travel food, Recipes, Top recipes, Treats, snacks, desserts

Red Quinoa with Cucumbers and Peaches

January 6, 2016 by Natasha Leave a Comment


IMG_8618

What are they serving in New York today? Apparently, red royal quinoa with shredded fresh cucumber and peaches.

We decided to go out last minute and I put together this 30 second dinner to take with us for Soren. I always have some kind of grain ready in the fridge (quinoa, millet, rice, oatmeal, etc.). Today it was quinoa. I just added some shredded cucumber and chopped peaches. Pure improvisation but it worked really well. We will be repeating this combination for sure and not only for the baby; it could actually be a nice side dish for adults.

IMG_8610 IMG_8617  IMG_8605

Quinoa is something that I cook on a weekly basis. I add it to our salads and the baby has it in many different variations: with veggies, fruit, meat, fish, you name it. It’s a better sources of protein and vitamins and minerals than other grains.

HOW TO COOK IT:

Pour a tablespoon of olive oil in the pan, add 1 cup of quinoa (very well rinsed to prevent bitterness). Stir well to coat quinoa in oil and toast it stirring frequently for about 2-3 minutes. Add 2 cups of water. Simmer on low heat for 20 minutes. If cooking just for adults, you can add any spices into the water. Or you can cook it in a stock to add more flavor. I usually just cook it in water and without any salt to be able to use it for Soren.

Filed Under: Main meals, On-the-go / travel food, Recipes, Vegetarian / Vegan / Raw

Healthy Banana Apple Muffins

January 6, 2016 by Natasha Leave a Comment

Banana Apple Muffins

These muffins are absolutely guilt-free. I wouldn’t hesitate a second giving them to my son. There is no added sugar or other sweeteners; the mildly sweet taste comes from bananas and apples.  Babies and adults love them. Super easy recipe! I tried it a dozen times and it works every time. I usually bake half batch in a mini muffin mold then add chocolate and nuts for the adult muffins.

IMG_8251 IMG_8252Ingredients:

1/3 cup melted coconut oil (if you don’t have it, the recipe works just fine without it)
2 eggs
3 ripe bananas (mashed)
2 small apples, grated (with or without skin works. More fiber with skin)
1 tsp baking powder
1 tsp vanilla extract
1/2 tsp cinnamon (put more if you love it)
1/2 cup wholewheat flour
3/4 cup instant oats
Optional: raisins, nuts, chocolate

Method:

Preheat oven to 325F. Hand beat eggs with coconut oil in a bowl. Add mashed bananas, baking powder, vanilla and cinnamon. Mix. Add apples. Mix. Add flour and oats. Stir well. Pour half a batch in a lightly greased muffin mold for babies. Then add raisins, chocolate and any other goodness you like to the adult batch. Bake for 25 minutes. Remove from oven and let cool off.

I hope you like it.

This recipe was adapted from Cookie & Kate recipe.

Healthy Banana Apple Muffins
 
Save Print
Prep time
10 mins
Cook time
25 mins
Total time
35 mins
 
These healthy muffins can be enjoyed by babies and adults. There is no added sweeteners and sugar. The mildly sweet taste comes from apples and bananas. Baby Led Weaning appropriate from 6 months.
Author: Natasha
Recipe type: breakfast, treat, muffins
Ingredients
  • ⅓ cup melted coconut oil (if you don't have it, the recipe works just fine without it)
  • 2 eggs
  • 3 ripe bananas (mashed)
  • 2 small apples, grated (with or without skin works. More fiber with skin)
  • 1 tsp baking powder
  • 1 tsp vanilla extract
  • ½ tsp cinnamon (put more if you love it)
  • ½ cup wholewheat flour
  • ¾ cup instant oats
  • Optional: raisins, nuts, chocolate
Instructions
  1. Preheat oven to 325F.
  2. Hand beat eggs with coconut oil in a bowl. Add mashed bananas, baking powder, vanilla and cinnamon. Mix. Add apples. Mix. Add flour and oats. Stir well.
  3. Pour half a batch in a lightly greased muffin mold for babies. Then add raisins, chocolate and any other goodness you like to the adult batch. Bake for 25 minutes. Remove from oven and let cool off.
  4. Enjoy.
3.5.3208


Filed Under: Breakfast, On-the-go / travel food, Recipes, Top recipes, Vegetarian / Vegan / Raw

Potato Salmon Zucchini cakes

January 5, 2016 by Natasha 1 Comment

Potato Salmon Zucchini fishcakes

Potato Salmon cakes

I am a big fan of making food so it lasts several days. Very often I have one or two ingredients leftover and I like putting them to use by making something quick and simple. These cakes are a good example of this practice: I used the leftover salmon and mashed potatoes from the dinner before.

If you are just starting with Baby Led Weaning, if you don’t have any family seafood allergies, I would say you should introduce fish early. My pediatrician recommended we started right from the beginning so Soren tasted salmon when he was 6.5 months and has really been liking it since. My mom friends start around 7-8 months. Whatever you feel comfortable with.

Theses little cakes are ideal for a play date meal or for traveling. They are easy to handle for you and for the baby avoiding major mess like with other foods.

INGREDIENTS:

1 cup of mashed potatoes or a medium boiled potato (cooled and grated)
1 cup of cooked salmon
1 small zucchini (grated)
1 egg
Optional: dill or parsley or both


METHOD:

Separate salmon into small pieces. Mix all ingredients in a bowl. Form little pancakes and pan fry on medium heat in a pan greased with coconut oil (any other oil would work too).


Potato Salmon Zucchini cakes
 
Save Print
Prep time
10 mins
Cook time
10 mins
Total time
20 mins
 
These little cakes are ideal for a play-date meal or for traveling. Baby Led Weaning appropriate from 7-8 months provided you don't have seafood allergies in the family.
Author: Natasha
Recipe type: lunch, dinner, travel, leftovers
Ingredients
  • 1 cup of mashed potatoes or 1 large boiled potato (cooled and grated)
  • 1 cup of cooked salmon
  • 1 small zucchini (grated)
  • 1 egg
  • Optional: dill or parsley or both
Instructions
  1. If not using leftovers like us, bake salmon at 350F for 15-20 minutes, depending on the size of the piece. Cool. Separate into chunks watching out for the bones.
  2. Grate 1 medium zucchini, squeeze excess water. Finely chop some dill and parsley (I really like the combination of two together). If not using leftover mashed potatoes, grate one cooked potato.
  3. Combine all the ingredients in a bowl. Add salt and pepper if cooking for kids over one. You don't need much salt: the fishcakes are pretty flavorful because of salmon and the herbs.
  4. Pan fry on a medium heat flipping once or twice. I use coconut oil but if the taste bothers you (salmon and coconut, eeeek for some), you can use any frying oil.
3.5.3208

Filed Under: Fish and Meat, Main meals, On-the-go / travel food, Recipes

Chicken Mushroom Meatballs from scratch

December 28, 2015 by Natasha Leave a Comment

IMG_3362

Lunch today is healthy comfort food that adults and babies (from 6-7 months) would enjoy:

  • Mashed potatoes with corn and peas
  • Chicken mushroom meatballs made from scratch

The idea of mixing potatoes with another vegetable is not new but recently it caught my eye again when I was flipping through other mommy cooks Instagram pages. Some of my friends have been whipping their mashed with broccoli – a great idea. Today I made ours with peas and corn. Here is how to make it:

INGREDIENTS:

3-4 potatoes
1/2 cup frozen peas
1/2 cup frozen corn (organic)
A bit of milk (nut or any other kind)
Butter or olive oil

METHOD:

Peel the potatoes and cut into 2 inch cubes. Place in a pot of water, add a little salt and boil until almost done. Right into that water add the peas and corn. In 4-5 minutes, strain the vegetables, and mash with some milk, butter or olive oil. I used the hand masher. If you want a very smooth consistency, you can purée it in a blender.

IMG_3346

Tender Chicken Meatballs from scratch
 
Save Print
When made completely from scratch, these meatballs outdo any other homemade recipe. Make sure not to overcook it! It's the key to tenderness.
Author: Natasha
Recipe type: lunch, dinner
Ingredients
  • 1 lb of chicken thighs (or ground chicken)
  • 1 celery stalk (roughly chopped)
  • ½ small onion (roughly chopped)
  • 6 crimini mushrooms (or any other kind)
  • 1 egg
  • A sprinkle of dried oregano
Instructions
  1. If making from scratch, place all the ingredients in a blender. Add salt & pepper (skip for babies under one). Pulse a few times until the chicken and veggies are ground. The mixture will be kind of pasty. That's good.
  2. Heat a pan with canola or coconut oil, form medium size meatballs with your hands and pan fry for no more than 4 minutes on each side.
  3. Place the meatballs in a pot with a tablespoon of water on the bottom. Close the lid. Steam for 5 minutes. .
3.5.3208

IMG_3363

Sometimes I buy ground chicken but most of the time I use my Vitamix blender to grind organic chicken thighs or breasts. When made completely  from scratch, these meatballs outdo any homemade recipe.  I’m warning you right away: make sure to prepare a large amount of side dishes so that you are not tempted to eat all of the meatballs at once. They are so good.

❗️TIP: to make these meatballs really tender, pan fry for 4 minutes on each side and then place in a pot with a tiny bit of water (tablespoon) and steam for 5 minutes. This will ensure that all the bacteria is killed and they are safe to eat for babies. Do not overcook! That’s the key.

Another❗️TIP: if you are using a blender to grind the chicken, it’s very important to clean it very well afterwards. I know, the obvious. But I want to stress this because meat fibers can get wrapped around the blade (especially underneath) and easily get stuck there and overlooked. I assume that you have just one blender, which you mainly use for raw smoothies and such. So wash it very well in a soapy water. After, rinse with BOILING water! I use an electric kettle and it takes no time.

Filed Under: Fish and Meat, Main meals, On-the-go / travel food, Recipes, Top recipes

Classic Whole Wheat Crepes

December 28, 2015 by Natasha Leave a Comment

Whole Wheat Crepes

The day after Christmas. Sad or happy? With a typical sense of relief after a mad race to wrap all the presents in time, not to burn your Christmas dinner and not to forget to feed your kid, comes a bit of a melancholy and a sense of loss. I find that anticipation, the journey, the process is more enjoyable that the destination, the reaching of the goal. That’s not to say that I didn’t enjoy my lazy Christmas Day. I did. Very much. Time suddenly stops and the holiday gently wraps itself around you. Ahhh… But this morning all three of us (I’m speaking for Soren here) felt the need to experience the pleasure that doesn’t expire in any season, holiday or age. Something that doesn’t fade after the noise of the holidays… Ta-da! All this intro for a couple of warm crepes! Kinda crazy, I know.

Anyway, this morning I gave the stage of Soren’s Purple Plate to my renowned sous chef- my husband Farhad. He is the master of crepes so I could just relax and quietly watch the kitchen being destroyed ?. But all worth it – these crepes always come out delicious. We topped them up with sour cream (Russian style), Nutella (World style) and date molasses (hippy style). It’s a simple recipe. Double or triple the proportions if making for more people. The below serves 2 and a toddler.

IMG_3327

A word on date molasses: it’s my new obsession. Ever since my pregnancy I am a prisoner to sweet things. There are so few that are unprocessed (like whole fresh fruits) and even fewer that are mildly processed (like maple syrup, coconut and date sugar). Usually sweeteners are highly processed and contain all kinds of preservatives and ingredients no one can pronounce. I recently discovered date molasses. I buy the brand that contains nothing other than dates. It’s so delicious, natural, unrefined and vegan. Read more here if you are interested in learning more. And since we are on the topic of sugary stuff, read this article to see which sugar is the best for you.


Classic Whole Wheat Crepes
 
Save Print
These whole wheat crepes are a classic easy breakfast. Enjoy them savory with smoked salmon and cream cheese, chicken with vegetables or plain (they are not sweet) or with jam, sour cream, nutella or fruit. So simple yet always feels special.
Author: Natasha
Recipe type: breakfast
Cuisine: world
Ingredients
  • 2 eggs
  • ½ cup of whole wheat flour
  • 7 oz of milk
  • 5 tbsp of water
  • Pinch of salt
  • a knob of melted butter
Instructions
  1. Combine all the ingredients together either by whisking by hand, using a hand-held blender or a regular stand alone blender. Blend until smooth.
  2. Drop 3-4 tbsp of batter into a heated and greased pan (with coconut oil or butter) and pan fry flipping once.
3.5.3208


Filed Under: Breakfast, On-the-go / travel food, Recipes, Treats, snacks, desserts, Vegetarian / Vegan / Raw

  • 1
  • 2
  • Next Page »

Hi, I’m Natasha, Soren’s mom. Welcome to our own visual menu of healthy meals that everyone in the family can indulge in, including babies. Here you will find mainly my own creations but also recipes discovered elsewhere, tested and enjoyed by my family. We are not vegetarians but most dishes are veggie-forward, often gluten-free and always free of processed ingredients.
A little more about me

STAY IN TOUCH

  • Facebook
  • Instagram
  • Pinterest

Instagram

Instagram did not return a 200.

Follow me for inspiration

Copyright © 2025 · sorenspurpleplate · All rights reserved