Soren's Purple Plate

Babies, kids, and parents eat together. Simple, healthy food ideas.

  • Home
  • Recipes
    • Breakfast
    • Main Meals
    • Fish & Meat
    • Vegetarian & Vegan
    • Soups & Stews
    • Treats & Snacks
    • Smoothies & Drinks
    • On-the-go & Travel
  • First Foods / BLW
  • Outside the Kitchen
    • Interesting Moms
  • About
    • My Eating Beliefs

Almond Oat Peanut Cookies

October 16, 2016 by Natasha Leave a Comment

Almond Oat Peanut Cookie

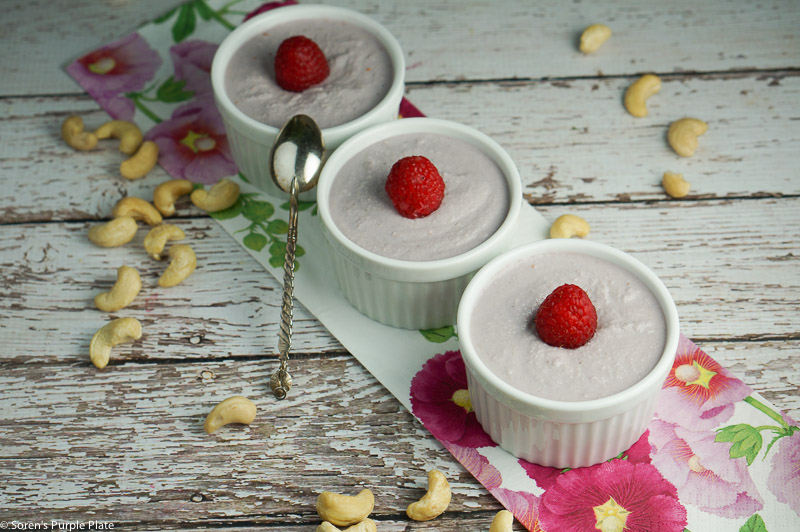
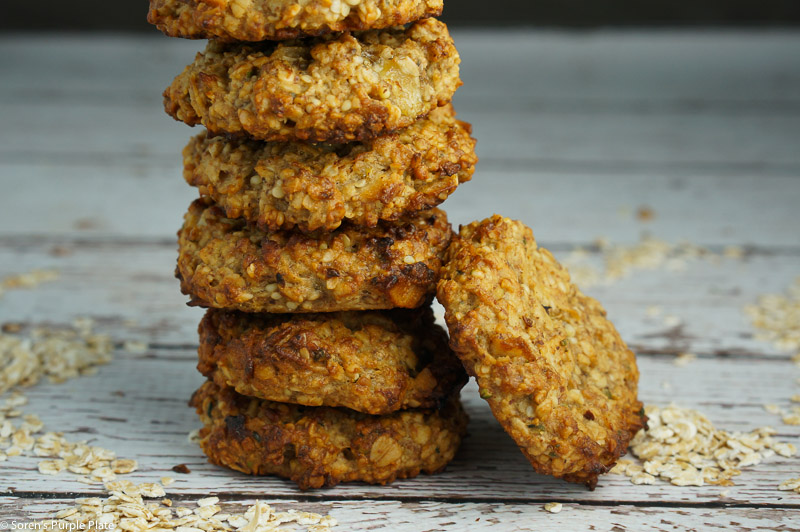
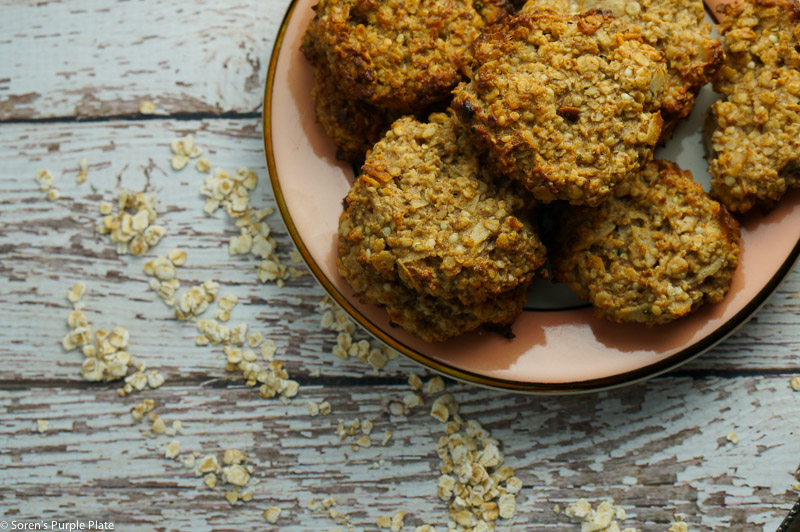
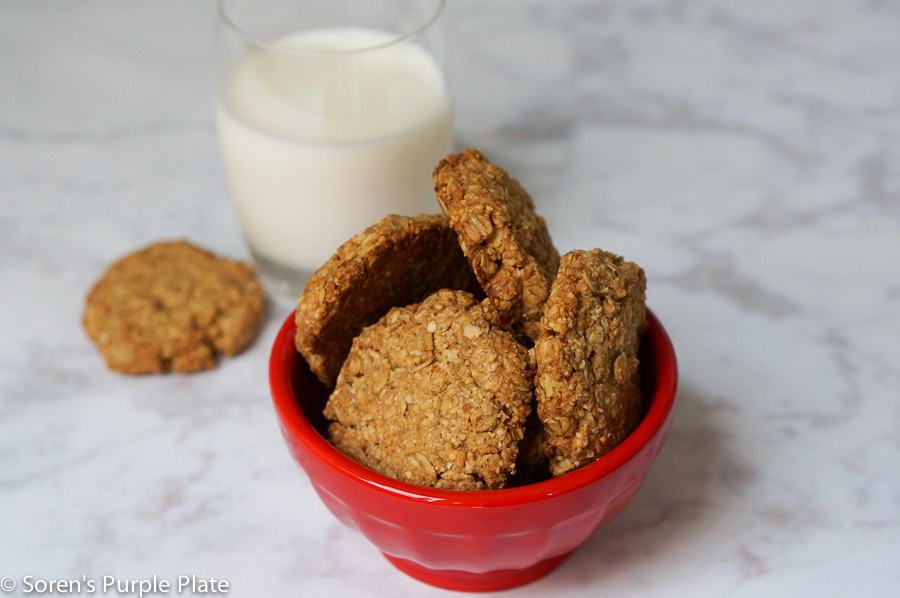
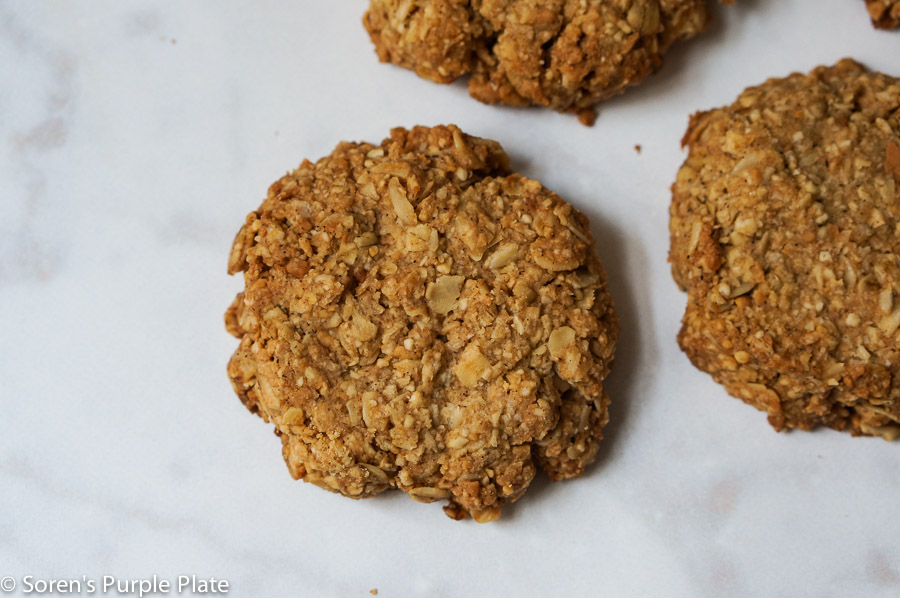
Hello, my perfect cookie, which just happens to be gluten free and vegan.

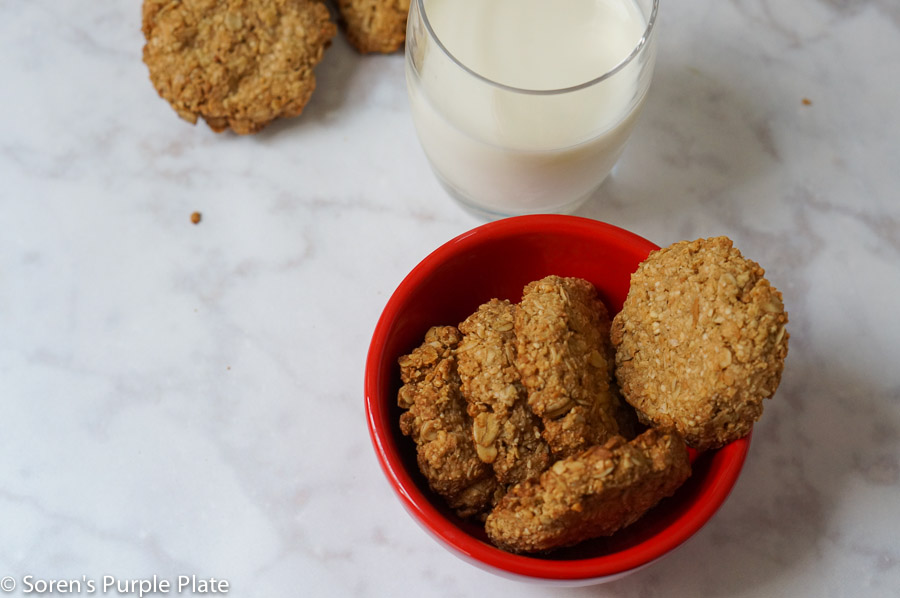
There are as many perfect cookies as there are people. My perfect cookie depends on what mood I wake up in and the weather. This one, my friends, I can eat in any season and any mood because it’s crunchy, healthy, mildly sweet and oh-so-toddler-approved.

I played with Barnerybutter.com recipe and changed a few things around, mainly reducing sweetness and adding peanut butter.

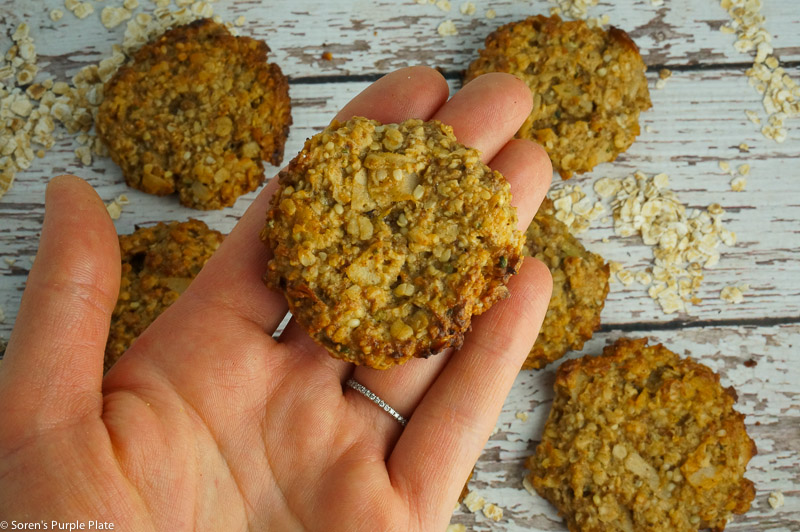
I have to warn you, the dough was a bit too crumbly and I doubted the cookies would hold together but they so did!

Another important thing: I used real peanut butter, the one you make yourself in stores like Whole Foods. It’s dry and made of just one ingredients – peanuts. If you are using the runny peanut butter from a jar, then definitely put less of it in the dough.

Almond Peanut Oat cookie

Almond Oat Peanut Cookie


Almond Oat Peanut Cookies
 
Save Print
These healthy cookies are crunchy, mildly sweet and oh-so-toddler-approved. They also happen to be vegan and gluten free.
Author: Natasha @ Soren's Purple Plate
Recipe type: sweets
Ingredients
  • 2 cups rolled/old-fashioned oats
  • 1 cup almond flour/meal
  • ½ cup coconut flakes
  • 1 tsp cinnamon
  • ⅓ tsp salt
  • 1 tsp raw vanilla powder (or extract)
  • ½ cup peanut butter
  • ?
  • ¼ cup melted coconut oil
  • ⅓ cup maple syrup
  • ?
Optional: chocolate chips, nuts, hemp seeds, chia seeds
Instructions
  1. Combine all the dry and wet ingredients in two separate bowl. For me peanut butter was a dry ingredient. If yours is runny, it will be a wet ingredient.
  2. Mix all together. I used my hands to crumble peanut butter and mix everything well. My dough was crumbly but sticky enough to form little balls.
  3. Stir in all the optional ingredients now.
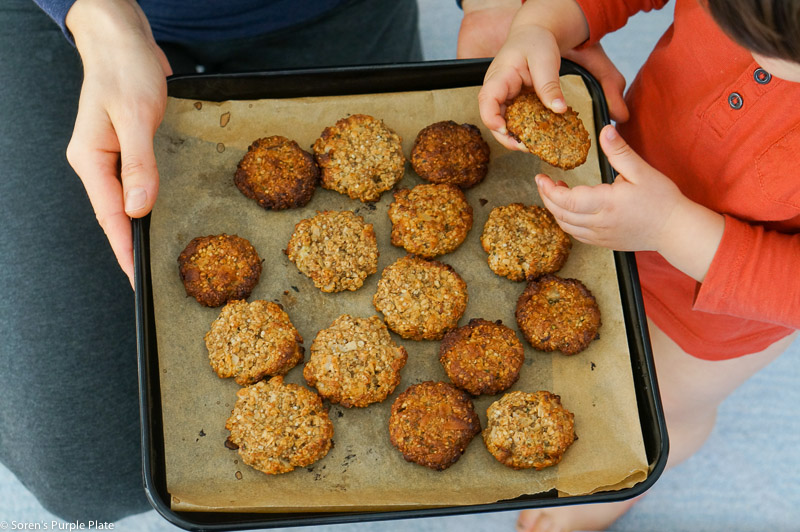
  4. With your hands form little balls, flatten them and place on a tray lined with parchment paper.
  5. Bake at 350F for 15-17 minutes. Let them cool before trying.
3.5.3208


Filed Under: Recipes, Top recipes, Treats, snacks, desserts

Apple Ricotta Breakfast Tart

August 20, 2016 by Natasha Leave a Comment

Baby Led Weaning (what is it?) appropriate from 7 months or as soon as you offer whole eggs.

Apple Ricotta Tart

Good morning summer Saturday!

Almost 10 years later, I’m still trying to learn to ignore the humidity in this city of New York. Only a very good attitude can save you from it, I’m telling you. We are lucky to live close to the park and all the wonderful playgrounds have sprinklers but man, when you are 6 weeks away from giving birth and running around after your almost 2-year-old toddler, little can save you… Sorry, had to vent.

Onto the better things… For breakfast we usually alternate between eggs (think omelets, frittatas, boiled, fried, etc.), porridge of any kind (buckwheat, oatmeal, millet, quinoa) and pancakes (the thousand versions that I often feature on Instagram). And then there is RICOTTA! Ricotta and farmer’s cheese deserve its own breakfast category in my world. I grew up on farmer’s cheese so it’s pretty much in my DNA. Unlike the Italians who use it mainly in pastas, I love ricotta in pancakes, tarts and just on its own with fruit or honey.

CALCIUM requirement for kids:

1-3 years old – 700 mg per day

4-8 years old – 1000 mg per day

Guess what? Ricotta has 500mg in 1 cup (compared to 300 mg in 1 cup of milk).

My son doesn’t drink regular cow’s milk but he gets his calcium usually from leafy greens, fermented dairy products (yogurts, kefir), goat milk and ricotta and farmer’s cheese. I will dedicate a special post to dairy and calcium some other day.

Apple Ricotta Tart Apple Ricotta Tart Apple Ricotta Tart Apple Ricotta Tart

Now, about this tart. It’s mildly sweetened with one ripe banana and apples. It has zero processed sugar. It has lots of calcium and can serve as breakfast, snack, to-go food or dinner. You need to make it cool substantially for it to harden. Otherwise, you will most likely need a spoon to eat it. If warm, I like it with sour cream or yogurt.


INGREDIENTS:

1 ripe banana
1 cup ricotta
2 eggs
2 egg yolks
1/2 cup kefir
1 tsp baking soda
1/2 cup semolina flour
2 tbsp coconut oil
pinch of salt
cinnamon
1/2 tsp vanilla powder
1 apple

Optional: raisins, chia seeds, coconut shreds, maple syrup, honey

METHOD:

1. Mash the banana. Add ricotta and eggs. Whisk by hand. Add the rest of ingredients (except apple) and let the dough sit for 10 minutes for semolina to expand.

2. Oil up your baking dish. Pour the dough into it. Thinly slice the apple and arrange it on top. You can sprinkle with more cinnamon.

3. Bake at 350F for 25-30 minutes. I have a compact convection oven so it takes me less time to bake. The tart will be ready when the top is golden and the toothpick comes out clean. Might take you 30 mins with regular oven. Play with the time.


Apple Ricotta Breakfast Tart
 
Save Print
Zero processed sugar, this mildly sweet ricotta tart is a perfect breakfast tart for the entire family including babies from 7 months old if you are offering whole eggs. Calcium rich and guilt-free. Enjoy!
Author: Natasha @ Soren's Purple Plate
Recipe type: Breakfast
Ingredients
  • 1 ripe banana
  • 1 cup ricotta
  • 2 eggs
  • 2 egg yolks
  • ½ cup kefir
  • 1 tsp baking soda
  • ½ cup semolina flour
  • 2 tbsp coconut oil
  • pinch of salt
  • cinnamon
  • ½ tsp vanilla powder
  • 1 apple
  • Optional: raisins, chia seeds, coconut shreds, maple syrup, honey
Instructions
  1. Mash the banana. Add ricotta and eggs. Whisk by hand. Add the rest of ingredients (except apple) and let the dough sit for 10 minutes for semolina to expand.
  2. Oil up your baking dish. Pour the dough into it. Thinly slice the apple and arrange it on top. You can sprinkle with more cinnamon.
  3. Bake at 350F for 25-30 minutes. I have a compact convection oven so it takes me less time to bake. The tart will be ready when the top is golden and the toothpick comes out clean. Might take you 30 mins with regular oven. Play with the time.
3.5.3208

Filed Under: Breakfast, Recipes, Top recipes, Treats, snacks, desserts

Cashew Raspberry Mousse

January 19, 2016 by Natasha Leave a Comment

cashew raspberry mousse

This dessert/snack is Baby Led Weaning appropriate from 7 or 8 months if you skip maple syrup (provided there are no nut allergies in the family). I was nervous the first and second (and third) time I gave nut butter to Soren when he was around 7 months but everything turned out ok. Our pediatrician encouraged me to give him everything (except honey) right from 6 months. She said the latest research actually indicates that the sooner you start introducing foods that are thought of as allergens the better (again, only if you don’t have history of allergies in your family). I think Mom’s intuition will guide you  best.

If you are craving something sweet but have committed to a healthier diet this year, try this easy 3-ingredient homemade cashew mousse. Cashews are an abundant source of essential minerals (tons of copper, selenium, magnesium, phosphorous and zinc), which are necessary for a proper function of our body from the production of red blood cell to the brain development.

This creamy sauce can be eaten as a mildly sweet mousse when chilled, added to your oatmeal in the morning, you can dip pancakes in it or add it to smoothies. It lasts about 3 days in the fridge. I made it for Soren and I to snack on.

You can control the sweetness by how much maple syrup you add. The recipe below makes a mildly sweet mousse.

SOAKING CASHEWS:

Below you can see that cashews that have been soaked for 3-4 hours expand and become whiter. They also soften, which is perfect for blending and making all kinds of sauces and mousses.
soaked cashews
raw soaked cashews
Soaking nuts is very important. I won’t go into details on why since I’m not a nutritionist and many other sources can demonstrate it in depth. All I will say is that by soaking nuts and seeds you increase the amounts of nutrients your body can absorb since soaking breaks down the substance that usually inhibits the absorption.
blending raw cashews
Cuisinart mini food processor
raw cashew raspberry mousse

INGREDIENTS:

1 cup of cashews
1/2-1 cup fresh raspberries
1 tbsp of maple syrup

A pinch of salt

METHOD:

1. Cover cashews with plenty of water and soak overnight in the fridge.

2. Drain cashews and place in a blender with fresh raspberries. Add a pinch of salt and maple syrup. Blend on high until the mixture is smooth and creamy (no pieces of nuts or berries).

3. Spoon into ramekins or small cups and chill for 4 hours.

Cashew Raspberry Mousse
 
Save Print
This creamy sauce can be eaten as a mildly sweet mousse when chilled, added to your oatmeal in the morning, you can dip pancakes in it or add it to smoothies. It lasts about 3 days in the fridge.
Author: Natasha
Recipe type: raw, vegan, dessert
Ingredients
  • 1 cup of cashews
  • ½-1 cup fresh raspberries
  • 1 tbsp of maple syrup
  • A pinch of salt
Instructions
  1. Cover cashews with plenty of water and soak overnight in the fridge.
  2. Drain cashews and place in a blender with fresh raspberries. Add a pinch of salt and maple syrup. Blend on high until the mixture is smooth and creamy (no pieces of nuts or berries).
  3. Spoon into ramekins or small cups and chill for 4 hours.
3.5.3208

Filed Under: Recipes, Treats, snacks, desserts, Vegetarian / Vegan / Raw

Butternut Squash Rice Balls

January 17, 2016 by Natasha Leave a Comment


butternut squash balls

I think a life of a mom is so much easier if you have roasted/steamed vegetables in the fridge at all times. I roasted a butternut squash yesterday to make pasta sauce and to use for snacking. With the leftover half, I came up with these cute-looking snack balls. Spoon-feeding is certainly not as fun as eating with your hands. Add a little crunch with brown rice crisps (sugar-free) and your babies and toddlers will certainly approve.

I bought Whole Foods brand plain, unsweetened brown rice crisps. The package listed only one ingredient, which is a good product in my book.

If you have butternut squash already roasted then these snacks will take you  5 minutes to make. Not even.

butternut squash balls

butternut squash balls

HOW TO BAKE BUTTERNUT SQUASH

Honestly, just a year ago I had no idea how easy it was to bake whole butternut squash. I used to ruin my fingers trying to peel the quash and cut it into chunks before steaming or roasting.

Preheat oven to 350F. Wash the squash. Dry with paper towels. Cut lengthwise. Place cut side down on parchment paper. Roast for 1 hour. In the middle of roasting, add a little water to the baking tray. That’s it.

Butternut Squash Rice Balls
 
Save Print
This is an ideal healthy snack for kids and people of all ages. Making it with leftover butternut squash will take you 5 minutes to prepare.
Author: Natasha
Ingredients
  • Just 2 ingredients:
  • Roasted butternut squash
  • Brown rice crisps
  • Optional: coconut flakes
Instructions
  1. Scoop the chilled squash out of its shell.
  2. Mash it with a fork (it should be very soft).
  3. Add as many rice crisps as necessary to make the mixture stick to together.
  4. Form little balls with your hands and roll in a bowl with coconut flakes.
3.5.3208


Filed Under: On-the-go / travel food, Recipes, Top recipes, Treats, snacks, desserts, Vegetarian / Vegan / Raw

Almond Butter Breakfast Cookies

January 16, 2016 by Natasha 2 Comments

oatmeal cookies with almond butter

My friend Liza is a big inventor of healthy cookies and treats. She has an Instagram blog called @CookingForGrey if you are interested to take a peek there. She has the cutest toddler on Earth who is being spoilt with all kinds of yummy things.

I finally made her breakfast cookies, which were really easy and fast. Now, these cookies are a little tricky because they come out looking very different each time a new person tries making them. The only thing I changed in Liza’s recipe was I used instant oats instead of rolled oats. Mine baked very fast in the oven but I hear it takes some moms longer to make them crunchy. Play with the timing.

oat cookies with almond butter

almond butter cookies

I couldn’t keep Soren away from them. I made them this morning and they are gone – I ate most of them. They are absolutely guilt-free and I would say baby led weaning appropriate from about 8 months (they have nut butter). They are a little crunchy, which can be controlled by cooking them less or more. I made two batches: one soft for Soren and a crunchy one for us. Make sure to cook them for no longer than 14 minutes if giving to small babies. Otherwise, toast them nicely for adults for crunchiness (17 minutes). Your oven might be different so keep an eye on them.

almond butter cookies

breakfast cookies


INGREDIENTS:

2 ripe bananas
1 cup quick oats (or instant oats)
1/2 cup almond butter
1/2 large shaved coconut flakes (or 3/4 cup regular coconut flakes)
1.5 tbsp coconut oil (preferably solidified)
Optional:
1 tbsp hemp seeds
1/2 tsp cinnamon

METHOD:

Mix all the ingredients in a bowl. I used potato masher and then hands. Form little balls with your hands and place them on a baking tray lined with parchment paper. Once on the tray, flatten each ball with your fingers. Bake for 14 minutes for soft cookies and 17 minutes for crispy. Enjoy.


Almond Butter Breakfast Cookies
 
Save Print
Prep time
5 mins
Cook time
15 mins
Total time
20 mins
 
Delicious, vegan, guilt-free breakfast cookies. BLW appropriate from about 8 months.
Author: Natasha
Recipe type: breakfast, cookies
Cuisine: vegan, healthy
Ingredients
  • 2 ripe bananas
  • 1 cup quick oats (or instant oats)
  • ½ cup almond butter
  • ½ large shaved coconut flakes (or ¾ cup regular coconut flakes)
  • 1.5 tbsp coconut oil (preferably solidified)
  • Optional:
  • 1 tbsp hemp seeds
  • ½ tsp cinnamon
Instructions
  1. Mix all the ingredients in a bowl. I used the potato masher and then hands.
  2. Form little balls with your hands and place them on a baking tray lined with parchment paper.
  3. Once on the tray, flatten each ball with your fingers.
  4. Bake for 14 minutes for soft cookies and 17 minutes for crispy.
  5. Enjoy!
3.5.3208


Filed Under: Breakfast, On-the-go / travel food, Recipes, Top recipes, Treats, snacks, desserts

Apple Banana Muffins

January 16, 2016 by Natasha Leave a Comment

Apple Banana Muffins

BLW appropriate from 7 months: just cut into tiny pieces and let your baby explore it. The recipe has an egg but if you don’t have any family egg allergies, I wouldn’t hesitate giving eggs. We started early with whole eggs following our pediatrician recommendation. Use your judgement and follow your intuition. I was impatient to introduce a lot of new ingredients into my son’s world and I just had a sense that he would be ok. Mama knows best.

I would say that last year of all the recipes, I used this one the most. These muffins are just a perfect healthy snack for babies and toddlers. There is no sugar of any kind; just apple and banana as a sweetener.

Pomegranates are in season now. Buy as much of it as you can. It’s an amazing source of vitamins and minerals among other things. The crazy person that I am, I used to squeeze spoonfuls of pomegranate juice using garlic press but now I give to Soren just like that for a snack and he loves eating the little bright sweet seeds. It’s fun to play with it too.

The recipe makes 12 mini and 6-8 large muffins.

Banana Apple Muffins

INGREDIENTS:

1/3 cup melted coconut oil (if you don’t have it, the recipe works just fine without it)
2 eggs
3 ripe bananas (mashed)
2 small apples, grated (with or without skin works. More fiber with skin)
1 tsp baking powder
1 tsp vanilla extract
1/2 tsp cinnamon (put more if you love it)
1/2 cup wholewheat flour
3/4 cup instant oats
Optional: raisins, nuts, chocolate

METHOD:

Preheat oven to 325F. Hand beat eggs with coconut oil in a bowl. Add mashed bananas, baking powder, vanilla and cinnamon. Mix. Add apples. Mix. Add flour and oats. Stir well. Pour half a batch in a lightly greased muffin mold for babies. Then add raisins, chocolate and any other goodness you like to the adult batch. Bake for 25 minutes. Remove from oven and let cool off.


Apple Banana Muffins
 
Save Print
These muffins are just a perfect healthy snack for babies and toddlers. There is no sugar of any kind; just apple and banana as a sweetener.
Author: Natasha
Recipe type: muffins, baking
Cuisine: healthy baking, healthy snacks
Ingredients
  • ⅓ cup melted coconut oil (if you don't have it, the recipe works just fine without it)
  • 2 eggs
  • 3 ripe bananas (mashed)
  • 2 small apples, grated (with or without skin works. More fiber with skin)
  • 1 tsp baking powder
  • 1 tsp vanilla extract
  • ½ tsp cinnamon (put more if you love it)
  • ½ cup wholewheat flour
  • ¾ cup instant oats
  • Optional: raisins, nuts, chocolate
Instructions
  1. Preheat oven to 325F.
  2. Hand beat eggs with coconut oil in a bowl. Add mashed bananas, baking powder, vanilla and cinnamon. Mix. Add apples. Mix. Add flour and oats. Stir well.
  3. Pour half a batch in a lightly greased muffin mold for babies. Then add raisins, chocolate and any other goodness you like to the adult batch.
  4. Bake for 25 minutes. Remove from oven and let cool off.
3.5.3208


Filed Under: Breakfast, Recipes, Treats, snacks, desserts, Vegetarian / Vegan / Raw

Classic Panna Cotta

December 30, 2015 by Natasha Leave a Comment

panna cotta

REAL AND NAUGHTY PANNA COTTA

Here is something NOT to give to your small babies! It’s all about parents and their naughty desires.

If you are not going out New Year’s Eve, treat yourself to a simple but simply divine dessert that evening.

When my husband and I met in London 6 years ago, our first real date night was at this cute authentic Italian restaurant in Notting Hill called Osteria Basilico. That night we had the best panna cotta on earth and ever since then always ordering it in restaurants became a tradition.

Until a few days ago, I didn’t know that it was so easy to make it at home! It is a pretty naughty desert in terms of calories (fat and sugar) but it’s so delicious so we splurged.

Soren didn’t have it. One day though.

The dark stuff you see on the top is the natural vanilla powder that settled on the bottom of the ramekin and appeared on top when I flipped it. The recipe called for vanilla extract which I didn’t have.

Recipe from Epicurious.com

panna cotta


INGREDIENTS:

1 envelope unflavored gelatin
2 tbsp cold water
2 cups heavy cream
1 cup half and half
1/3 cup sugar
1.5 tsp vanilla extract

.
METHOD:

1. In a very small saucepan sprinkle gelatin over water and let stand 1 minute. Heat gelatin mixture over low heat until it’s dissolved. Remove from heat.

2. In a large saucepan bring cream, half and half, and sugar to boil over medium heat, stirring.

3. Remove pan from heat and stir in gelatin mixture and vanilla. Divide mixture among eight ramekins and cool to room temperature. Chill ramekins, covered, at least 4 hours in the fridge. Better overnight.

4. When serving, dip ramekins, 1 at a time, into a bowl of hot water 3 seconds. Run a knife around edge and invert ramekin onto center of a small plate.

WHAT’S YOUR FAVORITE NAUGHTY DESERT?


Classic Panna Cotta
 
Save Print
Here is something NOT to give your small babies! It's all about parents and their naughty desires. If you are not going out New Year's Eve, treat yourself to a simple but simply divine dessert that evening.
Author: Natasha
Recipe type: Dessert
Cuisine: Italian
Ingredients
  • 1 envelope unflavored gelatin
  • 2 tbsp cold water
  • 2 cups heavy cream
  • 1 cup half and half
  • ⅓ cup sugar
  • 1.5 tsp vanilla extract
Instructions
  1. In a very small saucepan sprinkle gelatin over water and let stand 1 minute. Heat gelatin mixture over low heat until it's dissolved. Remove from heat.
  2. In a large saucepan bring cream, half and half, and sugar to boil over medium heat, stirring.
  3. Remove pan from heat and stir in gelatin mixture and vanilla. Divide mixture among eight ramekins and cool to room temperature. Chill ramekins, covered, at least 4 hours in the fridge. Better overnight.
  4. When serving, dip ramekins, 1 at a time, into a bowl of hot water 3 seconds. Run a knife around edge and invert ramekin onto center of a small plate.
3.5.3208


Filed Under: Recipes, Treats, snacks, desserts

Classic Whole Wheat Crepes

December 28, 2015 by Natasha Leave a Comment

Whole Wheat Crepes

The day after Christmas. Sad or happy? With a typical sense of relief after a mad race to wrap all the presents in time, not to burn your Christmas dinner and not to forget to feed your kid, comes a bit of a melancholy and a sense of loss. I find that anticipation, the journey, the process is more enjoyable that the destination, the reaching of the goal. That’s not to say that I didn’t enjoy my lazy Christmas Day. I did. Very much. Time suddenly stops and the holiday gently wraps itself around you. Ahhh… But this morning all three of us (I’m speaking for Soren here) felt the need to experience the pleasure that doesn’t expire in any season, holiday or age. Something that doesn’t fade after the noise of the holidays… Ta-da! All this intro for a couple of warm crepes! Kinda crazy, I know.

Anyway, this morning I gave the stage of Soren’s Purple Plate to my renowned sous chef- my husband Farhad. He is the master of crepes so I could just relax and quietly watch the kitchen being destroyed ?. But all worth it – these crepes always come out delicious. We topped them up with sour cream (Russian style), Nutella (World style) and date molasses (hippy style). It’s a simple recipe. Double or triple the proportions if making for more people. The below serves 2 and a toddler.

IMG_3327

A word on date molasses: it’s my new obsession. Ever since my pregnancy I am a prisoner to sweet things. There are so few that are unprocessed (like whole fresh fruits) and even fewer that are mildly processed (like maple syrup, coconut and date sugar). Usually sweeteners are highly processed and contain all kinds of preservatives and ingredients no one can pronounce. I recently discovered date molasses. I buy the brand that contains nothing other than dates. It’s so delicious, natural, unrefined and vegan. Read more here if you are interested in learning more. And since we are on the topic of sugary stuff, read this article to see which sugar is the best for you.


Classic Whole Wheat Crepes
 
Save Print
These whole wheat crepes are a classic easy breakfast. Enjoy them savory with smoked salmon and cream cheese, chicken with vegetables or plain (they are not sweet) or with jam, sour cream, nutella or fruit. So simple yet always feels special.
Author: Natasha
Recipe type: breakfast
Cuisine: world
Ingredients
  • 2 eggs
  • ½ cup of whole wheat flour
  • 7 oz of milk
  • 5 tbsp of water
  • Pinch of salt
  • a knob of melted butter
Instructions
  1. Combine all the ingredients together either by whisking by hand, using a hand-held blender or a regular stand alone blender. Blend until smooth.
  2. Drop 3-4 tbsp of batter into a heated and greased pan (with coconut oil or butter) and pan fry flipping once.
3.5.3208


Filed Under: Breakfast, On-the-go / travel food, Recipes, Treats, snacks, desserts, Vegetarian / Vegan / Raw

CORN APPLE PANCAKES made with YOGURT

December 23, 2015 by Natasha Leave a Comment

Corn Apple Pancakes

Ahh, waking up to a full house of family! A dream (for some ?). I remember when I just moved to the US when I was 20, holidays time was the loneliest time ever. The streets were empty, the driveways crowded with cars, stores closed, and my family was so so far away (in Belarus). I honestly get chills when I think of that time. Now it’s different for me. I feel lucky and blessed.

Whether you are alone or not this holiday week, I hope you will treat yourself to some rest and fun. And maybe your mornings can be filled with some yummy things. Forget healthy. Now is the time to be naughty. Go ahead and pour that Nutella all over your pancakes and make some bacon on the side (my husband is scratching his head wondering where his bacon is ?).

I thought I’d give you an idea for some unusual but very yummy pancakes. They are healthy so please spoil them with some toppings of your choice. ?

I used the corn flour mix from the muffins I made last week. The muffins turned out a touch dry but you certainly can’t say that about these pancakes. I hope you enjoy them.

CORN APPLE PANCAKES made with YOGURT
 
Save Print
Prep time
8 mins
Cook time
10 mins
Total time
18 mins
 
These corn apple pancakes are made with yogurt as a base. Have them with sour cream or fruit puree. A perfect Sunday breakfast for the whole family.
Author: Natasha
Recipe type: Breakfast
Ingredients
  • ½ cup cornmeal
  • ½ cup whole wheat flour
  • 1 tsp baking powder
  • ¼ tsp baking soda
  • ¼ tsp salt
  • .
  • 1 grated apple with skin
  • 1 tbsp of maple syrup
  • 1 cup of yogurt (I used Greek 2% but any will work)
  • 1 egg
Instructions
  1. Mix the dry ingredients first.
  2. In a separate bowl whisk all the wet ingredients together. Now fold the wet ingredients into the dry ingredients. Mix until combined but don't over mix.
Now, depending on which yogurt you are using, you will need to adjust the amount of flour you add. My yogurt was pretty thick. If yours is liquid, then add a little more whole wheat flour. The dough should not be too liquidy but you also should not be able to hold it with your hands.
  1. Use a large spoon to drop pancakes onto the pan heated with coconut oil. Pan fry for 2-3 minutes on each side.
3.5.3208


Filed Under: Breakfast, On-the-go / travel food, Recipes, Top recipes, Treats, snacks, desserts, Vegetarian / Vegan / Raw

Pumpkin Oat Muffins

November 4, 2015 by Natasha Leave a Comment

Pumpkin muffins

When Soren turned ONE, we entered the unknown world of snacks. I’m not much of a snacker myself so to come up with diverse, colorful, nutritious snacks for the baby on a daily basis was kind of stressful for me. Fruits, vegetables and yogurt were the obvious choices but I wanted to also add some muffins, breads, scones, etc. I browsed the isles of Whole Foods and other supermarkets but couldn’t find any brand that didn’t have a long list of ingredients (some hard to pronounce). I try to stay away from foods like that. Baby crackers and snacks of all kinds have acceptable food labels but questionable nutritional value (too much of refined flours or too much sugar).

I decided to start learning to make my own breads and muffins. I’ve never been much of a baker. Firstly, the science is too precise for my impatient nature. Secondly, to bake with unrefined flours and unprocessed sweeteners is hard. Thirdly, because in my small New York apartment, the oven happens to be old and huge so to use it often with a baby roaming around is dangerous and messy (I store all my pots and pans in it). And lastly, my husband would divorce me. He actually has a sweet tooth and enjoys anything baked. The problem is he eats it all at once and then yells at me with accusations.

After a bit of talking him into it, we bought the Breville convection oven. Yes, we sacrificed the precious counter space. But it was totally worth it because now I can bake all kinds of delicious goodness from sweet potatoes to frittatas and cakes. No more excuses.

Today’s muffins are based on Cookie&Kate recipe. I love this girl’s blog. She is doing such an amazing job creating healthy and diverse foods.

I skipped salt and ginger called for in her recipe, used only 1/4 cup maple syrup. For a real breakfast treat, stick to half a cup of maple syrup.

Pumpkin Oat Muffins Pumpkin Oat Muffins Pumpkin Oat Muffins


Pumpkin Oat Muffins
 
Save Print
Prep time
15 mins
Cook time
23 mins
Total time
38 mins
 
These Pumpkin muffins taste more like a breakfast bread than a dessert. If you like sweet baked goods, add more maple syrup. Enjoy!
Author: modified from Cookie & Kate
Serves: 10 muffins
Ingredients
  • ⅓ cup melted coconut oil or extra-virgin olive oil
  • ¼ cup maple syrup
  • 2 eggs at room temperature
  • 1 cup pumpkin purée
  • ¼ cup milk of choice (I used almond milk)
  • 1 teaspoon baking soda
  • 1 teaspoon vanilla extract
  • ½ teaspoon cinnamon, plus more for sprinkling on top
  • ¼ teaspoon nutmeg
  • ¼ teaspoon allspice or cloves
  • 1¾ cups whole wheat flour
  • ⅓ cup old-fashioned oats, plus more for sprinkling on top
Instructions
  1. In a large bowl, beat the oil and maple syrup together. Add eggs, and beat well.
  2. Mix in the pumpkin purée and milk, followed by the baking soda, vanilla extract, salt, cinnamon, nutmeg and allspice or cloves.
  3. Add the flour and oats to the bowl and mix with a large spoon, just until combined. If you’d like to add any additional mix-ins, like nuts, chocolate or dried fruit, fold them in now.
  4. Bake at 325F for 23-25 minutes. Cool before taking out of molds.
3.5.3208


Filed Under: Breakfast, Recipes, Top recipes, Treats, snacks, desserts, Vegetarian / Vegan / Raw

Hi, I’m Natasha, Soren’s mom. Welcome to our own visual menu of healthy meals that everyone in the family can indulge in, including babies. Here you will find mainly my own creations but also recipes discovered elsewhere, tested and enjoyed by my family. We are not vegetarians but most dishes are veggie-forward, often gluten-free and always free of processed ingredients.
A little more about me

STAY IN TOUCH

  • Facebook
  • Instagram
  • Pinterest

Instagram

Instagram did not return a 200.

Follow me for inspiration

Copyright © 2025 · sorenspurpleplate · All rights reserved