Soren's Purple Plate

Babies, kids, and parents eat together. Simple, healthy food ideas.

  • Home
  • Recipes
    • Breakfast
    • Main Meals
    • Fish & Meat
    • Vegetarian & Vegan
    • Soups & Stews
    • Treats & Snacks
    • Smoothies & Drinks
    • On-the-go & Travel
  • First Foods / BLW
  • Outside the Kitchen
    • Interesting Moms
  • About
    • My Eating Beliefs

WEEK 1 of Self-Feeding

April 6, 2017 by Natasha 2 Comments

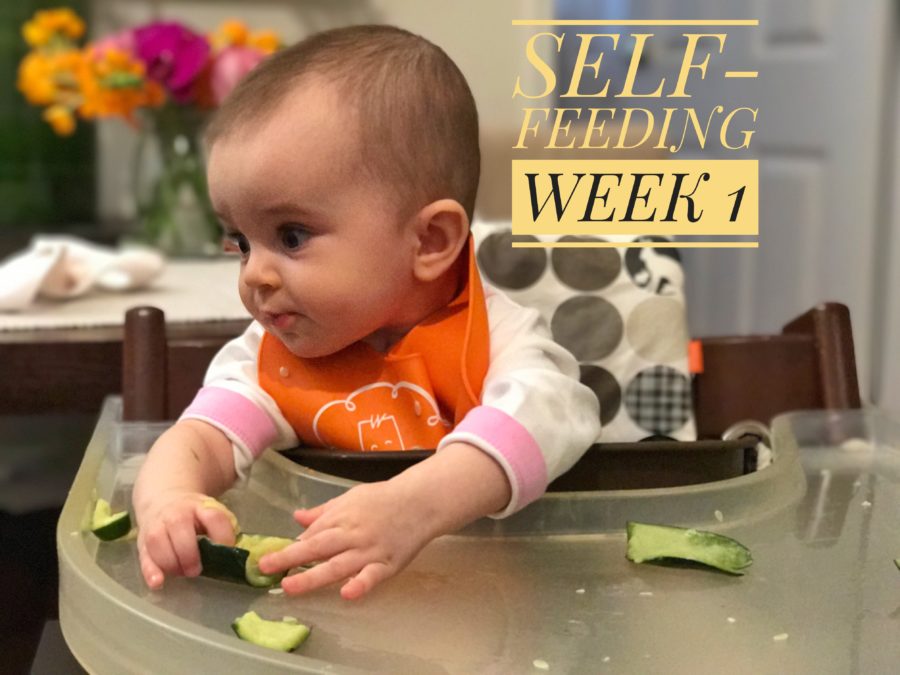
WEEK 1 of SELF-FEEDING with Elise

self-feeding week 1, blw, weaning, starting solids

OUR EXPERIENCE.

If you are just joining me here, I am a big fan of the method of self-feeding a.k.a Baby Led Weaning (BLW). No purees, just real food from the start. If you are unfamiliar, take a look here.

Elise is now 6 months and we just completed the first week of playing with real food. Playing is the key word here. It will be a while until this game turns into real eating. If your grandmas and aunts are looking at you with suspicion (at best), you are not alone. When we were babies, we were fed by the spoon and as early as 3 months. And in the eyes of our moms and grandmas, the food that we were offered was as essential to our growth as the breast milk or formula. Now the views are changing and it is considered that breast milk and/or formula is the main source of nutrition until 12 months of age; the rest is complimentary. There is certainly no pressure for a baby of 6 months to be eating lots of food, if at all.

As far as I’m concerned, babies know best. Before they show real interest in food (by trying to grab everything you are eating and bringing it to their mouths), they are not really ready. But then again, I’m not an expert,  I just follow my intuition second time around.  Every baby is different. Every parent is different. Choose what you will have the most fun with.

When to start?

I am a bit of an impatient mom so I started a week before Elise turned 6 months. It is recommended to wait until 6 months since that’s the time when digestive system is ready for real food. I started by sitting Elise in a highchair for a few minutes at a time. She was a bit wobbly at first but a week later she was ready to start eating. She was grabbing everything around and bringing it to her mouth and was interested in what we were eating. I could tell by the way she was looking at us and by the way she was reaching towards the food.

What to offer?

You can pretty much offer anything. If you research online, you will see babies eating things like chicken legs in barbecue sauce. An important thing to point out here is that BLW can be as healthy or as unhealthy as you make it to be. Self-feeding macaroni and cheese would be considered following Baby Led Weaning practices. Our family is all about healthy food, especially for kids.

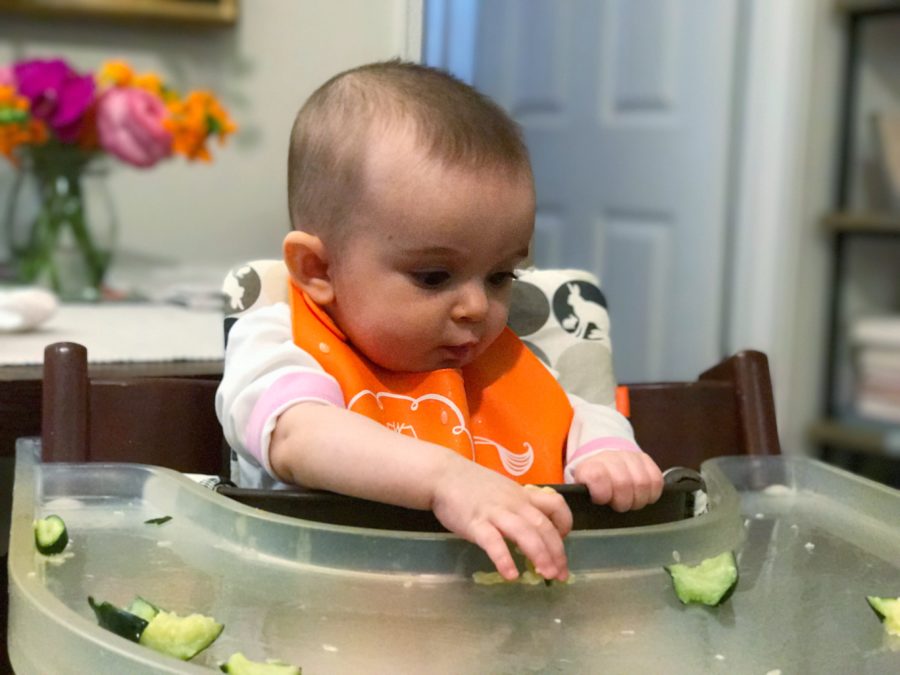
Our MENU was simple, healthy and baby-friendly: pear, avocado, oatmeal, zucchini, red pepper, sweet potato, pumpkin and almond butter. 

NUTS:

The earlier you introduce nut butters, the lesser chance of nut allergy – according to the latest research. Be careful with nut butters. Watch out for any allergic reaction, which can occur after several tries. I made sure I wasn’t alone at home, just in case. If you have nut allergies in your family, pay extra attention and consult with your pediatritian. Soren happens to have walnut and pecan allergy even though no one in the family has it. I will still try to offer it to Elise early but will most likely do it at the pediatrician’s office. Again, just in case.

How much?

It is recommended to try to stick to one-ingredient foods for 2-3 days to rule out any allergy. If you have a predisposition to allergies in your family, you certainly should do that. I offered one ingredient per day, that is, Elise tried 7 different things in a week. I did the same with Soren.

Weeks 1-4 is purely for playing. If nothing goes in, it’s totally fine. Two pieces of steamed veggies or fruits on the tray is more than enough to start the process.

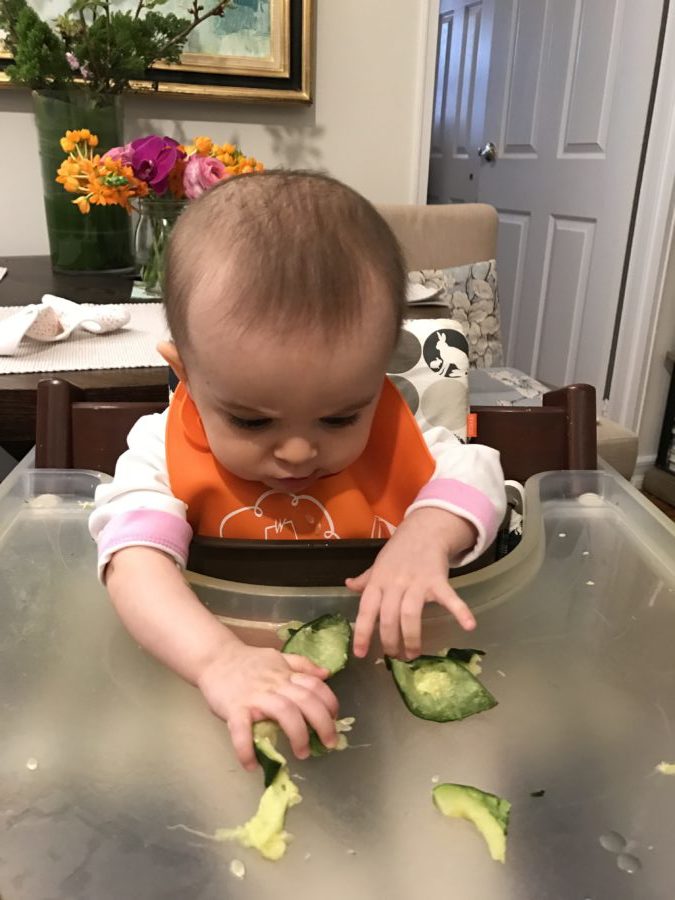
Remember that the pieces should be long enough to hold in the entire fist, not small bites.

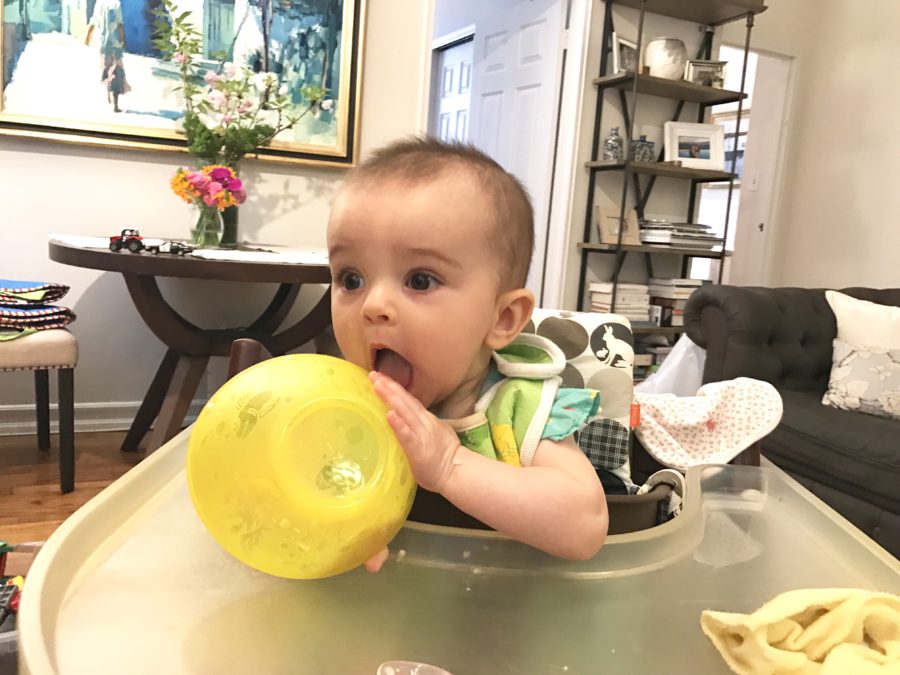
Experience and what to do with a spoon

Elise was still a wobbly sitter so I made sure the first few days were short experiences that would not tire her out. I placed big chunks of steamed veggies or fruit on her tray. I let her look at it and move it around for a few minutes. Because she was still not so good at picking stuff up, especially slimy food, I would help her by placing the food in her fist and guide it to her mouth. She knew what to do then. It was incredible to see how much she improved by the end of first week. She knew exactly what needed to happen and was already good at picking food up, usually with both hands.

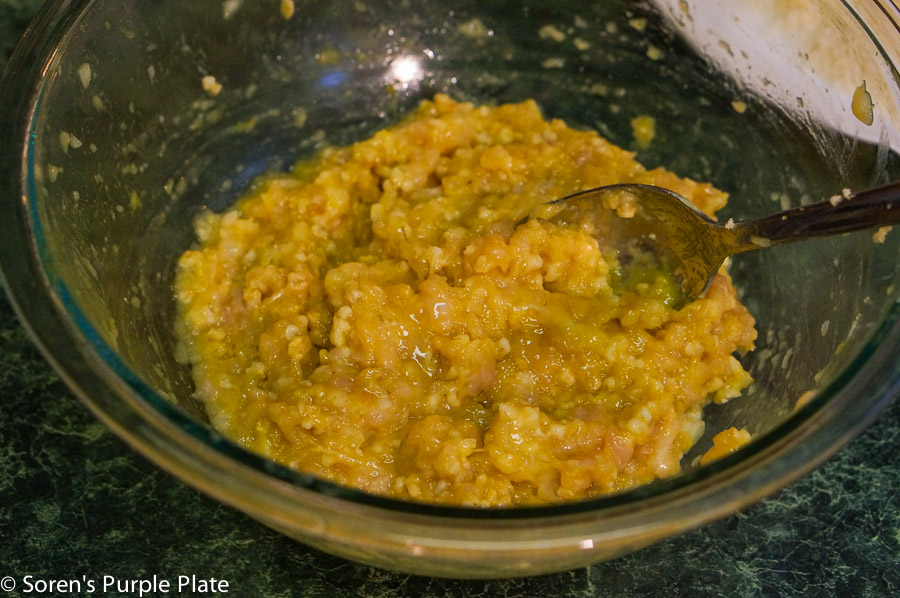
I offered her oatmeal (real old-fashioned kind that was cooked until soft) with a bit of my breast milk. It was pretty unrealistic to expect her to pick up the food with the spoon that early. I was trying to establish the connection between spoon and food by first putting a little oatmeal in her mouth by the spoon myself and then giving her the spoon to hold. Still inexperienced, she gagged a little by placing the spoon too deeply in her mouth. No big deal. Then I would scoop a bit of oatmeal and try to have her grab the spoon and put it into her mouth. Little by little we will get there. It’s a process.

Goal

My goal for WEEK 1 was:

  • to establish interest in food
  • to test the baby’s ability to manage what is offered
  • to create association that spoon is food
  • it was also important to me that if not swallowed, the baby tastes the food. That meant I helped a little by placing the food in her hand or even brought it to her mouth to help bite.

Given how different Elise is from her brother Soren (she doesn’t have the same appetite towards milk, she doesn’t take the bottle or a pacifier, she is not sitting up as early as Soren), I am very pleased with our first week of real food.

The first week or two are the hardest ones for new parents so I wanted to be detailed in my description. I hope it helps. I’ll keep it much shorter next time.

Have a lovely day!

PS: for even more info and Q&A, please consult my Self-Feeding Guide here.


Filed Under: Baby Led Weaning

Self-feeding or BLW second time around

April 3, 2017 by Natasha 2 Comments

BABY LED WEANING SECOND TIME AROUND

If you have never heard of Baby Led Weaning – a method of self-feeding introduced right at 6 months of age – please take a look on this page, where I provide a general overview and answer a lot of common questions.

Here I am again, at the start of real food with my second baby Elise. This time around, I’m more excited and much less anxious and scared.  When I started the method of self-feeding with Soren exactly two years ago, a lot of people looked at me like I was a crazy person. To give the baby a huge chunk of sweet potato right at 6 months? What about choking? Despite some disapproving looks of my family members, I persisted with it and I am so happy I did. My son Soren will try any food, drinks green, red and weird color smoothies, ate independently right from 6 months and mastered spoon skills by 13 months. It could be a coincidence but my experience and observation of other kids around tells me Baby Led Weaning or Self-Feeding has something to do with it.

If you follow me already, you don’t need convincing that healthy food means healthy body and more energy. We are on the same page here. So why did I decide to go with  this non-traditional feeding method (called Baby Led Weaning or SELF-FEEDING) instead of making healthy purees and feeding with a spoon?

? I want to raise kids who have a POSITIVE ATTITUDE TOWARDS FOOD, who are eager to try any food and excited about it
? I want my kids to be independent eaters early, because this means … ??(look at first point)
?I want my kids to regulate their appetite: they eat how much they want and I never force a spoon into them, which means healthy attitude towards food and no overeating later in life
?In the time of growing disease that’s mainly caused by poor food choices, I want my kids to be health advocates and lead by “kale” example


WHAT’S WRONG WITH PUREES?

Nothing. Nothing at all. Healthy homemade purees is a wonderful traditional way to introduce solid foods into your baby’s life. Like with Baby Led Weaning, you can provide lots of flavors and colors.  You avoid most of the mess during feedings because you control the feeding process unlike in Baby Led Weaning where your baby is the boss. What you are missing out on is textures: you might have a harder time with introduction of chunks in the later months. You are not providing an opportunity to early fine-tune those motor skills since the baby is not playing with food with her fingers/hand right from the start. You are making an extra effort to blend the food into a puree. And mainly, you are in control and your baby is getting used to you feeding her, which is kind of a passive process, potentially resulting in less interest in self-feeding down the line.

You should pick a method or a combination of methods that you are most comfortable with and that will provide the most fun for you and your little one.

In the next few weeks I will try to share with you my experience. I can not guarantee that my daughter Elise will be as interested in self-feeding as Soren was but I will try to provide equally exciting food world for her and let her be in charge.

I’m not a medical professional or an expert on feeding babies, I’m just a mom who is very excited to share with you my experience and hopefully inspire you to try this method since I so much believe in it.


Filed Under: Baby Led Weaning

TEA FOR KIDS

March 16, 2017 by Natasha Leave a Comment


The winter here in New York is getting the best of all of us. It’s March and everyone is so thirsty for some sunshine yet the city was just covered by three feet of snow. Fun for one afternoon of excitement and sledding if you live by the park but not so fun going anywhere when it’s impossible to cross the streetdqs. It’s also freezing. Anyway, it’s just winter. We’ll get over it.

My family has been stuck indoors for a week now with a serious virus. Everyone is coughing and sneezing. We are now past the temperature point but throats still need soothing. Mom and Dad have been drinking tea all along but kids can be funny with it, right? Will yours drink tea? What kind?

Soren, my 2.5 year-old, refuses ginger no matter how I tried but I finally found a blend that he likes. I make my own blend with the loose herbs rather than brewing a ready-made bagged tea. I know exactly what goes into it and how much.

CAMOMILE, SPEARMINT and LAVENDER are considered safe for children. They calm the nervous system as well as comfort during a cold. I make a mild tea with 50% camomile, 40% mint and just a dash of lavender.

Add honey, squeeze some lemon and you have a wonderful warm drink for sick kiddos. Splurge on the honey to increase the chance of your kids liking it.

Filed Under: Smoothies and drinks

QUINOA VEGGIE CUPS

March 14, 2017 by Natasha 2 Comments

This week I’m very honored to be a guest at #HealthyKidsCommuity. If you don’t know, it’s an amazing INSTAGRAM community of parents who put healthy meals for the family and especially children at the top of their priority list. You can find lots of healthy recipe and food ideas. These people are very creative. It’s my constant source of inspiration.

Unfortunately, instead of loosing myself in creativity over a superb family meal (the theme of the week), I have been dealing with winter and the entire family being sick. Happens to all of us, right? Not having much time on hand, I prepared these tasty quinoa cups that everyone can enjoy: kids for dinner and parents as an appetizer or even dinner if you throw in a little salad.


When cooking quinoa, I added a tablespoon of turmeric for extra immunity boost and, of course, color. Leftover quinoa is an ideal way to prepare these little cups as it really won’t take you much time at all.

They are absolutely delicious when warm but held up the flavor pretty well when reheated the next day.


QUINOA VEGGIE CUPS
 
Save Print
These super healthy quinoa cups are a fast and easy dinner for children. Add a teaspoon of turmeric to quinoa for extra immunity boost and color.
Author: Natasha @ Soren's Purple Plate
Ingredients
  • ​
  • 2.5 cups cooked quinoa
  • a few broccoli florets
  • 2-3 spring onions
  • 1 small zucchini
  • 2 eggs
  • ½ cup shredded mozarella cheese
  • ⅓ tsp dried basil
  • Salt/pepper
Instructions
  1. ​Wash and chop all the vegetables. Combine them with quinoa.
  2. In a separate bowl beat the eggs by hand and add salt, pepper, dried basil, and cheese.
  3. Pour the egg mixture over quinoa and mix well.
  4. Bake in muffin tins (using either silicone or paper liners) for 20-25 minutes at 350F.
Notes
I have a convection oven so everything cooks faster there. You might want to cook yours a little longer in the regular oven.
Also you can use any cheese you like instead of mozzarella.
3.5.3208


Filed Under: Main meals, On-the-go / travel food, Recipes, Vegetarian / Vegan / Raw

A Writer and Mom on Raising Kids and Being Herself

February 10, 2017 by Natasha Leave a Comment

Santa Monica sunset

Dear working moms, stay-at-home moms, expecting moms, aspiring moms, grandmas, grandmas-to-be, and anyone interested in the thoughts, actions, choices, feelings, struggles and joys of the wonderful mothers I know or yet to get to know.

I’m opening my Interesting Moms section today with a stellar woman – my dear friend Stacy Suaya. The photo above was taken on a casual, yes casual, stroll with the kids when Soren (here shamelessly with a pacifier) and I visited Stacy and her two wonderful boys Tiago and Valentino in Los Angeles last year. I’m way overdue with this post but you know, better now than never.

To the world Stacy is known as a Los Angeles-based writer with an emphasis on food, fashion, wellness and travel. She has contributed to the New York Times, Los Angeles Times, Angeleno Magazine and AFAR.com. Her debut novel, represented by Michelle Richter at Fuse Literary, is coming soon.

To me, she is an incredible human being, an old soul, the most genuine person I know, direct, honest and caring friend. She is someone who lives to learn and improve herself and the world. She is always hungry for new ideas and trends be it in the realm of raising kids or preparing healthy foods.

The quality that I admire in her the most is that she is in tune with herself and is not afraid of judgement of others. She doesn’t fall into the trap of a self-pitying mommyhood. When she’s had it with her kids, she calls for help right away. To her, being emotionally vibrant and healthy for her children is top priority.

Here is what Stacy had to share with me. Keep reading.

Stacy Suaya

Do you love/value yourself more now that you are a mom?
Yes, I feel less selfish, more loving, and in general, I have new dimension. I’m reading a book right now called Quantum Wellness, and the author says that engaging your multiple intelligences (whether musical, mathematical, intuitive, or as yet undefined) you light up different areas of the brain, creating more space for a broader breakthrough. Since I’ve had children, not only am I engaging a new skill set by mothering and learning about childhood development, I’ve also recently taken up cooking as a conduit for feeding the whole family healthier foods. I can only imagine what will happen if either of them develop an interest in music or art! It’s such a fun adventure.

What would you like you kids to be like when they grow up?
At peace with whatever choices they make, and strong enough to meet all the challenges that come their way.

Do you compare yourself to other moms?
Only if it’s constructive, like taking cooking and nutrition lessons from you! Other than that, I try to remember the phrase “keep your eyes on your own paper.”

How do you treat yourself? What do you do for yourself to relax and get away? How often?
I’ve recently gotten into meditation. I highly recommend that. I try to go to a guided group meditation for 45 minutes at least once a week, and I’ve been meditating for 10 minutes a day with the Headspace app. It’s like a mini-vacation.

What advice would you give your younger self on what not to worry about during pregnancy/birth/raising kids?
Pregnancy: Plan something exciting or relaxing for the time surrounding the due date. Even if it’s binge-watching some show you never had time for or treating yourself to multiple spa dates. I gave birth a week late during both pregnancies, and I was so desperate to get each out, it was all I could focus on to try everything in the book: spicy foods, walking, etc. None of it works!

Birth: Don’t try to be a hero! If you’re getting an epidural, ask for it before your pain  is excruciating, since it takes a few minutes for them to prepare it. I waited too long, trying to impress my husband and mother with my pain tolerance. I regret that!

Raising kids: Be present. I know everyone has short attention spans these days, but zeroing in on them and really watching them bloom is a miracle.

Santa Monica with kids
Mom love

Filed Under: Interesting moms, Outside the kitchen

Almond Oat Peanut Cookies

October 16, 2016 by Natasha Leave a Comment

Almond Oat Peanut Cookie

Hello, my perfect cookie, which just happens to be gluten free and vegan.

There are as many perfect cookies as there are people. My perfect cookie depends on what mood I wake up in and the weather. This one, my friends, I can eat in any season and any mood because it’s crunchy, healthy, mildly sweet and oh-so-toddler-approved.

I played with Barnerybutter.com recipe and changed a few things around, mainly reducing sweetness and adding peanut butter.

I have to warn you, the dough was a bit too crumbly and I doubted the cookies would hold together but they so did!

Another important thing: I used real peanut butter, the one you make yourself in stores like Whole Foods. It’s dry and made of just one ingredients – peanuts. If you are using the runny peanut butter from a jar, then definitely put less of it in the dough.

Almond Peanut Oat cookie

Almond Oat Peanut Cookie


Almond Oat Peanut Cookies
 
Save Print
These healthy cookies are crunchy, mildly sweet and oh-so-toddler-approved. They also happen to be vegan and gluten free.
Author: Natasha @ Soren's Purple Plate
Recipe type: sweets
Ingredients
  • 2 cups rolled/old-fashioned oats
  • 1 cup almond flour/meal
  • ½ cup coconut flakes
  • 1 tsp cinnamon
  • ⅓ tsp salt
  • 1 tsp raw vanilla powder (or extract)
  • ½ cup peanut butter
  • ?
  • ¼ cup melted coconut oil
  • ⅓ cup maple syrup
  • ?
Optional: chocolate chips, nuts, hemp seeds, chia seeds
Instructions
  1. Combine all the dry and wet ingredients in two separate bowl. For me peanut butter was a dry ingredient. If yours is runny, it will be a wet ingredient.
  2. Mix all together. I used my hands to crumble peanut butter and mix everything well. My dough was crumbly but sticky enough to form little balls.
  3. Stir in all the optional ingredients now.
  4. With your hands form little balls, flatten them and place on a tray lined with parchment paper.
  5. Bake at 350F for 15-17 minutes. Let them cool before trying.
3.5.3208


Filed Under: Recipes, Top recipes, Treats, snacks, desserts

Crispy Coconut Chicken

September 21, 2016 by Natasha

Coconut Chicken

Hello yummy crispy coconut chicken! It’s made of healthy ingredients but it’s fried.

I would like to state  that I would not offer this chicken to a baby under 1. Yes, I am a fan of Baby Led Weaning (what is it?) but Baby Led Weaning can be as healthy or unhealthy as you make it to be. Babies can be given the most greasy foods right at 6 months and, technically, it would be considered BLW. The main premise is that you offer your child whole foods (large chunks instead of purees) and leave them to be independent eaters (rather than spoon-feeding them from 6 months.) So there. My philosophy is – healthy foods at any cost.

That said, my son is now approaching his SECOND Birthday and I have to admit I definitely have relaxed a lot more about what foods he eats. His appetite is still good but the food preferences are there, sometimes very strong, like a plate can fly high into the air and spill all over the carpet and couch if he doesn’t like what’s on it. I used to be a purist when it came to baby food and I am glad I put the effort. I think it’s paying off already. But at this point, Soren eats a lot more traditional kids foods.

On to the recipe

If you use a non-stick pan, you can make this chicken with minimal oil. If you would like to achieve maximum crispiness, then it’s better to use a regular pan with a considerable amount of oil (however much you need for the chicken not to stick).

It won’t be crispy:

  • if you cover the pan with the lid
  • if you refrigerate
  • if you use too low heat

Crispy or not, it’s still delicious.


Coconut ChickenCoconut chicken


INGREDIENTS:

2 large chicken breasts
2 eggs
1/2 cup flour (I used whole wheat)
1 cup unsweetened coconut shreds
1/2 cup panko (Japanese breadcrumbs)
Coconut oil

METHOD:

1. Prepare 2 plates: one with flour and one with coconut mixed with panko. Beat the eggs. Prepare a pan with coconut oil. If you want really crispy chicken, then use a regular pan (not a non-stick) and use quite a bit of coconut oil.
2. Cut the chicken into thin strips. Season with salt and pepper. Dredge in flour first, then dip in egg mixture, then dredge in coconut shreds mixture.
3. Pan fry for 8 minutes on each side. If you used a lot of oil, then place the cooked chicken on paper towel to absorb excess oil.


Crispy Coconut Chicken
 
Save Print
Author: Natasha @ Soren's Purple Plate
Ingredients
  • INGREDIENTS:
  • 2 large chicken breasts
  • 2 eggs
  • ½ cup flour (I used whole wheat)
  • 1 cup unsweetened coconut shreds
  • ½ cup panko (Japanese breadcrumbs)
  • Coconut oil
Instructions
  1. Prepare 2 plates: one with flour and one with coconut mixed with panko. Beat the eggs. Prepare a pan with coconut oil. If you want really crispy chicken, then use a regular pan (not a non-stick) and use quite a bit of coconut oil.
  2. Cut the chicken into thin strips. Season with salt and pepper. Dredge in flour first, then dip in egg mixture, then dredge in coconut shreds mixture.
  3. Pan fry for 8 minutes on each side. If you used a lot of oil, then place the cooked chicken on paper towel to absorb excess oil.
3.5.3208


Filed Under: Fish and Meat, Main meals, On-the-go / travel food, Recipes

Vegan French Lentils with Rice

September 16, 2016 by Natasha Leave a Comment

20160913-dsc01443

This simple vegan dish used to be my go-to dish when I was just starting Baby Led Weaning with Soren (what is Baby Led Weaning?) Luckily, he liked almost anything I put in front of him in those days. Now that he is nearing his second birthday, he is still a very good eater but he is definitely more selective than he used to be. Nevertheless, whenever I make lentils, he is eager to eat them at least once. He can refuse the same dish if I offer it again the same or the next day.

Lentils and Rice are considered a complete protein. What is it? Keep reading.

A Complete Protein

Simply put, our body needs a full range of amino acids (building blocks of  protein) to function properly. 12 of them we produce ourselves but 9 additional ones, which are called essential amino acids, we need to get in adequate amounts from food. Animal protein is usually considered a complete protein, meaning it contains all 9 of the essential amino acids. In the plant world, quinoa and buckwheat are among the few vegan complete proteins. Many other plant food contain several essential amino acids but not all 9 in one plant. It is easy to achieve a complete protein if you combine legumes and grains. It’s a generalization but the idea is that: rice and beans make up a complete 9 amino acids that we need.

On to the recipe…

If you make a dish like this, you can skip meat and rest assured that you kid is getting all the protein he/she needs. Adding as many vegetables as you have will make it into a sort of nutrition powerhouse. I used mushrooms, celery, carrots and onions. This  dish doesn’t have sophisticated flavors but it makes for a nice, healthy, earthy, and a satisfying meal.

20160913-dsc01445

Ingredients:

  • 1 cup french lentils
  • 1/2 cup rice (white or brown)
  • 1/2 yellow onion
  • 3-4 garlic cloves
  • 3 celery stalks
  • 3 carrots
  • 5-8 mushrooms (of your choice)
  • Optional but good: 1 tbsp of butter

Method:

  1. In a medium pot, heat up a little oil (I used avocado oil). Sauté finely chopped onions and garlic for 5-8 minutes. Add sliced mushrooms. Continue sautéing for 5 more minutes. I like seasoning a little with salt and pepper at this point and adding the butter.
  2. Add finely chopped celery and carrots ( I like cutting in circles). Stir. Sauté for 5 minutes.
  3. Add french lentils, very well rinsed. I don’t usually soak lentils but you can (for 2 hours minimum) to speed up the process a little. Pour enough water to cover the lentils by an inch. Bring to a boil and simmer on low heat for 5 minutes. Then add the rice. Continue cooking everything on low heat for 25 minutes. If you feel like the water is evaporating too soon, add a little more. Season with salt. Turn off the heat and let sit under cover for 5-10 minutes.

NOTE: Don’t season with salt while cooking as it will make lentils hard.

20160913-dsc01441


Vegan French Lentils with Rice
 
Save Print
If you make a dish like this, you can skip meat and rest assured that you kid is getting all the protein he/she needs. Adding as many vegetables as you have will make it into a sort of nutrition powerhouse. I used mushrooms, celery, carrots and onions. This dish doesn't have sophisticated flavors but it makes for a nice, healthy, earthy, and a satisfying meal.
Author: Natasha @ Soren's Purple Plate
Ingredients
  • 1 cup french lentils
  • ½ cup rice (white or brown)
  • ½ yellow onion
  • 3-4 garlic cloves
  • 3 celery stalks
  • 3 carrots
  • 5-8 mushrooms (of your choice)
  • Optional but good: 1 tbsp of butter
Instructions
  1. In a medium pot, heat up a little oil (I used avocado oil). Sauté finely chopped onions and garlic for 5-8 minutes. Add sliced mushrooms. Continue sautéing for 5 more minutes. I like seasoning a little with salt and pepper at this point and adding the butter.
  2. Add finely chopped celery and carrots ( I like cutting in circles). Stir. Sauté for 5 minutes.
  3. Add french lentils, very well rinsed. I don't usually soak lentils but you can (for 2 hours minimum) to speed up the process a little. Pour enough water to cover the lentils by an inch. Bring to a boil and simmer on low heat for 5 minutes. Then add the rice. Continue cooking everything on low heat for 15 minutes. If you feel like the water is evaporating too soon, add a little more. Season with salt. Turn off the heat and let sit under cover for 5-10 minutes.
NOTE: Don't season with salt while cooking as it will make lentils hard.
3.5.3208


Filed Under: Main meals, Recipes, Vegetarian / Vegan / Raw

HEALTHY CHICKEN OAT MEATBALLS

September 6, 2016 by Natasha 2 Comments

Baby Led Weaning (what is it?) appropriate from 7 months if you omit salt.

Chicken Oat Meatballs

When I can, I try to grind my own meat. It sounds complicated but it actually is not at all and it takes just a few minutes. The only thing you would need to do is wash an extra piece of kitchen equipment. I know it sounds like  a hassle to most moms and dads who don’t have time for anything extra, but to me it is really worth it.

WHY GRIND YOUR OWN MEAT:

  • SAFETY: It is much safer to consume freshly ground meat versus the ground meat that has been sitting in the store for a few days (only very high-end stores grind their meat daily). Once exposed to air, it is more likely to be contaminated with bacteria. I honestly don’t even want to go into the bacteria topic, it’s so gross. There is plenty written about it online.
  • QUALITY: It tastes better and fresher.

HOW TO GRIND YOUR OWN MEAT:

I don’t have a special meat grinder (one day when I have a bigger kitchen, I’ll invest into something like this). I used to use my Vitamix but I found it was way too difficult to clean afterwards because the fibers of the meat would roll around the blade and get stuck. For a while now, I have been using my small, affordable kitchen helper Cuisinart Mini Prep Food Processor (view and buy it on Amazon). I use it for everything from chopping to making my own hummus, nut butter, tomato sauce, etc. It’s tiny and only costs $40.

To grind your meat, just cut it up into big chunks and pulse for 15-20 seconds. Don’t over process because you will get a very pasty mass, which would still work for meatballs but I prefer to leave meat with a little texture. For a big batch, you would need to grind in batches but it really takes little time.

Make sure to thoroughly clean everything afterwards in warm soapy water. Once done, I like to pour boiling water on all the parts for extra disinfection. Dry completely before putting away.


Onto the recipe…

It’s ideal to use steel cut or old-fashioned oats in this recipe. I’m a big fan of leftovers. Just make a larger than usual batch for breakfast and use whatever is left for this recipe.

These meatballs freeze well.

Chicken Oat Meatballs Chicken Oat Meatballs Chicken Oat Meatballs Chicken Oat Meatballs Chicken Oat Meatballs


HEALTHY CHICKEN OAT MEATBALLS
 
Save Print
These easy healthy meatballs are a perfect meal for babies, kids and adults. They are very quick to make and also freeze well. Use panko breadcrumbs for extra crunchiness and turmeric for extra health punch and color. Enjoy!
Author: Natasha @ Soren's Purple Plate
Recipe type: healthy meatballs
Ingredients
  • 1 cup cooked oats (I used the leftover steel cut)
  • 2 large chicken breasts or 1 lb ground chicken
  • 2 eggs
  • ½ onion
  • 1 garlic clove
  • 1 tsp turmeric
  • panko breadcrumbs (or any other breadcrumbs)
Instructions
  1. Mince or finely chop the onion. Mix all the ingredients well together reserving the breadcrumbs for later. Season with salt and pepper (unless preparing for babies under 1). The mixture will seem a little runny but once you dredge the meatballs in the breadcrumbs, they will hold up well.
  2. Preheat your large pan. I didn't have a non-stick available so had to use a bit more oil. Avocado oil is perfect for it since it has a very high smoke point.
  3. Form little balls and roll them in breadcrumbs. I love using Japanese panko breadcrumbs because they make the meatballs nice and crunchy. Any other breadcrumbs will do.
  4. Pan fry on medium heat for 8 minutes on each side. Place on a paper towel once done to soak up extra oil.
Notes
Panko breadcrumbs are Japanese breadcrumbs that add crunchiness and airiness to food.

Avocado oil and coconut oil are ideal for frying as they have very high smoke point.

Turmeric is a strong anti-inflammatory spice that is very mild in flavor and bright in color.
3.5.3208


Filed Under: Fish and Meat, Main meals, Recipes

Apple Ricotta Breakfast Tart

August 20, 2016 by Natasha Leave a Comment

Baby Led Weaning (what is it?) appropriate from 7 months or as soon as you offer whole eggs.

Apple Ricotta Tart

Good morning summer Saturday!

Almost 10 years later, I’m still trying to learn to ignore the humidity in this city of New York. Only a very good attitude can save you from it, I’m telling you. We are lucky to live close to the park and all the wonderful playgrounds have sprinklers but man, when you are 6 weeks away from giving birth and running around after your almost 2-year-old toddler, little can save you… Sorry, had to vent.

Onto the better things… For breakfast we usually alternate between eggs (think omelets, frittatas, boiled, fried, etc.), porridge of any kind (buckwheat, oatmeal, millet, quinoa) and pancakes (the thousand versions that I often feature on Instagram). And then there is RICOTTA! Ricotta and farmer’s cheese deserve its own breakfast category in my world. I grew up on farmer’s cheese so it’s pretty much in my DNA. Unlike the Italians who use it mainly in pastas, I love ricotta in pancakes, tarts and just on its own with fruit or honey.

CALCIUM requirement for kids:

1-3 years old – 700 mg per day

4-8 years old – 1000 mg per day

Guess what? Ricotta has 500mg in 1 cup (compared to 300 mg in 1 cup of milk).

My son doesn’t drink regular cow’s milk but he gets his calcium usually from leafy greens, fermented dairy products (yogurts, kefir), goat milk and ricotta and farmer’s cheese. I will dedicate a special post to dairy and calcium some other day.

Apple Ricotta Tart Apple Ricotta Tart Apple Ricotta Tart Apple Ricotta Tart

Now, about this tart. It’s mildly sweetened with one ripe banana and apples. It has zero processed sugar. It has lots of calcium and can serve as breakfast, snack, to-go food or dinner. You need to make it cool substantially for it to harden. Otherwise, you will most likely need a spoon to eat it. If warm, I like it with sour cream or yogurt.


INGREDIENTS:

1 ripe banana
1 cup ricotta
2 eggs
2 egg yolks
1/2 cup kefir
1 tsp baking soda
1/2 cup semolina flour
2 tbsp coconut oil
pinch of salt
cinnamon
1/2 tsp vanilla powder
1 apple

Optional: raisins, chia seeds, coconut shreds, maple syrup, honey

METHOD:

1. Mash the banana. Add ricotta and eggs. Whisk by hand. Add the rest of ingredients (except apple) and let the dough sit for 10 minutes for semolina to expand.

2. Oil up your baking dish. Pour the dough into it. Thinly slice the apple and arrange it on top. You can sprinkle with more cinnamon.

3. Bake at 350F for 25-30 minutes. I have a compact convection oven so it takes me less time to bake. The tart will be ready when the top is golden and the toothpick comes out clean. Might take you 30 mins with regular oven. Play with the time.


Apple Ricotta Breakfast Tart
 
Save Print
Zero processed sugar, this mildly sweet ricotta tart is a perfect breakfast tart for the entire family including babies from 7 months old if you are offering whole eggs. Calcium rich and guilt-free. Enjoy!
Author: Natasha @ Soren's Purple Plate
Recipe type: Breakfast
Ingredients
  • 1 ripe banana
  • 1 cup ricotta
  • 2 eggs
  • 2 egg yolks
  • ½ cup kefir
  • 1 tsp baking soda
  • ½ cup semolina flour
  • 2 tbsp coconut oil
  • pinch of salt
  • cinnamon
  • ½ tsp vanilla powder
  • 1 apple
  • Optional: raisins, chia seeds, coconut shreds, maple syrup, honey
Instructions
  1. Mash the banana. Add ricotta and eggs. Whisk by hand. Add the rest of ingredients (except apple) and let the dough sit for 10 minutes for semolina to expand.
  2. Oil up your baking dish. Pour the dough into it. Thinly slice the apple and arrange it on top. You can sprinkle with more cinnamon.
  3. Bake at 350F for 25-30 minutes. I have a compact convection oven so it takes me less time to bake. The tart will be ready when the top is golden and the toothpick comes out clean. Might take you 30 mins with regular oven. Play with the time.
3.5.3208

Filed Under: Breakfast, Recipes, Top recipes, Treats, snacks, desserts

  • 1
  • 2
  • 3
  • …
  • 5
  • Next Page »

Hi, I’m Natasha, Soren’s mom. Welcome to our own visual menu of healthy meals that everyone in the family can indulge in, including babies. Here you will find mainly my own creations but also recipes discovered elsewhere, tested and enjoyed by my family. We are not vegetarians but most dishes are veggie-forward, often gluten-free and always free of processed ingredients.
A little more about me

STAY IN TOUCH

  • Facebook
  • Instagram
  • Pinterest

Instagram

Instagram did not return a 200.

Follow me for inspiration

Copyright © 2025 · sorenspurpleplate · All rights reserved