Soren's Purple Plate

Babies, kids, and parents eat together. Simple, healthy food ideas.

  • Home
  • Recipes
    • Breakfast
    • Main Meals
    • Fish & Meat
    • Vegetarian & Vegan
    • Soups & Stews
    • Treats & Snacks
    • Smoothies & Drinks
    • On-the-go & Travel
  • First Foods / BLW
  • Outside the Kitchen
    • Interesting Moms
  • About
    • My Eating Beliefs

Hello world….

July 31, 2016 by Natasha Leave a Comment

20160621-DSC00550

It is a sweltering New York summer day so I thought why not today. Why not get courageous enough to open up this little blog to the world.  After three years of thinking about it, I’m actually doing it. You’d think having a baby would postpone the realization of any personal ideas until a later, much freer future but to my own shock, I find myself more focused, determined and generally productive these days. I’m sure most mothers can relate, especially those who are out of the pure chaos of the first six sleepless months. Congrats on that!

There will be lots of food on these pages with plenty of instructions, suggestions and tips. I’ll gladly share all I have learnt since the time I didn’t know how to cook at all. I read numerous nutrition books and articles, watch food documentaries, which influence the way I treat my body and food. I hope you will benefit from my knowledge and research as well. I’ll share my story of Baby Led Weaning (what is it) in hopes of alleviating the stress of many first time moms who don’t know where to begin and how and what to feed to their baby. I really wish to inspire you to eat healthy and offer the most nutritional things that also taste good to your family and especially your kids.

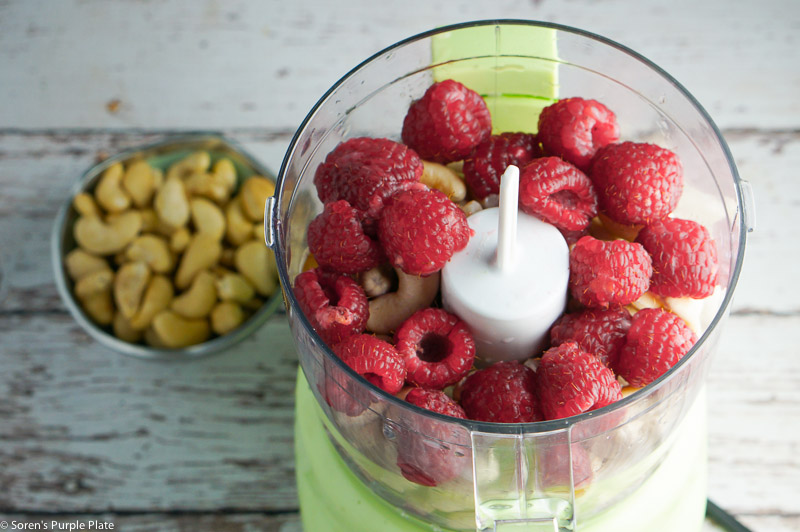
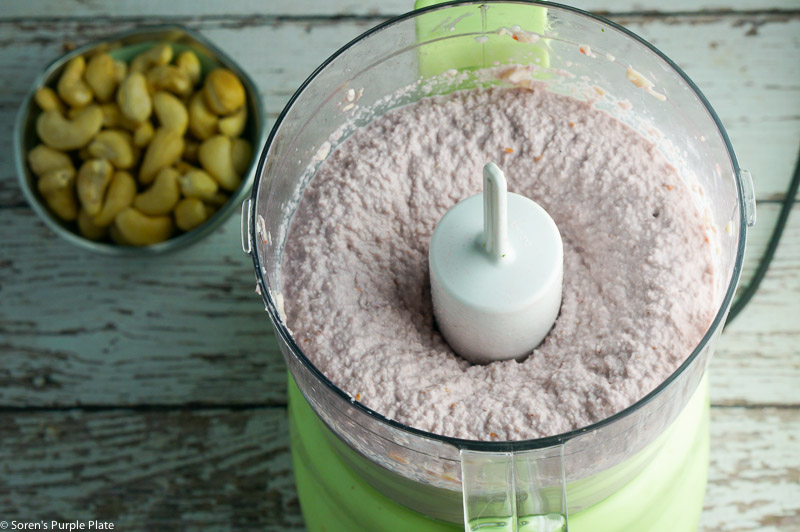
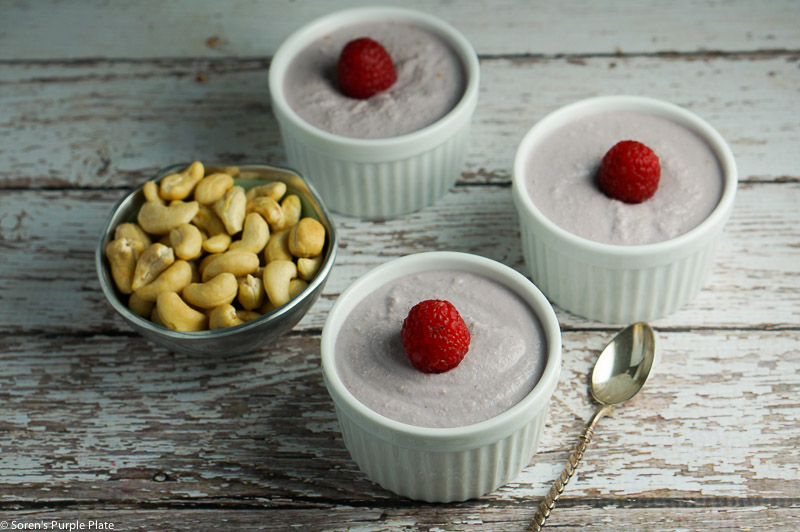
But this post is not about ingredients, healthy eating, any food trend or how to best feed your kids. It’s about no rules, improvisation and following your intuition. The best things in life come from the heart and from breaking the rules. That’s how I like to cook. I can barely follow a recipe without adding something of my own or changing it entirely, of course at a certain cost especially with baking! But it’s fun and more often than not you become an inventor of something unique and delicious. I hope my posts motivate you to create your OWN food, be it through trial and error. There is a huge satisfaction to be found in making something on a whim that actually tastes good to you, your family or your neighbor (I have some lovely neighbors who peek in once in a while to steal a cookie or two). If your husband, wife, child or friend comes for a second helping, it will leave you with a smile for the rest of the day. If you are just starting out, you might be surprised at how fast you become good, or it might take you just a bit of time to build up essential skills and knowledge before you start to rock in the kitchen.

Oh, and trust me, we as a family go way off course quite often. It is fun and it is encouraged: a balanced approach makes healthy eating sustainable, especially for those who haven’t yet learnt to love the “good-for-you” foods.

So follow along my journey of mommyhood imperfections, healthy kitchen adventures and attempts to raise a self-reliant, food-loving, soulful human being.

A little about me and my eating beliefs here.


Filed Under: Outside the kitchen

Cashew Raspberry Mousse

January 19, 2016 by Natasha Leave a Comment

cashew raspberry mousse

This dessert/snack is Baby Led Weaning appropriate from 7 or 8 months if you skip maple syrup (provided there are no nut allergies in the family). I was nervous the first and second (and third) time I gave nut butter to Soren when he was around 7 months but everything turned out ok. Our pediatrician encouraged me to give him everything (except honey) right from 6 months. She said the latest research actually indicates that the sooner you start introducing foods that are thought of as allergens the better (again, only if you don’t have history of allergies in your family). I think Mom’s intuition will guide you  best.

If you are craving something sweet but have committed to a healthier diet this year, try this easy 3-ingredient homemade cashew mousse. Cashews are an abundant source of essential minerals (tons of copper, selenium, magnesium, phosphorous and zinc), which are necessary for a proper function of our body from the production of red blood cell to the brain development.

This creamy sauce can be eaten as a mildly sweet mousse when chilled, added to your oatmeal in the morning, you can dip pancakes in it or add it to smoothies. It lasts about 3 days in the fridge. I made it for Soren and I to snack on.

You can control the sweetness by how much maple syrup you add. The recipe below makes a mildly sweet mousse.

SOAKING CASHEWS:

Below you can see that cashews that have been soaked for 3-4 hours expand and become whiter. They also soften, which is perfect for blending and making all kinds of sauces and mousses.
soaked cashews
raw soaked cashews
Soaking nuts is very important. I won’t go into details on why since I’m not a nutritionist and many other sources can demonstrate it in depth. All I will say is that by soaking nuts and seeds you increase the amounts of nutrients your body can absorb since soaking breaks down the substance that usually inhibits the absorption.
blending raw cashews
Cuisinart mini food processor
raw cashew raspberry mousse

INGREDIENTS:

1 cup of cashews
1/2-1 cup fresh raspberries
1 tbsp of maple syrup

A pinch of salt

METHOD:

1. Cover cashews with plenty of water and soak overnight in the fridge.

2. Drain cashews and place in a blender with fresh raspberries. Add a pinch of salt and maple syrup. Blend on high until the mixture is smooth and creamy (no pieces of nuts or berries).

3. Spoon into ramekins or small cups and chill for 4 hours.

Cashew Raspberry Mousse
 
Save Print
This creamy sauce can be eaten as a mildly sweet mousse when chilled, added to your oatmeal in the morning, you can dip pancakes in it or add it to smoothies. It lasts about 3 days in the fridge.
Author: Natasha
Recipe type: raw, vegan, dessert
Ingredients
  • 1 cup of cashews
  • ½-1 cup fresh raspberries
  • 1 tbsp of maple syrup
  • A pinch of salt
Instructions
  1. Cover cashews with plenty of water and soak overnight in the fridge.
  2. Drain cashews and place in a blender with fresh raspberries. Add a pinch of salt and maple syrup. Blend on high until the mixture is smooth and creamy (no pieces of nuts or berries).
  3. Spoon into ramekins or small cups and chill for 4 hours.
3.5.3208

Filed Under: Recipes, Treats, snacks, desserts, Vegetarian / Vegan / Raw

Almond Sweet Potato PURÉE

January 19, 2016 by Natasha Leave a Comment

almond sweet potato puree

If by the end of the week you are, like most people, exhausted and don’t have the energy to think of what to make for dinner, here is a simple idea. Make a healthy sweet potato purée with almond milk. Throw in a piece of fish or chicken or salad and you are good to go.
That’s what we are having for dinner here.
.
TO BAKE SWEET POTATO:
.
Scrub and dry a couple of sweet potatoes with paper towels. Pierce all over with a fork (be careful not to hurt yourself) and bake in the preheated oven at 375F for 1 hour. You might need to bake a little less or more depending on the size of your potatoes.
.
almond sweet potato puree
.
TO MAKE PURÉE:
.
Cool off the potatoes (or bake them ahead of time), scoop the potato out of its skins and place in a bowl. If very soft already, just add 1/2-1 cup of almond milk (depending on how many potatoes you a using), a pinch of salt and mash with potato masher to mix well.
.
If you want the purée extra creamy and silky, then place the ingredients in a blender and give it a spin for 30 seconds.
.

Filed Under: Main meals, Recipes, Vegetarian / Vegan / Raw

Butternut Squash Rice Balls

January 17, 2016 by Natasha Leave a Comment


butternut squash balls

I think a life of a mom is so much easier if you have roasted/steamed vegetables in the fridge at all times. I roasted a butternut squash yesterday to make pasta sauce and to use for snacking. With the leftover half, I came up with these cute-looking snack balls. Spoon-feeding is certainly not as fun as eating with your hands. Add a little crunch with brown rice crisps (sugar-free) and your babies and toddlers will certainly approve.

I bought Whole Foods brand plain, unsweetened brown rice crisps. The package listed only one ingredient, which is a good product in my book.

If you have butternut squash already roasted then these snacks will take you  5 minutes to make. Not even.

butternut squash balls

butternut squash balls

HOW TO BAKE BUTTERNUT SQUASH

Honestly, just a year ago I had no idea how easy it was to bake whole butternut squash. I used to ruin my fingers trying to peel the quash and cut it into chunks before steaming or roasting.

Preheat oven to 350F. Wash the squash. Dry with paper towels. Cut lengthwise. Place cut side down on parchment paper. Roast for 1 hour. In the middle of roasting, add a little water to the baking tray. That’s it.

Butternut Squash Rice Balls
 
Save Print
This is an ideal healthy snack for kids and people of all ages. Making it with leftover butternut squash will take you 5 minutes to prepare.
Author: Natasha
Ingredients
  • Just 2 ingredients:
  • Roasted butternut squash
  • Brown rice crisps
  • Optional: coconut flakes
Instructions
  1. Scoop the chilled squash out of its shell.
  2. Mash it with a fork (it should be very soft).
  3. Add as many rice crisps as necessary to make the mixture stick to together.
  4. Form little balls with your hands and roll in a bowl with coconut flakes.
3.5.3208


Filed Under: On-the-go / travel food, Recipes, Top recipes, Treats, snacks, desserts, Vegetarian / Vegan / Raw

QUINOA BROCCOLI CROQUETTES

January 17, 2016 by Natasha Leave a Comment

Today on Soren’s plate: salmon baked with lemon (BLW from 8 months – skip salt), cucumbers and leftover quinoa-turned-broccoli croquettes.
Quinoa broccoli croquettes
Salmon and quinoa croquettes

TO BAKE SALMON:

In a bowl combine olive oil, salt, pepper and juice of half of lemon. Whisk until well combined. Rinse salmon under cold water, pat dry with paper towels and coat well with the oil mixture. Bake at 350F for 13-20 minutes max, depending on the size and thickness of your fish.

THE CROQUETTES

quinoa croquettes
quinoa croquettes 20160104-DSC09404-2 20160104-DSC09402-2 20160104-DSC09399

These little nutritious balls turned out really yummy and could easily be enjoyed by babies 10 months and older. They are perfectly soft and could be handled well by the little ones. The reason I suggest 10 months and up is because they have cheese in them. Cheese by definition is a processed product, which usually contains a lot of salt. It’s not a hard rule to avoid cheese but I  was hesitant to give it to Soren before he was 10/11 months. If you are ok with cheese, go ahead and share with your little ones even earlier.

These vegetarian croquettes can be made from scratch or using leftover quinoa and broccoli, which I did. They taste best when warm but can also be stored in fridge for 2 days. Note that they will harden in the fridge so if you are planning to give them to small babies, you can warm them up a bit so that the cheese melts and softens the balls.

Enjoy them as a side dish, in a pita just like you would falafel or eat as a main dish with some salad on the side.

The more cheese you put, the flatter they will come out (which is not bad at all; actually yummy).

quinoa broccoli balls
20160104-DSC09415 20160104-DSC09412

INGREDIENTS (makes a large batch):

2 cups of cooked quinoa
2 large steamed broccoli florets (about 2 cups chopped)
1/2 cup of apple sauce
3 eggs
1.5 cup of grated cheese (I used Italian blend, already grated)
1 garlic clove (minced)


METHOD:

1. Line the baking tray with parchment paper (not foil because it will definitely stick; I tried)
2. Chop up the broccoli. In a large bowl combine all the ingredients together. Season with salt and pepper.
3. Form medium balls in your hands and place them on the tray.
4. Bake for 25-30 minutes at 350F. Once the edge start turning golden, the croquettes are ready.


QUINOA BROCCOLI CROQUETTES
 
Save Print
These vegetarian croquettes can be made from scratch or using leftover quinoa and broccoli. They taste best when warm but can also be stored in fridge for 2 days. Enjoy them as a side dish, in a pita just like you would falafel or eat as a main dish with some salad on the side.
Author: Natasha
Ingredients
  • 2 cups of cooked quinoa
  • 2 large steamed broccoli florets (about 2 cups chopped)
  • ½ cup of apple sauce
  • 3 eggs
  • 1.5 cup of grated cheese (I used Italian blend, already grated)
  • 1 garlic clove (minced)
Instructions
  1. Line the baking tray with parchment paper (not foil because it will definitely stick; I tried)
  2. Chop up the broccoli. In a large bowl combine all the ingredients together. Season with salt and pepper.
  3. Form medium balls in your hands and place them on the tray.
  4. Bake for 25-30 minutes at 350F. Once the edge start turning golden, the croquettes are ready.
3.5.3208

Filed Under: Main meals, On-the-go / travel food, Recipes, Top recipes, Vegetarian / Vegan / Raw

Almond Butter Breakfast Cookies

January 16, 2016 by Natasha 2 Comments

oatmeal cookies with almond butter

My friend Liza is a big inventor of healthy cookies and treats. She has an Instagram blog called @CookingForGrey if you are interested to take a peek there. She has the cutest toddler on Earth who is being spoilt with all kinds of yummy things.

I finally made her breakfast cookies, which were really easy and fast. Now, these cookies are a little tricky because they come out looking very different each time a new person tries making them. The only thing I changed in Liza’s recipe was I used instant oats instead of rolled oats. Mine baked very fast in the oven but I hear it takes some moms longer to make them crunchy. Play with the timing.

oat cookies with almond butter

almond butter cookies

I couldn’t keep Soren away from them. I made them this morning and they are gone – I ate most of them. They are absolutely guilt-free and I would say baby led weaning appropriate from about 8 months (they have nut butter). They are a little crunchy, which can be controlled by cooking them less or more. I made two batches: one soft for Soren and a crunchy one for us. Make sure to cook them for no longer than 14 minutes if giving to small babies. Otherwise, toast them nicely for adults for crunchiness (17 minutes). Your oven might be different so keep an eye on them.

almond butter cookies

breakfast cookies


INGREDIENTS:

2 ripe bananas
1 cup quick oats (or instant oats)
1/2 cup almond butter
1/2 large shaved coconut flakes (or 3/4 cup regular coconut flakes)
1.5 tbsp coconut oil (preferably solidified)
Optional:
1 tbsp hemp seeds
1/2 tsp cinnamon

METHOD:

Mix all the ingredients in a bowl. I used potato masher and then hands. Form little balls with your hands and place them on a baking tray lined with parchment paper. Once on the tray, flatten each ball with your fingers. Bake for 14 minutes for soft cookies and 17 minutes for crispy. Enjoy.


Almond Butter Breakfast Cookies
 
Save Print
Prep time
5 mins
Cook time
15 mins
Total time
20 mins
 
Delicious, vegan, guilt-free breakfast cookies. BLW appropriate from about 8 months.
Author: Natasha
Recipe type: breakfast, cookies
Cuisine: vegan, healthy
Ingredients
  • 2 ripe bananas
  • 1 cup quick oats (or instant oats)
  • ½ cup almond butter
  • ½ large shaved coconut flakes (or ¾ cup regular coconut flakes)
  • 1.5 tbsp coconut oil (preferably solidified)
  • Optional:
  • 1 tbsp hemp seeds
  • ½ tsp cinnamon
Instructions
  1. Mix all the ingredients in a bowl. I used the potato masher and then hands.
  2. Form little balls with your hands and place them on a baking tray lined with parchment paper.
  3. Once on the tray, flatten each ball with your fingers.
  4. Bake for 14 minutes for soft cookies and 17 minutes for crispy.
  5. Enjoy!
3.5.3208


Filed Under: Breakfast, On-the-go / travel food, Recipes, Top recipes, Treats, snacks, desserts

Apple Banana Muffins

January 16, 2016 by Natasha Leave a Comment

Apple Banana Muffins

BLW appropriate from 7 months: just cut into tiny pieces and let your baby explore it. The recipe has an egg but if you don’t have any family egg allergies, I wouldn’t hesitate giving eggs. We started early with whole eggs following our pediatrician recommendation. Use your judgement and follow your intuition. I was impatient to introduce a lot of new ingredients into my son’s world and I just had a sense that he would be ok. Mama knows best.

I would say that last year of all the recipes, I used this one the most. These muffins are just a perfect healthy snack for babies and toddlers. There is no sugar of any kind; just apple and banana as a sweetener.

Pomegranates are in season now. Buy as much of it as you can. It’s an amazing source of vitamins and minerals among other things. The crazy person that I am, I used to squeeze spoonfuls of pomegranate juice using garlic press but now I give to Soren just like that for a snack and he loves eating the little bright sweet seeds. It’s fun to play with it too.

The recipe makes 12 mini and 6-8 large muffins.

Banana Apple Muffins

INGREDIENTS:

1/3 cup melted coconut oil (if you don’t have it, the recipe works just fine without it)
2 eggs
3 ripe bananas (mashed)
2 small apples, grated (with or without skin works. More fiber with skin)
1 tsp baking powder
1 tsp vanilla extract
1/2 tsp cinnamon (put more if you love it)
1/2 cup wholewheat flour
3/4 cup instant oats
Optional: raisins, nuts, chocolate

METHOD:

Preheat oven to 325F. Hand beat eggs with coconut oil in a bowl. Add mashed bananas, baking powder, vanilla and cinnamon. Mix. Add apples. Mix. Add flour and oats. Stir well. Pour half a batch in a lightly greased muffin mold for babies. Then add raisins, chocolate and any other goodness you like to the adult batch. Bake for 25 minutes. Remove from oven and let cool off.


Apple Banana Muffins
 
Save Print
These muffins are just a perfect healthy snack for babies and toddlers. There is no sugar of any kind; just apple and banana as a sweetener.
Author: Natasha
Recipe type: muffins, baking
Cuisine: healthy baking, healthy snacks
Ingredients
  • ⅓ cup melted coconut oil (if you don't have it, the recipe works just fine without it)
  • 2 eggs
  • 3 ripe bananas (mashed)
  • 2 small apples, grated (with or without skin works. More fiber with skin)
  • 1 tsp baking powder
  • 1 tsp vanilla extract
  • ½ tsp cinnamon (put more if you love it)
  • ½ cup wholewheat flour
  • ¾ cup instant oats
  • Optional: raisins, nuts, chocolate
Instructions
  1. Preheat oven to 325F.
  2. Hand beat eggs with coconut oil in a bowl. Add mashed bananas, baking powder, vanilla and cinnamon. Mix. Add apples. Mix. Add flour and oats. Stir well.
  3. Pour half a batch in a lightly greased muffin mold for babies. Then add raisins, chocolate and any other goodness you like to the adult batch.
  4. Bake for 25 minutes. Remove from oven and let cool off.
3.5.3208


Filed Under: Breakfast, Recipes, Treats, snacks, desserts, Vegetarian / Vegan / Raw

Eggplant Sauté with Vegetables

January 15, 2016 by Natasha Leave a Comment

Eggplant stew with vegetables

We love eggplant here. This is a healthy vegetable sauté that is made with whatever you have in the fridge. You can substitute anything in the list of ingredients. Just follow a basic principle of cooking hard vegetables first (parsnips, carrots) and adding softer ones after (broccoli, zucchini).


20160101-DSC09314
20160101-DSC09323
Cook some quinoa or rice on the side and you are good to go for a few days without entering the kitchen.


❗️BLW TIP –  if cooking for a family with babies under one:
1) avoid salt (you can add separately later)
2) cook for longer. With the suggested cook time, the vegetables will be a little crunchy. Continue cooking until the carrots are very soft. You can definitely offer it to babies 6-7 months old in a deconstructed way – pieces on the tray.


INGREDIENTS:

1 large eggplant
4-5 carrots (I used rainbow)
A bunch of spring onions (or 1 yellow onion)
1 cup chopped green beans
5-6  crimini mushrooms
2 medium tomatoes (or a bunch of cherry tomatoes)
Parsley fresh
Thyme fresh
1 large garlic clove


METHOD:


1. Wash and chop all vegetables: peel and cube the eggplant, chop spring onions, peel and cut the carrots into circles, chop mushrooms, half or quarter tomatoes depending on the size.


2. Heat a little olive oil in a deep pan. Sauté carrots and onions for 5 minutes.  Add eggplant, green beans, mushrooms, and thyme.  Stir, cover with the lid and cook on medium heat stirring occasionally for 15 minutes. At first the veggies will appear dry but soon they will release juices so do not add water.


3. Add the tomatoes, parsley and chopped garlic. Season with salt and pepper. Cook for another 15 minutes. Turn off the heat and let sit for 10-15 minutes to develop more flavor.


Eggplant Saute with Vegetables
 
Save Print
This is a healthy vegetable sauté that is made with whatever you have in the fridge. You can substitute anything in the list of ingredients. Just follow a basic principle of cooking hard vegetables first (parsnips, carrots) and adding softer ones after (broccoli, zucchini).
Author: Natasha
Recipe type: lunch, dinner, main dish
Cuisine: vegan, vegetarian
Ingredients
  • 1 large eggplant
  • 4-5 carrots (I used rainbow)
  • A bunch of spring onions (or 1 yellow onion)
  • 1 cup chopped green beans
  • 5-6 crimini mushrooms
  • 2 medium tomatoes (or a bunch of cherry tomatoes)
  • Parsley fresh
  • Thyme fresh
  • 1 large garlic clove
Instructions
  1. Wash and chop all vegetables: peel and cube the eggplant, chop spring onions, peel and cut the carrots into circles, chop mushrooms, half or quarter tomatoes depending on the size.
  2. Heat a little olive oil in a deep pan. Sauté carrots and onions for 5 minutes. Add eggplant, green beans, mushrooms, and thyme. Stir, cover with the lid and cook on medium heat stirring occasionally for 15 minutes. At first the veggies will appear dry but soon they will release juices so do not add water.
  3. Add the tomatoes, parsley and chopped garlic. Season with salt and pepper. Cook for another 15 minutes. Turn off the heat and let sit for 10-15 minutes to develop more flavor.
3.5.3208

Filed Under: Main meals, Recipes, Vegetarian / Vegan / Raw

QUINOA PASTA WITH RAINBOW CHARD AND SALMON

January 11, 2016 by Natasha Leave a Comment

20160105-DSC09439

This pasta can be made with leftover fish but the recipe is totally worthy of cooking with fresh fish as well. It’s healthy and “adult-tasting” meaning it would probably be enjoyed more by adults because it doesn’t contain any baby/toddler favorites like butternut squash, sweet potatoes, etc. I’m lucky that my Soren loves stuff like that so if you kiddos are adventurous as well, feel free to offer it to them (BLW appropriate from 7-8 months).

We used quinoa pasta because we like it and because it’s a healthier alternative to regular wheat pasta.

20160105-DSC09434

INGREDIENTS:

3 large rainbow chard leaves
A piece of salmon (really as large or small as you like)
1 garlic clove
1/3 cup chopped cilantro
Olive oil
Optional: 3 tbsp white wine

METHOD:

1. Cook your pasta.

2. Meanwhile, heat 3-4 tbsp of olive oil in a pan. Chop up the chard (cut three times lengthwise and then across), place in a pan. Stir frequently for 2 minutes on medium heat. Add 2 tbsp of water and close the lid. Let the chard steam for 5 minutes.

3. Add minced garlic and cilantro, sauté for 1 minute. Add wine (if using for adults). Add the cooked salmon (pulled apart into pieces). I used a small piece of leftover salmon and I think it’s the best way to create a dish out of it. Stir everything, season with salt and pepper and cook for 5 minutes. Stir in the pasta.


QUINOA PASTA WITH RAINBOW CHARD AND SALMON
 
Save Print
I can't think of a better way to use a small piece of leftover salmon and make the meal out of it.
Author: Natasha
Recipe type: fish, leftovers, pasta
Cuisine: healthy, dinner
Ingredients
  • 3 large rainbow chard leaves
  • A piece of salmon (really as large or small as you like)
  • 1 garlic clove
  • ⅓ cup chopped cilantro
  • Olive oil
  • Optional: 3 tbsp white wine
Instructions
  1. Cook your pasta.
  2. Meanwhile, heat 3-4 tbsp of olive oil in a pan. Chop up the chard (cut three times lengthwise and then across), place in a pan. Stir frequently for 2 minutes on medium heat. Add 2 tbsp of water and close the lid. Let the chard steam for 5 minutes.
  3. Add minced garlic and cilantro, sauté for 1 minute. Add wine (if using for adults). Add the cooked salmon (pulled apart into pieces). I used a small piece of leftover salmon and I think it's the best way to create a dish out of it. Stir everything, season wth salt and pepper and cook for 5 minutes. Stir in the pasta.
3.5.3208


Filed Under: Fish and Meat, Main meals, Recipes, Top recipes

Kale Avocado Bean Hummus

January 11, 2016 by Natasha Leave a Comment

IMG_8666

Kale Bean Avocado Dill hummus on top of a steamed sweet potato. This can be a snack for a toddler, an appetizer for adults or a full meal for a small baby.

It is ideal for baby led weaning starting from 6 months. My super duper healthy pesto-hummus thingy is obviously on a very healthy-tasting side so if your baby protests for whatever reason, add an apple or any other sweet fruit to make it more appealing.  I added no fruit, instead – just a tiny bit of raw garlic. I really want to expose Soren to as many flavors as possible before he becomes picky in toddlerhood. I, of course, hope he doesn’t and starts cooking with me and for me as soon as he can hold a fork (yeah, right mama, hope away).

IMG_8635

Now, let’s admit few of us steamed veggies daily before having kids (unless you are vegan, in which case you are a pro ?). A couple of my friends, whose babies are just entering the realm of real foods, asked me how I do it. I have a tiny kitchen and I don’t like the clutter so I use an old-fashioned stainless steel steamer basket (you can see an edge of it on the picture). It costs about $5 on Amazon (click here to buy) and folds to nothing. That said, any steamer would work. Every vegetable takes different time to cook. In this case:

?Vegetable: kale and sweet potato
?Cook time: 10-12 minutes
?How: pour an inch of water in a pot. Put the steam basket so that the bottom of it is not touching the water. Place veggies on top. Close lid. Steam until the fork goes through easily.

If you always have a few steamed veggies in the fridge, then you will never be stressed about what to feed your baby.


PESTO

INGREDIENTS:

1 cup steamed kale
1 cup Red kidney beans
1 avocado

small bunch of dill
⅓ cup olive oil
Optional: garlic, salt, pepper

METHOD:

Blend all the ingredients in a blender or any food processor. I use Cuisinart Mini-Prep Plus Food Processor for smaller portions and Vitamix for large portions and smoother consistency.

The proportions really don’t matter; you can use as much or as little of each ingredient. I like adding garlic and dill because it makes this pesto very fragrant and adds vitamins. Add more olive oil for more liquid consistency.


HOW TO SERVE IT TO BABIES:

Just as you see in the picture but cut up into small pieces. Have a messy fun!

Filed Under: Main meals, Recipes, Vegetarian / Vegan / Raw

  • « Previous Page
  • 1
  • 2
  • 3
  • 4
  • 5
  • Next Page »

Hi, I’m Natasha, Soren’s mom. Welcome to our own visual menu of healthy meals that everyone in the family can indulge in, including babies. Here you will find mainly my own creations but also recipes discovered elsewhere, tested and enjoyed by my family. We are not vegetarians but most dishes are veggie-forward, often gluten-free and always free of processed ingredients.
A little more about me

STAY IN TOUCH

  • Facebook
  • Instagram
  • Pinterest

Instagram

Instagram did not return a 200.

Follow me for inspiration

Copyright © 2025 · sorenspurpleplate · All rights reserved